Operator`s manual
Table Of Contents
- Contents
- Figures
- Tables
- Safety
- Introduction
- Setting Up the 708-DS / 709-DS
- Operating the 708-DS / 709-DS
- Main Screen - Options
- Main Screen - Display Parameters
- Main Screen - Sample Temperatures
- Main Screen - Run
- Main Screen - Stop
- Main Screen - Drive Unit Up / Down
- Manual Drive Unit Up / Down
- Manual Sampling
- Main Screen - Manifold Up / Down
- Main Screen - Lock
- Main Screen - Unlock
- Main Screen - Remote Control
- Main Screen - Alarms
- Main Screen - Maintenance Due Icon
- Menu Screen - System Menu
- General 708-DS / 709-DS Conventions
- Agilent 708-DS / 709-DS Notifications
- Main Screen - Options
- Maintenance and Troubleshooting
- Index

120 708-DS / 709-DS Operator’s Manual
5 Maintenance and Troubleshooting
6 Carefully lower the drive unit of the 708-DS / 709-DS until each
sample cannula is submerged in the cleaning solution of the rinse
tray.
7 Activate the pump configured with the system until the tubing is
sufficiently cleansed.
8 Raise the manifold and drive unit.
9 Remove the rinse tray and properly dispose of the rinsing solution.
10 Lower the shafts to their appropriate location.
Rinse Cups (Optional)
If the Agilent 708-DS / 709-DS is configured with a sampling manifold,
the sample lines require a routine rinsing after each test. Easy-to-attach
rinse cups are available to make the flushing of the tubing simple and
efficient.
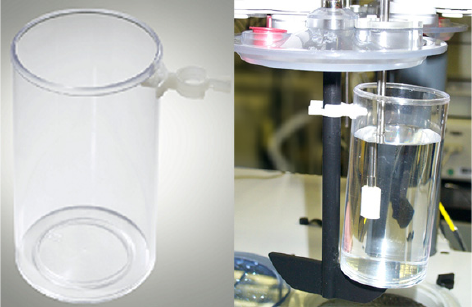
1 Fill the rinse cups with the cleaning solution desired and attach a cup
to each shaft.
Figure 28 Rinse Cup
2 The sample cannulas must be sufficiently immersed in the solution.
The return cannulas can either be contained in the cup or allowed to


