
Other Content
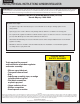


INSTALL/REMOVAL INSTRUCTIONS: WINDOW REGULATOR
741-010
Disclaimer:
Even though every attempt is made to ensure this information is complete and accurate, it is impossible to account for all possible circumstances or situations. Please consult with a quali ed auto technician
before attempting to perform any work you are not quali ed to do. Automobiles can be hazardous to work on; be sure to take all necessary safety precautions. Failure to do so may result in property damage
or personal injury. Certain motor vehicle standards and performance requirements may apply to your motor vehicle (such as Federal Motor Vehicle Safety Standards by the National Highway Tra c Safety
Administration). Be sure that your work is performed in accordance with such standards and that you do not disable any motor vehicle safety feature.
ATTENTION: Refer to the appropriate shop manual for your vehicle to obtain speci c service procedures for this part. If you do not have
a service manual or lack the skill to install this part, it is recommended that you seek the services of a quali ed technician. Pay special
attention to all cautions and warnings included in the shop manual. Read and follow all instructions carefully.
4
©2013 Dorman Products, Inc.
No reproductions in whole or in part without prior written approval.
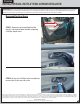
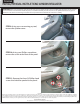
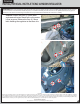
STEP 6: Once you have the rear pried
slightly, push the whole handle assembly
toward the front of the vehicle. When the
assembly has been carefully removed,
remove the door rod clip and remove the
clip from the assembly.
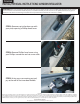
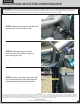
STEP 7: Remove the door lock switch
connector and set assembly aside.
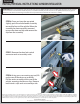
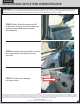
STEP 8: Using your non-marring pry tool, lift
up the rear of the door cup assembly.
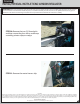
Pull the entire assembly to the rear of the
vehicle, exposing the harness clips. Remove
both harness clips and set assembly aside.