
User's Manual


3
3. Assembly Instruction
In this part, we will talk about the parts of Robstep and how to install Robstep.
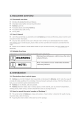
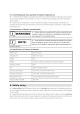
3.1 Double check the spare parts inside the packing
Please check the package of Robstep and make sure that all spare parts are complete. The spare parts of
Robstep are listed as follows, if any of them missing, please contact with the local agent or us directly.
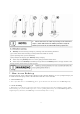
1) Main body
2) Handlebar grip
3) Handlebar stem
4) Charger
5) Tool and screws bag (which contains of erecting tools and 10 screws)
6) User’s Manual, and warranty card
7) Product quality certificate
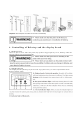
3.2 Installing Robstep
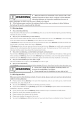
Stepone:Inserttherubberofhandlebarintothehandlebaraccordingtotheinstructionofthefollowingpictures,
tightenupthefourscrewswithtools(screwsandtoolsareallgiven,pleasepayattentiontotheanterio‐posterior
oftherubberofthehandlebar,andinstallitaccordingtothe
instructionbythearrowswithsamecolor).Thispart
ishandlebarcomponentsanditcanbequick‐releasedbythelockingwrench.
Steptwo:Undertheloosenedstateofthelockingwrench,pleaseinsertthehandlebarcomponentsontothe
rotaryjointofRobstep.Thentightenthelockingwrenchby
yourhand,whenthehandlebarcomponentsinsert
thebottom.
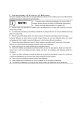
MakesurethestabilityofthehandlebarcomponentsbeforeyouridetheRobin.Youcangentlytrytoliftupthe
handlebarwhentheRobinispoweroff,ifthehandlebarisloosened,youshouldtightenthetwoscrewsofthe
locking
wrench.(Ifitneedtodisassemble,pleaseholdhandlebarfirst,thenreleasetheQuick‐releasepart.