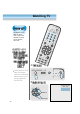
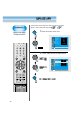
Watching TV POW ER TV VID E DVDO/ SAT CAT V The buttons on the PDP set, which have a same name with that of remote control, function same role. DIS PLA Y STIL L TV/V IDE CH O EDIA TIM UL M CT FE EF S. V O L ME NU PRE VC V O L H E SIZ EN SCRE CH MU TE F.R /SL OW PLA Y PRO G F.F/S .GUID LOW E REC STO P PRE V O PEN /CLO SE PIC T MO URE DE SO MOUND DE 1 As the main AC is off state, the remote control is not working because there is no power supplied to the PDP set.
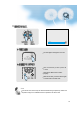
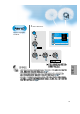
3 MU LT I IA ED M .E FF CH T EC S V O L V O L N E PR V SI ZE MENU E RE SC CH CH Volume The LED light is changed to red color. POWER TV VIDEO/ DVD V O L SAT CATV V O L N E PR V SI ZE MENU CH CH MUTE F.R/SLOW PLAY E RE SC PROG.GUIDE F.F/SLOW 'Mute' is useful when you have a phone call or visitor OSD shows 'Mute' when it works properly. While mute state, press the button again to return back to normal state.
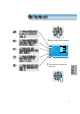
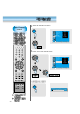
Main Features 1 DISPLAY STILL TV/VIDEO F CH T EC PIP POSITION SWAP TV/ VIDEO MTS MU LT I M It shows the current channel information and change the channel analog to digital or vice versa. CAPTION CH CH DISPLAY The dsired channel will be set. STILL TV/VIDEO MU LT I M FF CH T EC Note The virtual channel can be selected by sub-picture chanel button. 46 Choose the disire channel.
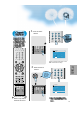
MU LT I IA ED M .E FF CH T EC S V O L V O L N E PR V SI ZE MENU CH CH E RE SC 1Pressing main key shows the OSD below. Video Audio Channel User Mode Brightness Contrast Color Tint Sharpness Color temp. Normal Feature Time MENU Exit Move Select 2 Select the dsire menu using Vel. key and Ch. key. S V O L MU LT I IA ED M .
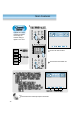
Select proper anttena depend on where the cable is connected. Refer to 'antena and cable connection'( Antenna 1 Video MU LT I S V O L V Channel V O L MENU SI ZE CATV Start Air Air Active Start Ant. setup Analog ant. Digital ant. Ant. 2 Ch. setup Fine tune Sig. strength No signal Feature N SAT E PR VIDEO/ DVD TV Audio IA ED M .E FF CH T EC ) 1 Select the channel in the menu. MENU Receive both analog and digita broadcast.
1 Select 'Antenna 2'. Receive only digital broadcast. MENU Video Audio Channel S V O L Move Select SI ZE CH CH E RE SC V O L MENU V SI ZE .E FF .E FF V O L MU LT I N SI ZE SI ZE N V S V O L MENU T EC IA ED M E RE SC CH MU LT I E PR CH V O L E PR E PR CH S V O L MENU T EC IA ED M S V O L CH MU LT I IA ED M T EC E RE SC N CH .E FF MENU Prev. N E PR CH CH V Time V O L MENU V No signal Feature MU LT I IA ED M .
Auto Channel search 1 Select the channel in the menu. MENU Video Audio Channel Start Air Air Active Start Ant. setup Analog ant. Digital ant. Ant. 2 Ch. setup Fine tune Sig. strength No signal Feature V O L Move Select SI ZE N E PR CH CH SAT MENU Exit V O L MENU V VIDEO/ DVD TV Time MU LT I IA ED M .E FF CH T EC S E RE SC CATV 2 Select 'Yes' at auto channel search. CH .E FF T EC MU LT I IA ED M DISPLAY S E PR MU LT I CH CH Audio Channel CH T EC CH REC STOP PROG.
1 Store the desire channel. DISPLAY STILL PIP . VIDEO/ DVD TV SAT POSITION SWAP TV/ VIDEO TV/VIDEO CH CH CATV MTS CAPTION ADD/ ERASE Ch Add/Delete "Air 35" Add this ch.? No Yes Add/Del Select Move DISPLAY STILL TV/VIDEO Press erase/store button again to store the channel with a message. MU LT I IA ED M .E FF CH T EC S V O L V O L Delete the stored channel. N E PR V 2 SI ZE MENU E RE SC CH CH STOP PAUSE S V O L V O L MENU V SI ZE REC PROG.GUIDE F.
Fine Tune 1 MENU Video Audio Channel Start Air Air Active Start Ant. setup Analog ant. Digital ant. Ant. 2 Ch. setup Fine tune Sig. strength No signal Feature V O L CH E RE SC 2 Adjust with "Fine Tune" STILL TV/VIDEO CH .E FF V SI ZE S CH CH Video CH N CH T EC S V O L V CH CH REC STOP Start Air Air Active Start Ant. setup Analog ant. Digital ant. Ant. 2 Ch. setup Fine tune Sig. strength No signal Feature SI ZE PROG.GUIDE F.
Digital Signal Strength 1 MENU Video Audio Channel Start Air Air Active Start Ant. setup Analog ant. Digital ant. Ant. 2 Ch. setup Fine tune Sig. strength No signal Feature MU LT I IA ED M .E FF CH T EC S V O L CATV V Move Select SI ZE SAT MENU Exit N TV E PR VIDEO/ DVD Time V O L MENU CH CH E RE SC DISPLAY STILL TV/VIDEO 2 After selecting the digital signal strenth, control the direction of the antena. MU LT I T EC IA ED M CH .E FF S T EC MU LT I IA ED M .
54
Selecting Picture Mode Each Press of the Button Will Select One of Four Picture Modes. PICTURE MODE Normal * Normal : * Cinema: * User: POWER • Each time you press the button, a different Picture mode appears. The sequence used is as follows: Dynamic Cinema User For a highly defined image in a normally bright room For a clear-cut image emphasizing high contrast for sports viewing For a movie Allows the user to customise settings as desired.
Customizing Picture 1 Press the MENU Button. • The MENU shown below will display on the screen. CH MU LT I T EC IA ED M .E FF Customizing Picture S • You can adjust the color tone and brightness to your preference. V O L V O L Audio N E PR V E RE SC CH CH Normal Mode Brightness Contrast Color Tint Sharpness Color temp.
.E FF CH T EC S V O L V O L N E PR Video SI ZE MENU V • While you are in [Picture Mode – User], press the “ buttons to select a specific adjustment item. MU LT I IA ED M 4 Select User Mode Adjustments CH CH E RE SC Audio Channel Mode Brightness Contrast Color Tint Sharpness Color temp. CH ” User Normal Feature Time MENU Prev.
Adjusting Screen Size Adjusting Screen Size N SI ZE • You can adjust screen size or aspect ratio as desired. 1 Press the “SCREEN SIZE” Button. E RE C S • Each time you press the “SCREEN SIZE” button on the Remote Control, a different “SCREEN SIZE” appears. The sequence used is as follows: • The current screen size will be displayed on the screen. POWER VIDEO/ DVD TV SAT Wide (16:9) Zoom 1 Normal (4:3) Zoom 2 CATV DISPLAY STILL TV/VIDEO MU LT I IA ED M .
Adjusting Screen Size(PC, DVI) • Each time you press the “SCREEN SIZE” button on the Remote Control, a different “SCREEN SIZE” appears. The sequence used is as follows: SI ZE • You can adjust the screen position and size as desired. 1 Press the “SCREEN SIZE” Button. N Adjusting Screen Position and Size E RE SC POWER VIDEO/ DVD TV SAT CATV DISPLAY STILL TV/VIDEO MU LT I IA ED M SI ZE N E RE SC CH CH MUTE F.R/SLOW PLAY 2 PROG.GUIDE F.
3 Press the Volume “ VOL ” button. S V O L MU LT I IA ED M .E FF CH T EC V O L N E PR V SI ZE MENU • Press the Volume “ VOL ” button to enter the sub menu of [Screen]. • While you are in [Screen] mode, press the “ CH ” button to select a desired item, and then, adjust the value by pressing the “ VOL ”. CH CH E RE SC Size H. size 0 V. size 0 H. position 0 V. position 0 Freq. 0 Phase 0 Exit Move Adj.
Adjusting Auto Sound Mode 1 Select "SOUND MODE". Adjusting Auto Sound Mode • Press the "SOUND MODE" on the Remote Control. • Current sound mode will be displayed. SOUND MODE • Enjoy various sound modes by selecting your favorite Sound Mode depending on the kinds of moving pictures. POWER 2 Every Press of the Button Changes Modes. VIDEO/ DVD TV SAT CATV • Each time you press the button, a different sound mode appears.
Customizing Sound Mode 1 Press the MENU Button. • The MENU Screen as below will be displayed. CH MU LT I T EC IA ED M .E FF Customizing Sound Mode S • This feature allows the user to adjust at his preference. V O L N E PR SI ZE Audio V E RE SC CH CH Normal Mode Brightness Contrast Color Tint Sharpness Color temp.
CH MU LT I T EC S V O L V O L Video N E PR SI ZE MENU V • Select [Effect] by pressing the “ CH ” buttons, then select ON/OFF by pressing the “ VOL ” button. • [Effect]: Used to emphasize stereo effect. IA ED M .E FF 4 Select the Effect Mode. E RE SC CH CH Audio Channel Feature Balance AVC Effect Mode 120 Hz 500 Hz 1.2 kHz 7.5 kHz 12 kHz MTS 0 Off Off Normal 0 0 0 0 0 Stereo Time MENU Prev.
Selecting INPUT SIGNAL POW ER INPUT SIGNAL TV • Used to select INPUT signal of external device connected to the PDP. VIDE DVDO/ SAT DISP LAY STIL L TV/V IDEO CH CT FE EF S. A EDI TIM UL V O L M MEN U PRE V O L H E VC CH MUT E F.R/S LOW PLAY REC IZ NS EE SCR PRO G.GU IDE F.F/S LOW STO P PAU SE V O PEN/C LOSE NEX PICT T MODURE SO E U MODND E SLEE P PRE PIP POS ITIO N SW A P 1 Press the INPUT SELECT Button.
• “TV/VIDEO” button Video1 Video2 TV • “MULTIMEDIA” button Component1 Component2 TV DVI PC Component 1 1920 x 1080 NOTES: 1) If an external device is not connected or INPUT signal is not applied, Warning Message (“No Signal”) would be displayed. 2) In this case, check if external device is connected and/or terminal connection is properly done. 3) Also, you can select input using [INPUT SELECT] button in the keypad of the pdp set.
Checking the Current Input Signal Checking the Current Input Signal • Used to check the INPUT signal mode, resolution, frequency(video only), etc. of the current screen. 1 Press the “DISPLAY” Button. • Press the “DISPLAY” button on the Remote Control. DISPLAY Component 1 1920 x 1080 POWER VIDEO/ DVD TV SAT CATV 1. If you watch Component, PC or DVI : DISPLAY STILL TV/VIDEO Indicates the horizontal and vertical resolution of the current INPUT signal. MU LT I T EC S V O L V O L 2.
MENU Background, Language and Key pad Lock Settings 1 Menu Background and Language Settings Press the MENU Button. • The MENU screen will be displayed as below. MU LT I IA ED M .E FF CH T EC S Video V O L V O L N E PR V Audio SI ZE MENU Channel E RE SC CH CH Normal Mode Brightness Contrast Color Tint Sharpness Color temp. • Used to select transparent of MENU background and language used in MENU. Normal Feature Time MENU Exit 2 Move Select Press the “ CH ” Button.
MENU Background, Language and Key pad Lock Settings 4 Select LANGUAGE by using the “ CH ” Button. MU LT I IA ED M .E FF CH T EC S V O L V O L N E PR V SI ZE MENU • Select LANGUAGE by using the “ CH ” button. • Every press of the “ VOL ” button while you are in the [LANGUAGE] mode would cycle through the different languages.
MGDI (Meta Genuine Digital Image) MGDI is the image enhancement technology of Daewoo Electronics, which provides more clear, splendid, and delicated images. 1 Press the MENU Button. • The MENU screen will be displayed as below. MU LT I IA ED M .E FF CH T EC S V O L Video V O L Audio N E PR SI ZE MENU V MGDI Demo E RE SC CH CH Channel Normal Mode Brightness Contrast Color Tint Sharpness Color temp.
Auto Power Setting 4 CH V O L • Select the [Auto Power] by pressing the “ MU LT I SI ZE the “ VOL ” button. N E PR CH CH E RE SC Picture Sound Screen POWER VIDEO/ DVD TV ” button • You can select [Auto Power] ON and OFF mode by using V O L MENU V CH from [Features]. IA ED M T EC S Front panel LED lights • When the AC power is on : Green. • When the AC power is in the standby mode : Red. Auto Power Setting .
Closed Caption Setting • Press the “CAPTION” button on the Remote Control. • Whenever pressing the “CAPTION” button, caption mode is changed as follow. CAPTION Off CC1 CC2 CC3 CC4 XDS Text4 Text3 Text2 Text1 POWER VIDEO/ DVD TV SAT CATV DISPLAY STILL O ff TV/VIDEO MU LT I T EC IA ED M .E FF CH S V O L S V O L MU LT I IA ED M T EC V O L N E PR SI ZE MENU V • Press the Menu Button. • The MENU screen will be displayed as below.
Closed Caption Setting • Select [Features] by pressing the “ CH ” button. IA ED M S Video V O L MENU N SI ZE Audio V CH MU LT I T EC V O L E PR • Black : Background of the caption box is black. • Transparent : Background of the caption box is Transparent. 3 Select Features .
Time Setting 1 Press the MENU Button. • The MENU screen will be displayed as below. MU LT I IA ED M .E FF CH T EC S V O L SI ZE Audio N E PR V Video V O L MENU E RE SC CH CH Channel Normal Mode Brightness Contrast Color Tint Sharpness Color temp.
Time Setting CH S VIDEO/ DVD TV SAT CATV V O L N V SI ZE MENU CH CH POWER MU LT I IA ED M T EC V O L E PR • The “Current time” must be set up ahead of setting up other time memories. 4 Off Time and Wake Time settings. .E FF Clock(current time) Setting E RE SC • Select Functions by pressing the “ CH ” button. First, set [Clock]- current time, and then You can setup off-time and wake time. • [Clock] : Enter clock setting menu by pressing the “VOL ” button.
Image Sticking Minimization(ISM) 1 Press the MENU Button. • The MENU screen will be displayed as below. ISM MU LT I IA ED M .E FF CH T EC S Video V O L V O L Channel N E PR V Audio SI ZE MENU E RE SC CH CH Normal Mode Brightness Contrast Color Tint Sharpness Color temp. • Image sticking minimization. • Displaying a still image like PC input for a long time causes part image sticking in the panel • The ISM function minimize this effect.
Image Sticking Minimization(ISM) CH T EC S V O L V O L ISM N E PR SI ZE MENU V • Every press of the “ VOL ” button after select function by the “ CH ” button would switch between ON/OFF. MU LT I IA ED M .E FF 4 Select Functions. CH CH E RE SC Picture Pixel Shift Low Bright Off Off Sound POWER Screen VIDEO/ DVD TV SAT Features CATV Channel Move Adjust MENU Exit DISPLAY STILL TV/VIDEO MU LT I IA ED M .E FF CH T EC S V O L SI ZE N E PR V E RE SC CH CH MUTE F.
Parental Lock Setting 1 Press the MENU Button. Parental Lock • The MENU screen will be displayed as below. MU LT I IA ED M .E FF CH T EC S Video V O L V O L N E PR V Audio SI ZE MENU CH CH Channel E RE SC • When “Parental Lock” is on, the locked channels are not available on the screen. Normal Mode Brightness Contrast Color Tint Sharpness Color temp.
Parental Lock Setting New Password setting 4 Press “Password”. • Press Password by using number 0~9. New Password setting menu is displayed at first use. Set New Password for using Parental Lock menu. Caution) If using your password, remember it. It is needed for continuous use of this function hereafter. Eenter Password _ _ MENU _ _ Exit POWER VIDEO/ DVD SAT CH CATV T EC S V O L MU LT I IA ED M .
S V O L MU LT I IA ED M .E FF CH T EC V O L Off Parental Lock TV GuidLines Sound Movie Retings No Ratings Unblock Ext. Sources Block Screen Change Password N E PR V Parental Control Picture SI ZE MENU • Rating of movie is setup even in movie, videotape and other media objects including TV program.
Parental Lock Setting 5 “Change Password”. S V O L MU LT I IA ED M .E FF CH T EC V O L N E PR V SI ZE MENU CH CH E RE SC • In the initial purchase of TV set, password is set to blank. In continuous use of Parental Control, you need to change your password. • If pressing the “ VOL ” button after selecting password, the second screen of below drawing appears. Here, newly enter your unique password by using number of 0 through 9. Enter your password in the same manner once again.
Initialize Setting 1 Press the MENU Button. S V O L • The MENU screen will be displayed as below. MU LT I IA ED M .E FF CH T EC Video V O L Audio N E PR SI ZE MENU V CH CH Back to Initialization E RE SC Channel • You can restore the values of the adjustment setting made in the MENU to factory settings. Normal Mode Brightness Contrast Color Tint Sharpness Color temp.
Initialize Setting CH T EC S V O L MU LT I IA ED M .E FF 3 INITIALIZATION V O L N E PR V SI ZE MENU CH CH E RE SC • Enter the sub menu by using the “ VOL ” button. • Select the [Initialize] by pressing the “ CH ” button, then press the “ VOL ” button. • A confirmation message will be displayed. • To perform initialization, press the “VOL ” button after selecting [YES] by pressing the “ CH ” button. • To return to MENU, press "MENU" button.
Setting Sleep Timer • Press the “SLEEP” button on the Remote Control. • Pressing the “SLEEP” button first time will display the current setting for SLEEP TIMER. • To cancel the SLEEP TIMER, press the “SLEEP” button to select ‘OFF’. • SLEEP TIMER turns the PDP off after a preset time. POWER VIDEO/ DVD TV Sleep SAT CATV O ff DISPLAY STILL TV/VIDEO CH MU LT I IA ED M T EC S Sleep off Sleep 120 V O L Sleep 90 V SI ZE 15 E PR Sleep V O L MENU N SLEEP Setting Sleep Timer .
Before Requesting Service Before requesting for service, check the following points once again. St y o mm ps • Remote control does not function properly. • The Display makes a snapping sound. • There are empty spots at the top and the bottom area of the screen. C h e c k s • Check for any obstacle between the Remote Control and the Display. • Check for dead batteries and incorrect battery orientation. • Check if the Remote Control is the right one. • Check if the pictures and sound are normal.
In the event that the product has been submerged in the water in rainy season: Immediately wash it with clean water, and dry it in a shadow place, then call for service from the nearest Daewoo Service Center. Never plug the Power Cord since there is risk of electric shock and damage of the product. SPECIFICATIONS DISPLAY UNIT Diagonal Size 50 Screen Aspect Ratio 16 : 9 Display Resolution 1024(H) 768(V) dots Pixel Pitch 0.810(H) 0.810(V) mm Video Signal NTSC, PAL, SECAM, PAL-M/N, NTSC4.