
User's Manual


Sensor Features
Countertop Microwave Oven
18
Humidity
Sensor
The Sensor Features detect the increasing
humidity released during cooking. The oven
automatically adjusts the cooking time to
various types and amounts of food.
Do not use the Sensor Features twice in
succession on the same food portion—it may
result in severely overcooked or burnt food.
If food is undercooked after the countdown,
use TIME COOK for additional cooking time.
r The proper containers and covers are
essential for best sensor cooking.
r Always use microwave-safe containers and
cover them with lids or vented plastic wrap.
Never use tight-sealing plastic covers—
they can prevent steam from escaping and
cause food to overcook.
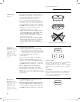
r Be sure the outside of the cooking container
and the inside of the microwave oven are dry
before placing food in the oven. Beads of
moisture turning into steam can mislead the
sensor.
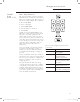
Covered
Vented
Dry off dishes so they don’t mislead the sensor.
Popcorn
NOTE: Do not use
this feature twice in
succession on the
same food
portion—it may
result in severely
overcooked or burnt
food.
To use the Popcorn feature:
1. Follow package instructions, using Time
Cook if the package is less than 1.75 ounces
or larger than 3.5 ounces. Place the package
of popcorn in the center of the microwave.
2. Press POPCORN. The oven starts
immediately.
If you open the door while “POPCORN” is
displayed, “SENSOR ERROR” will appear.
Close the door and press START immediately.
If food is undercooked after the countdown,
use TIME COOK for additional cooking time.
How to Adjust the Popcorn Program to
Provide a Shorter or Longer Cook Time
If you nd that the brand of popcorn you use
underpops or overcooks consistently, you can
add or subtract 20–30 seconds to the automatic
popping time.
To subtract time:
After pressing POPCORN, press 1 immediately
after the oven starts for 20 seconds less
cooking time. Press 1 again to reduce cooking
time another 10 seconds (total 30 seconds less
time).
To add time:
After pressing POPCORN, press 9 immediately
after the oven starts for an extra 20 seconds.
Press 9 again to add another 10 seconds (total
30 seconds additional time).
Beverage
NOTE: Do not use
this feature twice in
succession on the
same food
portion—it may
result in severely
overcooked or burnt
food.
Press BEVERAGE to heat an 8–10 oz. cup
of coffee or other beverage.
Drinks heated with the Beverage feature may
be very hot. Remove the container with care.
If food is undercooked after the countdown,
use TIME COOK for additional cooking time.
Reheat
NOTE: Do not
use this feature
twice in
succession on
the same food
portion—it may
result in severely
overcooked or
burnt food.
The Reheat feature reheats 4–36 ounces of
previously cooked foods or a plate of leftovers.
1. Place covered food in the oven. Press
REHEAT. The oven starts immediately.
2. The oven signals when steam is sensed and
the time remaining begins counting down.
Do not open the oven door until time is
counting down. If the door is opened, close
it and press START immediately.
After removing food from the oven, stir, if
possible, to even out the temperature. If the
food is not hot enough, use Time Cook to
reheat for more time. Reheated foods may
have wide variations in temperature. Some
areas may be extremely hot.
Some Foods Not Recommended for Use
With Reheat
It is best to use Time Cook for these foods:
r Bread products.
r Foods that must be reheated uncovered.
r Foods that need to be stirred or rotated.
r Foods calling for a dry look or crisp surface
after reheating.
MYPLATE
NOTE: Do not use
this feature twice in
succession on the
same food
portion—it may
result in severely
overcooked or burnt
food.
Use MYPLATE feature to cook healthy food
choices by servings or with sensor.
1.
Place food in the oven. And press
MYPLATE pad.
2. Enter the food code. See Cooking Guide for
MYPLATE below for codes.
3. Enter the number of servings (1-4) for
codes 1-3.
For Code 4-11, the oven can start with no
serving selection needed.
4.
Cooking Guide for MyPlate Feature
NOTE: Use power level 10 unless otherwise
noted.
Press START pad.
You may open the door during cooking to check
the food. Close the door and press START pad to
resume cooking.
NOTE: Do not use the sensor features twice in
succession on the same food portion. if food is
undercooked after the rst countdown, use
TIME COOK for additional time.
How to
Change the
Automatic
Settings
You can adjust the cooking time for
Reheat, Potato and Vegetable
features to suit your personal taste.
To reduce time by 10%:
Press 1 after the feature pad.
To add 10% to cooking time:
Press 9 after the feature pad.
Less Time More Time
19
Enter Code
1
2
3
4
5
6
7
8
9
10
11
Food choice
Rice
Oatmeal
Pasta
Asparagus
Broccoli
Green Beans
Carrots
Corn
Spinach
Potato
Green Peas
Weight Setting
1-4 Servings
(Power Level 7 for 1 serving)
1-4 Servings
1-4 Servings
Sensor Menu
Sensor Menu
Sensor Menu
Sensor Menu
Sensor Menu
Sensor Menu
Sensor Menu
Sensor Menu
18 19
KOR-2263SBF_PEB7226_OM(영).indd 18 2013-01-14 오후 2:33:00