
Installation Guide


Fitting the camera CAM45
EN
14
•
When laying the cables (fig. 3, page 4), make sure:
– they are not kinked or twisted
– they do not rub on edges
– they are not routed in sharp-edged ducts without protection.
•
Attach the cables securely in the vehicles to prevent tripping hazards. This can be performed by
using cable binders, insulating tape or gluing in place with adhesives.
•
Protect every through-hole made in the bodywork against water penetration, e.g. by using a
cable with a sealant and by spraying the cable and the cable sleeve with sealant.
I
7 Fitting the camera
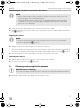
7.1 Tools required
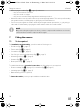
For installation and assembly, you will need the following tools:
•
Drill bit set (fig. 1 1, page 3)
•
Electric drill (fig. 1 2, page 3)
•
Screwdriver (fig. 1 3, page 3)
•
Set of ring or open-ended spanners (fig. 1 4, page 3)
•
Measuring ruler (fig. 1 5, page 3)
•
Hammer (fig. 1 6, page 3)
•
Centre punch (fig. 1 7, page 3)
To establish and test the electrical connection, the following tools are required:
•
Diode test lamp (fig. 1 8, page 3) or voltmeter (fig. 1 9, page 3)
•
Insulating tape (fig. 1 11, page 3)
•
Cable bushing sleeves (optional)
To fasten the cables you may require additional cable binders.
NOTE
Only start sealing through-holes when you have completed all installation work on the
camera and have laid the required cable lengths.
CAM45-IO-16s.book Seite 14 Donnerstag, 1. März 2018 10:19 10