
Installation Guide


EN
Installation Dometic Harrier Inverter
12
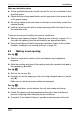
8.3 Installing in an existing opening
I
See fig. 6
➤ Remove all screws and fixtures of the existing roof hatch or an old air
conditioner.
➤ Take out the roof hatch or old air conditioner.
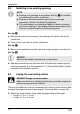
See fig. 7
➤ Remove any sealant around the opening using a scraper or similar tool.
See fig. 8
A
➤ Seal any screw holes and recesses with a flexible non-hardening butyl
sealing compound (e.g. SikaLastomer-710, Selleys Butyl Mastic, Bostik
ezycaulk butyl sealant or similar).
8.4 Laying the connecting cables
D
The roof air conditioner must be connected to an electric circuit which is able
to supply the required current (see chapter “Technical data” on page 19).
➤ Select the cross-section of the cable corresponding to the length:
– Length < 7.5 m: 1.5 mm²
– Length > 7.5 m: 2.5 mm²
NOTE
Existing roof openings in accordance with fig. 3 are suitable
for installing the roof air conditioner.
Dispose of all waste material, glue, silicone and seals
separately. Observe the disposal guidelines.
The manufacturer only assumes liability for parts included in
the scope of delivery. The validity of the warranty expires if the
device is installed together with third-party parts.
NOTICE!
Observe the sealant manufacturer’s instructions.
DANGER! Danger of electrocution
Make sure there is no voltage at electrically operated components
before carrying out work on them!