
Product Manual

EN
Installing the Midi Heki Midi Heki roof light
10
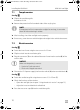
7.1 Temple version
See fig. b
➤ Clip on the ventilation grille.
It needs to click in.
➤ Remove the protective film from both sides of the acrylic glass.
I
➤ After installing, check the roof light works properly.
➤ If necessary, enter the new vehicle height and weight in the vehicle documents.
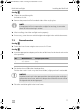
7.2 Electric version
See fig. b
➤ Fasten the inner frame using the two screws 4 x 20 mm.
➤ Clip the switch into the ventilation grille.
➤ Plug the connector (1) on the cable of the outer frame into the socket (2) of the
switch cable.
A
➤ Connect the 12-V power supply line from the vehicle (3) to the terminal block (4).
See fig. c
➤ Fasten the ventilation grille using the two screws 3.5 x 25 mm (1).
➤ Check the functions of the window:
– Open the roof light (see chapter “Using the electric version” on page 13).
– Adjust the insect and the black roller blind.
➤ Press the two cover caps (2) into the ventilation grille.
NOTE
If the protective film is exposed to sunlight for too long, it cannot be
taken off without leaving a residue.
NOTICE!
Make sure the polarity is correct:
• Red wire: Positive terminal
• Black wire: Negative terminal
Midi-Heki--IO-16s.book Seite 10 Freitag, 10. Februar 2017 5:29 17