
User manual


- 8 -
4.
your wine cellar far away from any source
of heat, e.g. radiator, cooker or intense
sunlight.
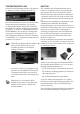
the top left corner inside the wine cellar.
6.
Appendix B.
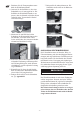
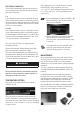
Attach the drip tray on the back. The 7.
screws are already attached at the back.
INSTALLATION
Please follow these instructions:
-
ly over the cooling unit behind the wine cellar.
The free-standing design of the cellar means that
and side walls.
the wine cellar.
Note that it must be possible to open the wine
shelves to be pulled out.
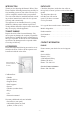
Remove the transport pallet on which your
wine cellar rests.
clearance under the wine cellar and verify
that it stands in a vertical position in both
directions. If necessary, use a spirit level.
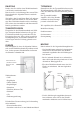
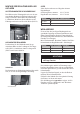
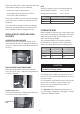
Attach the distance bar using the two 3.
screws at the top back on each side of the
cellar. The bar ensures the correct distance
to the wall behind.
Distance
bar
Rear
Wall
Wall
Distance
bar