
Manual


Ibis 3 Owners Guide Revision V6 Page 9 of 19
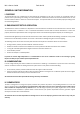
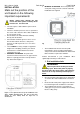
4. Electrical supply
This unit MUST be installed in accordance
with AS/NZ 3001:2008 “Electrical
installations – transportable structures & vehicles
including their site supplies’. Ensure that power is
properly disconnected at the supply (mains and/or
battery). Failure to do so may result in personal
injury or death. This connection can only be done
by a suitably licensed electrical tradesperson.
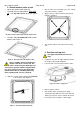
From inside the caravan look up and locate the
unit’s connection point. Figure 8
Undo the 2 screws securing the connection box.
Pull the box out to allow for easier access. Prepare
cable, connect conductors to appropriate
terminals. Tighten cable gland. Replace
connection box and secure with both screws.
Figure 8 - Hard wire connection point
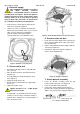
5. Secure unit to roof
Assemble the M8 bolts, washers and hold down
bars. (Item #3)
Raise the Duct and brace (Item #2) towards the
installed unit.
Insert the M8 Bolt assembly through the corner
holes. Figure 9
Engage the bolts into the unit.
Ensure that the hold down bars are aligned with
their recess.
Tighten the 4 bolts evenly.
Tighten the bolts to 12 – 14 Nm torque.
Do not exceed 14 Nm.
If required #8 x ¾” pan head screws can be used
to further secure the edges of the Duct and brace
(Item #2) to the ceiling. Insert screws through the 2
holes on two of the sides.
Figure 9- Assemble Bolt, washer & bar into duct & brace
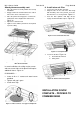
6. Connect return air duct
Reach up between the diagonal arms of the duct &
brace. Grasp the white plastic collar on the end of
the concertina duct.
Pull the collar downwards until it engages with the
central duct. Figure 10
Pull until the collar snaps into place with the 4
catches on the diagonal arms.
Figure 10 - Engage central duct
7. Attach plenum assembly
Locate the Plenum assembly (Item #4) and
remove the filter (Item #5). See Figure 16
Locate 4 of the M4 x 25 metal threads
Connect the control cable that leads from the
plenum to the roof top unit. Ensure the plug mates
with the socket and catch is engaged. Figure 11
Figure 11 - Connect control cable
From plenum
From roof top unit