
User`s manual


User’s Manual
26
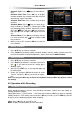
the next menu.
2. Press keys to set latitude and longitude of
local, and press OK key to enter select LNB win-
dow. (Approximate is fine)
3. Press keys to select LNB type according to
your LNB and set LNB frequency according to
your LNB type (default is 10700 LNB also known
as 10.7). The details are on the sticker on the LNB.
4. After setting, press OK key to enter signal detec-
tion window. You can adjust satellite dish manually
according to calculation result displayed on screen.
5. Press OK key to search channels if the signal is locked with green coloured bars.
6. Press EXIT key to save and exit.
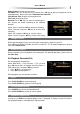
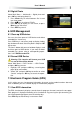
8.2 Installation
Note: This function is for custom/complex configurations.
Select Main Menu → Installation →Installation and press OK key to enter.
1. Set parameters as follows:
LNB Power: If your receiver is connected to LNB,
select “ON”. The default status is “ON”.
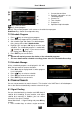
Note: Do not change this setting unless your
LNB is powered on by other satellite receiver.
L.O. (MHz): Press
keys to select LNB type
according to your LNB.
Low/High Freq: If “LNB Type” is set to “Custom”,
you can set LNB frequency according to your LNB
type.
22K: Press
keys to select ON or OFF according to connection of 22K switch.
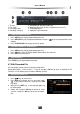
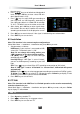
Note: If “LNB Type” is set to “9750/10600” or “Custom-Dual”, 22K switch will operate
automatically.
DiSEqC: Press
keys to select a proper port according to connection of DiSEqC switch.
TP Setup: Press
keys to select a TP. You can also press Yellow key to display TP edit
window. For more details, please refer to 8.3 TP Edit.
2. Press EXIT key to save and exit.
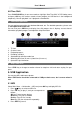
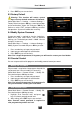
8.3 TP Edit
Note: This function in the VAST box is of limited operation as the receiver automatically
searches channels for you.
Select Main Menu → Installation →Installation and press OK key to enter, and press Yellow
key to display TP edit window.
1. Add TP
1. Press Green key to add a TP.
2. Press or number keys to set proper values.
3. Press EXIT key to save the new TP.