
User`s manual


User’s Manual
22
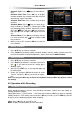
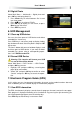
2. Group Recorded File
1. Press keys to select a file.
2. Press Green key to pop up group edit window.
3. Select a group and press OK key to add the se-
lected file to this group.
4. Press EXIT key to save and exit.
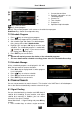
In addition, you can add, delete and rename groups.
Add Group
Press Green key to pop up a keyboard. For detailed operations, please refer to 4.7.3 Rename
Recorded File.
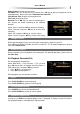
Delete Group
1. Press keys to select a group.
2. After pressing Red key, a message box pops up for confirmation.
3. Select “OK” and press OK key to confirm or select “Cancel” and press OK key to cancel the
operation.
Rename Group
1. Press keys to select a group.
2. Press Yellow key to pop up a keyboard. For detailed operations, please refer to 4.7.3
Rename Recorded File.
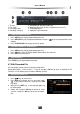
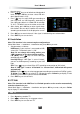
3. Rename Recorded File
1. Press keys to select a file.
2. Press Yellow key to pop up a keyboard.
3. Input the file name. Please refer to following oper-
ations:
Select characters on the keyboard with arrow keys
and press OK key to input.
Select “Clear” and press OK key to delete all
characters on title bar.
Select “Caps On/Off” and press OK key to switch
between lowercase and capital.
Select “Back” and press OK key to delete last character on title bar.
Select “OK” and press OK key to confirm renaming.
Select “Cancel” and press OK key to cancel renaming.
4. Press EXIT key to save and exit. The new recorded file name appears in file list.
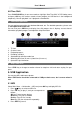
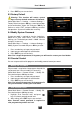
4. Lock Recorded File
1. Press keys to select a file.
2. Press Blue key to lock this file, and mark it with
“ ”. If you want to cancel this setting, press Blue
key again.
3. Press EXIT key to save and exit.
Note: System password is required to unlock files
and view programs of locked files.