
Installation Instructions


Planning the Job
4
DMX AG™ Foundation Guide: Version 4.3
Updated: Updated September 9, 2014 (clarifications only denoted by ᵠ)
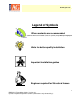
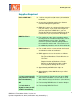
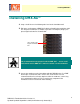
Tools Required
Utility knife
For cutting the membrane
Chalk line
For marking the grade level on the foundation wall
Drill
For ICF foundations. Cordless is the most
convenient.
Hammer or power nail
gun
For poured or concrete block foundations.
New or green concrete can be nailed by hand. Cured
walls and block walls are more easily dealt with
using a power nail gun.
=
Adapter
For holding the DMX Washers™ when you are using
a power nail gun.
Dewatering Equipment
(if necessary)*
For dewatering excavations with accumulated water
to allow the installation of DMX AG
Preparing the Site
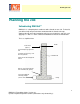
Make sure the foundation is clean at the grade level.
Clear off the footing.
This makes it easier to roll out the membrane smoothly. We recommend that
you install the membrane before covering the drainage tile with stone, or at
least keep the stone away from the footing until after the membrane is
installed.
Make sure you have good drainage at the footing in accordance with local
Code Requirements*.
Drainage is vital to the success of your project, and the optimum performance
of DMX AG*. Any moisture that collects behind the membrane is designed to
flow to the drainage tile* at the footing. It is extremely important for the
drainage tile* to be functioning properly.
You can install the DMX AG™ membrane in any type of weather, we suggest
for productive installations that DMX AG not be installed in temperatures
below -24ºF (-31ºC)*.
When dewatering follow local By-Laws/Rules about discharging rain water on
public or private property*.