
Technical data


Ichill 200CX EVO rev 1.1 14/11/2013
Pag. 14 of 151
2. Push SET one time: the value is blinking
3. Use the Up and Down keys to adjust it. Push SET one time to confirm; automatically the display shows
next parameter
4. Repeat the operations 2. 3. and 4. for all the RTC parameters:
- Min: minutes (0÷60)
- UdAy: day of the week (Sun = Sunday, Mon =Monday, tuE =Tuesday, UEd = Wednesday, tHu =
Thursday, Fri =Friday, SAt =Saturday)
- dAy: day of the month (0÷31)
- MntH: month (1÷12)
- yEAr: year (00÷99)
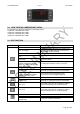
6. PROGRAMMING WITH THE “HOT KEY 64”
Download: how to program an instrument with a programmed “Hot Key”
1. Power off the instrument
2. Insert the hot key already programmed (by software Wizmate or other instrument)
3. Power on the instrument
4. Automatically the parameters are downloaded
During the download the regulation is locked and the top display shows the “doL” blinking label. At the end of
the download will appear:
“End” if the programming procedure is completely OK, after 30seconds the regulation starts automatically.
“Err” if the programming procedure has found an error and the parameter have not been transferred. In this
case turn off and then on the instrument supply to repeat the operation or remove the hot key, with power
supply off, to restart the regulation.
Upload: How to program a “Hot Key” with the parameters of the instrument
1. Power on the instrument
2. Insert the hot key
3. Enter the function Menu
4. Select the UPL function (on the bottom display)
5. Push SET key and immediately the instrument starts transfer the parameters into the Hot key.
During the upload the regulation is locked and the top display shows the “UPL” blinking label. At the end of
the UPLOAD will appear:
“End” if the programming procedure is completely OK, after 30seconds the regulation starts automatically.
“Err” if the programming procedure has found an error and the parameter have not been transferred.
Repeat the procedure.
To exit the UPL function push the MENU key or wait the time-out (15 sec).
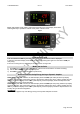
7. PROGRAMMING USING THE KEYBOARD
Through the instrument keyboard it is possible to enter the programming. In all the three accessible levels
the user can show and modify both value and visibility of the parameters. To ensure an easy navigation
through the different levels the common parameters have been named and grouped under a family name.
The three levels of programming:
• Pr1 User level
• Pr2 Maintenance level
• Pr3 OEM level
Password default values
• Password level Pr1 = 1
• Password level Pr2 = 2
• Password level Pr3 = 3
Each password can be changed; the range is 0 ... 999.
Each parameter has two level: visibility and changeability. Therefore it can be configured as follow:
• The parameter can be showed and changed.
• The parameter can be showed but not changed.