
Manual

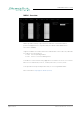


Table Of Contents
- About This Manual
- Chapter 1: Overview
- CHAPTER 2: Legal issues & facts
- Chapter 3: Installation
- CHAPTER 4: Operation
- CHAPTER 5: Remote Control
- Introduction
- Browser Control
- Status - Overview
- Status - Sync
- Status - Network
- Status - Device
- Status - Input Streams
- Status - Output Streams
- Matrix
- Advanced - Overview
- Advanced - PTP Settings
- Advanced - PTP Unicast
- Advanced - PTP Profile Customized Settings
- Advanced - Current PTP Master
- Advanced - PTP Statistic
- Advanced - PTP Clock Setting
- Advanced - Network Advanced Settings
- Advanced - PTP Jitter
- NMOS - Overview
- NMOS - NIC1 & NIC2
- NMOS - Additional Settings
- Logging
- Statistic
- Switch
- CHAPTER 6: Troubleshooting and Maintenance
- CHAPTER 7: Technical Data
- Appendix A - Wiring Sketches
- Appendix B - Working with BLDS™
- Appendix C - Working with ch 57 mode
- Appendix D - Firmware Update
- Index

page 77 of 93EXBOX.RAV Manual - Version 1.1
CHAPTER 5: Remote Control
Switch
The device features four RJ45 sockets managed by two independent network
interfaces (NIC 1 / NIC 2).
Port 1 is fixed assigned to NIC 1.
Port 2, 3 and 4 can be assigned to either NIC 1 or NIC 2 on the SWITCH tab
NOTE
To access the module‘s control page it is required to connect the management
network to one of the ports that is directly attached to a NIC - see next pages.
To give the very best PTP synchronisation performance, the switch incorporates
advanced timestamping between the external PORTS and the internal NICs.
As a consequence, the on-board switch cannot be used to connect other PTP
devices via a single shared connection to the wider network.
Please connect all other PTP devices directly to your system’s network switch.
NOTE
If NIC 1 and NIC 2 are connected to the same switch, they must be configured to
different subnets - see "Network Settings" on page 38.