
Manual

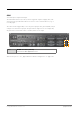
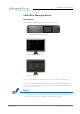
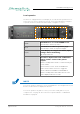
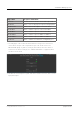
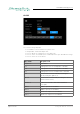
Table Of Contents
- About This Manual
- CHAPTER 1: Overview
- CHAPTER 2: Legal issues & facts
- CHAPTER 3: Installation
- CHAPTER 4: Operation
- CHAPTER 5: Managing Device
- CHAPTER 6: RAV.IO
- Introduction
- Connecting Audio Network
- Status - Overview
- Status - Sync
- Status - Network
- Status - Device
- Status - Input Streams
- Status - Output Streams
- Advanced - Overview
- Advanced - PTP Settings
- Advanced - PTP Unicast
- Advanced - PTP Profile Customized Settings
- Advanced - Current PTP Master
- Advanced - PTP Statistic
- Advanced - PTP Clock Setting
- Advanced - Network Advanced Settings
- Advanced - PTP Jitter
- NMOS - Overview
- NMOS - NIC1 & NIC2
- NMOS - Additional Settings
- Logging
- Statistic
- Switch
- RAV.IO - Firmware Update
- CHAPTER 7: DANTE.IO
- CHAPTER 8: Troubleshooting and Maintenance
- CHAPTER 9: Technical Data
- Index
- Appendix A - DSUB-25 Pin assignment
- Appendix B - DSUB-9 Pin assignment
- Appendix C - Dimensions
- Appendix D - System Update & License Installation

page 55 of 140Prodigy.MP Manual - Version 2.4
CHAPTER 5: Managing Device
Getting started
1. Check the hardware - the housing must be closed completely.
Empty slots require covering with a blank plate.
2. Check network connection with one of the three MGMT ports on the rear
panel.
3. Check the power cabling and switch on the device.
4. After the boot process of the device is complete. Check the display on the
front panel for the IP address.
NOTE
The device will look for a DHCP server in the network to obtain its IP address.
However the IP address can be changed manually via the touch display - see
“NETWORK SETTINGS” on page 66.