
Owner's Manual

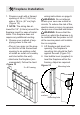
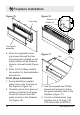
Table Of Contents
12 www.dimplex.com
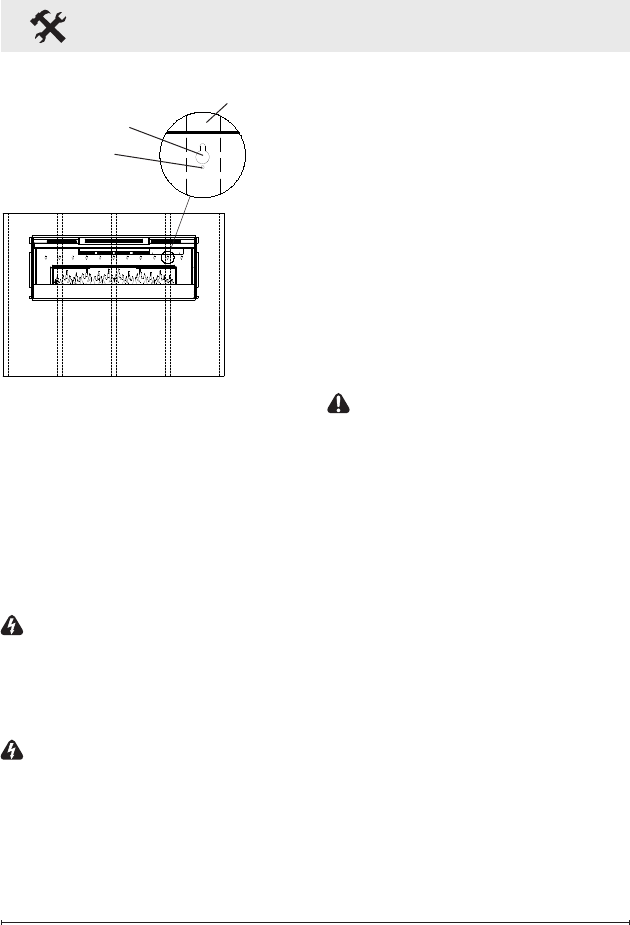
Figure 9
Key-hole
Wall stud
Permanent
mounting hole
a minimum of two wall studs
available for mounting.
2. Choose your method of sup-
plying power to the unit:
• Plug in to an existing outlet or
install an outlet nearby.
• Hard wire the replace. Follow
the hard wiring instructions on
page 9.
WARNING: Do not attempt
to wire your own new outlets or
circuits. To reduce the risk of re,
electric shock or injury to persons,
always use a licensed electrician.
WARNING: Ensure that the
circuit on which the replace is to
be installed has the power cut off
at the service panel until installa-
tion is complete.
3. Remove the partially reective
Fireplace Installation
glass from the replace:
• Lay replace on its back.
• Remove two Phillips screws
from each of the two glass
brackets (Figure 3, page 9).
• Remove glass brackets.
• With one hand keeping pres-
sure on the partially reective
glass, tilt the replace upright
and slightly forward to allow
the partially reective glass to
fall out of the inside framing.
CAUTION: Partially reective
glass is not tempered. Do not
bump or drop the partially reec-
tive glass to avoid breakage and
personal injury.
• Remove partially reective
glass from replace.
4. Position the replace on a wall
at the position where it will
be mounted (Figure 9). Use a
bubble level (one is supplied)
to ensure that replace is level
on the wall.
5. Ensuring that at least two
key-holes line up with a wall
stud (key-holes are spaced
at 4 in. (10.2 cm) centers),
mark the location of four screw
locations on the wall (through
key-holes).