
Installation Instructions


30
Installation Guide
GB
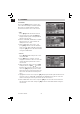
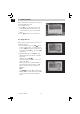
DiSEqC1.1:
Use [Vol ] to switch DiSEqC1.1 option or press [OK] to enter DiSEqC1.1 option to
select directly with [CH
], press [OK] to confi rm it. The options of this item are:
Disable / CCard1 M1 Port1 / CCard1 M1 Port2 / CCard1 M1 Port3 / CCard1
M1 Port4 / CCard1 M2 Port1 / CCard1 M2 Port2 / CCard1 M2 Port3 / CCard1
M2 Port4 / CCard1 M3 Port1 / CCard1 M3 Port2 / CCard1 M3 Port3 / CCard1
M3 Port4 / CCard2 Port1 / CCard2 Port2 / CCard2 Port3 / CCard2 Port4 /
CCard2 Port5 / CCard2 Port6 / CCard2 Port7 / CCard2 Port8 / CCard2 Port9
/ CCard2 Port10 / CCard2 Port11 / CCard2 Port12 / CCard2 Port13 / CCard2
Port14 / CCard2 Port15 / CCard2 Port16.
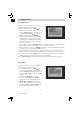
Positioner:
Press [Vol
] to select between “Off / DiSEqC1.2 / USALS”.
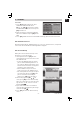
! Notice:
When you select “DiSEqC1.2 or USALS”, “DiSEqC1.0” and “DiSEqC1.1” items will be
disabled.
Polarity:
Press [Vol ] to switch between “Auto / H / V ”.
Toneburst:
Press [Vol ] to switch this function “On” or “Off”.
5. After you completed your modifi cation, on the “TP Scan” item, press [OK] twice to
start scanning.
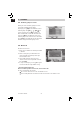
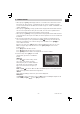
4.4 Satellite List
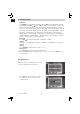
When you enter the “Satellite List” menu you
can see a window like the one beside:
1. Press [Red] button to enter edit satellite
menu. You can edit the satellite’s name
and its longitude.
4. INSTALLATION