Installation Guide IMPERIAL DB 2 USB See the world through
GB SAFETY PRECAUTION CAUTION The lightening flash with arrowhead symbol, within an equilateral triangle, is intended to alert the user to „dangerous voltage“ and to prevent from a risk of electric shock. To reduce the risk of electric shock, don‘t open the cabinet. Refer servicing to qualified personnel only. To reduce the risk of electric shock, don‘t open the cabinet. Refer servicing to qualified personnel only.
SAFETY PRECAUTION GB Attachments: Never add any attachments and/or equipment without the manufacturer consent; as such additions may result in the risk of fire, electric shock or other personal injury. Locating: Slots and openings in the cabinet are provided for ventilation to protect it from overheating.
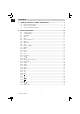
GB CONTENTS 1. REMOTE CONTROL & PANEL DESCRIPTION .............................................. 7 1.1 1.2 1.3 Front Panel Description .......................................................................................................... 7 Rear Panel Description ........................................................................................................... 8 Remote Control Description ................................................................................................ 9 2.
CONTENTS GB 3. CHANNEL .................................................................................................................. 19 3.1 3.2 3.3 3.4 3.5 3.6 3.7 TV Channel List...........................................................................................................................19 3.1.1 Favorite.............................................................................................................................. 20 3.1.2 Move ...........................................
GB CONTENTS 7. MEDIA MANAGEMENT..........................................................................................45 7.1 7.2 7.3 7.4 Media-List..................................................................................................................................... 45 7.1.1 All............................................................................................................................................ 46 7.1.2 MP3 ...........................................................
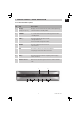
1. REMOTE CONTROL & PANEL DESCRIPTION GB 1.1 Front Panel Description No Key Description 1 Display Displays the received channel number while operating and time while in standby mode. (4-Digit/7-Segment) 2 POWER Is used to switch between the working mode and the standby mode. 3 VOL+/- To change volume to move cursor, change numbers in the menu or to change the choice 4 MENU To enter into the main menu and exit all menus.
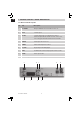
GB 1. REMOTE CONTROL & PANEL DESCRIPTION 1.2 Rear Panel Description No Key Description 1 TV SCART Output SCART for the connection to a TV set. 2 IF IN Satellite input. 3 IF OUT Satellite output for cascading to other devices Note: The operation of another receiver at the same time is only possible with limited channel selection. 4 AUDIO HiFi outputs for stereo set 5 VIDEO CVBS video output for TV AV in. 6 S/PDIF Digital output for Dolby Digital.
1. REMOTE CONTROL & PANEL DESCRIPTION GB 1.
GB 2. BASIC OPERATIONS 2.1 Switch on STB Switch the [Device’s Main Power] switch on. When the STB is first used it will display “Quick Setup” window. you will set Language, First Audio, Second Audio, LNB Power, Antenna Setup and Multi Search. ? Frequently Asked Question Q: The power of my STB is on and it is running in TV mode but the TV screen shows nothing: A: Make sure the TV set has been set to the correct video input(not the TV channels).
2. BASIC OPERATIONS GB 2.4 Code For this, press the button CODE on your remote control until the correct LED is lighting. 2.5 Mute 1. Press the [Mute] button to mute the sound. On the screen an icon will be displayed to indicate the muted sound. 2. Press the [Mute] button again to restore the sound. 2.6 Channel Number In TV mode you can enter the channel number directly with your remote control unit and confirm the number with the OK button to change to the desired channel. 2.
GB 2. BASIC OPERATIONS 2.8 MULTI-PIC In TV mode, press [0] key to enter the “MULTI-PIC” menu. 1. In “MULTI-PIC” menu, you can choose channels’ preview window(static), starting from the current channel. Only the marked preview program is continuously playing. 2. Press [CH ] / [Vol ] to change the marked channel among the preview programs. 3. With the number buttons [1] ~ [9] you can directly move the highlight to the related channel. 4. With [OK] you return to full screen mode in the marked channel. 2.
2. BASIC OPERATIONS GB 2.11 BACK Pressing the [BACK] button allows you to toggle between the actual and the last selected channel 2.12 EPG 1. The STB supports Electronic Program Guides (EPG) to give you information about the actual programs of certain channels like event name, subtitle, description, start and finish time. This feature is depending on the service of the channel provider. Press [EPG] to open the EPG window. 2. The [Red] button opens the detailed schedule of the marked channel.
GB 2. BASIC OPERATIONS 2.13 FAV +/1. In full screen, press [FAV +/-] keys can switch the favorite channels in current satellite channels list directly. 2. The sequence of the switch favorite channels is following the sequence that in the current satellite channel list, not follow the sequence in the favorite group. 2.14 Menu Press [Menu] button to enter or exit the current menu. 2.15 Exit Press [Exit] button to exit the current menu. 2.16 CH In TV/Radio mode press [CH ] to change channel. 2.
2. BASIC OPERATIONS GB 4. Press [Yellow] button to open the SAT list. After selecting a satellite the channel list will be reduced to the channels of this satellite. 5. Press [FAV] button to open FAV list. After selecting a Favorite Group the channel list will be reduced to the channels of this group. 6. Press [Blue] button to open the Find window. You can use this feature to find channel by their names. 7. Press [OK] to change and display the marked channel. 2.
GB 2. BASIC OPERATIONS 2.21 Audio 1. In TV mode, press the [Audio] button to open the Audio Mode window. 2. Select the item you want to adjust with [CH ] and change the value with [Vol ]. 2.22 Zoom 1. The [Zoom] key allows you to magnify a certain area on the images and the current screen will show 2. Press [Zoom] key again, the image will enlarge rotate as x1, x2, x4, x6, x8, x12, x16. ] / 3. In “x2 ~ x16” image, using [CH [Vol ] keys to move the image center area you want to see. 4.
2. BASIC OPERATIONS GB 2.25 PAUSE 1. In playing mode, press [PAUSE], the picture will be paused, but the sound of the channel will still continues. 2. Press [PAUSE] again, the screen’s picture will skip over to the current playing picture, and the sound of the channel will corresponding playing. 2.
GB 2. BASIC OPERATIONS 2.30 In TV mode, press [ ] button you will be asked to “Do you want to record?” menu. 2.31 When you play a recorded channel, press [ ] button to back the program fast and Press [ Selection: 2x, 4x, 8x speed . ] to fast forward the program. 2.32 When you play a current or recorded program, press [ ] will stop the program, press [ ] again will play the program continually, And Timeshift is started by this key. 2.
3. CHANNEL GB Press [Menu] in the TV/radio mode to enter the main menu. ] to select the channel 1. Press [CH item. 2. Press [OK] to enter the selected item. In the channel menu: Press[CH ] to select the wanted menu item among TV Channel List, Radio Channel List, Channel setup, Favorite group list name, Delete All, Restore channel list and settings and Save channel list and settings. Press [OK] to enter the selected item. 3.
GB 3. CHANNEL 3.1.1 Favorite 1. Press [FAV] to open the favorite window. 2. You can select between 8 favorite groups with[CH ] Press [OK] to assign the channel to a favorite group, press [EXIT] to exit favorite group. 3. Press [OK] again to remove the channel from the marked favorite group. 4. Press [MENU] button you will be asked “Are you sure to save?”. Select “Yes” to save the marked favorite group. Select “No” to cancel the operation. 5. To return to the TV channel list.
3. CHANNEL GB 3.1.3 Sort Press [Green] to open the sort window. ] to select and [OK] to Press [CH confirm your choice. The ways of sorting are: • Default: Sort channel factory default. • FTA/CAS: Sort channel by free and scrambled sequence. Free channels will be listed first and scrambled channels behind in the channel list. • Lock: Unlocked channels are listed first end locked channels at the end. • Name(A-Z): Sorting in Alphabetical order, ignoring “$” symbol.
GB 3. CHANNEL 3.1.4.4 Edit Pressing the [Blue] button in the TV channel list edit menu will open another window where you can choose between edit the actual channel and create a new channel. • Edit Press [Red] button to edit the channel. 1. Selecting the name item with [OK] will display a button pad to show you how to edit the channel name. 2. On the “Video PID”, “Audio PID” and “PCR PID” items you can input numbers to modify the item’s value. 3.
3. CHANNEL GB 3.1.5 Find 1. Press [Blue] button to open the “Find” window like showed beside. Press [CH ] /[Vol ] to select the leading character of the channel name and press [OK] to confirm it. 2. After entering the character(s) highlight “OK” in the window and press [OK] on the RCU. 3. Press [Exit] button to close the find window and brings you back to the channel list. 3.
GB 3. CHANNEL 3.4 Favorite group list name When you enter “Favorite group list name” menu with 8 favorite group will be displayed, press [OK] on the RCU to rename favorite group. Use [CH ] /[Vol ] to select character, press [OK] to confirm it. After modification select “OK” of button bar and press [OK] on the RCU to rename the favorite group name and leave the edit mode. Press [Exit] on the RCU to exit the edit mode without saving the favorite group name. 3.5 Delete All To delete all channels: 1.
3. CHANNEL GB 3.6 Restore channel list and settings To restore channel list and settings. 1. Enter the password. The default password is “0000”. 2. After entering the password correct a safety question will show up where you have to confirm first. 3. Select “OK”, press [OK] to restore the last backup channel list, the current channel list will be erased. Select “Cancel” press [OK] to cancel the operation. 3.7 Save channel list and settings To save channel list and settings. 1. Enter the password.
GB 4. INSTALLATION After selecting the installation menu you can see the window like beside. In “Installation” menu; 1. Press [CH ] to select menu items among Single Search, Multi Search, TP Scan, Satellite List, TP List and Satellite Guide. 2. Press [OK] to enter the selected item. 4.1 Single Search After selecting “Single Search” you will see a window like beside: 1.
4. INSTALLATION 3. 4. 5. 6. 7. 8. GB ! Notice: After choosing LNB type “Universal” you cannot modify 22K. DiSEqC1.0: Use [Vol ] to switch the options or press [OK] to open the DiSEqC1.0 option list to select directly with [CH ] , press [OK] to confirm it. DiSEqC1.1: Use [Vol ] to switch DiSEqC1.1 option or press [OK] to enter DiSEqC1.1 option to select directly with [CH ] , press [OK] to confirm it.
GB 4. INSTALLATION 4.2 Multi Search When you enter the “Multi Search” menu a window like the one beside will open. 1. In the “Satellite” item press [Vol ] to select the satellite which you want to scan or press [OK] to open the “satellite list” to select directly with [CH ] , and press [OK] to mark/unmark and [MENU] to finish the selection. You can select several satellites in this menu. The system will use DiSEqC1.0/1.1, DiSEqC1.2 and USALS functions to search the marked satellites and scan channels. 2.
4. INSTALLATION GB • When you press [Red] it will display “New TP” in “TP Index” item. You have to set the parameters of “TP Frequency”, “Symbol Rate” for this new transponder. Therefore use the number buttons of the RCU. The available range are “3000~13450MHz” and “1000~45000KS/s”. • When you press [Green] a safety question will be displayed for confirmation to delete the current transponder or not.
GB 4. INSTALLATION DiSEqC1.1: Use [Vol ] to switch DiSEqC1.1 option or press [OK] to enter DiSEqC1.1 option to ], press [OK] to confirm it.
4. INSTALLATION GB 2. Press [Green] button to open the “Add satellite” window. 3. After pressing [Yellow] button you will be asked “Are you sure to delete?”. Select “OK” to delete the marked satellite. Select “Cancel” to cancel the operation. 4.5 TP List When you open the “TP List” menu you will see a window like the one beside. 1. Press [Vol satellite. ] to change the marked 2. Press [Red] button to open the “Edit TP” menu. Here you can edit the transponder’s data. 3.
GB 4. INSTALLATION 4. Press [Yellow] button will open a dialog box asking you to confirm the deletion of the current TP. If you select “OK” all the related channels will be deleted. If you select “Cancel” the operation will be cancelled. 5. Pressing the [Blue] button will open a dialog box asking you to confirm the deletion of all TP on current satellite. If you select “OK”, all TP of the current satellite will be deleted. If you select “Cancel” the operation will be cancelled. 4.
5. SYSTEM SETUP GB When you open the “System Setup” menu a window like the one beside will be opened. In “System Setup” menu: 1. Press [CH ] to select menu items among Language, TV System, Time & Timer setting, OSD Setting, Parental Lock and Power setting. 2. Press [OK] to open the selected item. 5.1 Language After selecting the “Language” menu you will see a window like beside: 1. Menu Language: Press [Vol ] to select languages.
GB 5. SYSTEM SETUP 5.2 TV System When you enter the “TV System” menu you will see the screen like below: 1. Display Mode is used to switch the display mode. You can select from Auto / PAL / PAL-M / PAL-N / NTSC3.58 / NTSC4.43. Press [Vol ] to switch the desired mode. 2. Aspect Mode is used to switch the screen aspect ratio mode. You can select the needed mode from Auto / 4:3 PS / 4:3 LB / 16:9 with [Vol ]. 3. Video output is use for switching the screen aspect ratio mode.
5. SYSTEM SETUP GB • When you select “TV Channel / Radio Channel”(timer setting for channel change and Wakeup channel / date) then you have further options you need to set: Wakeup Channel: Press [OK] to enter the channel list, and select the channel you want to see with [CH ] press [OK] to confirm it. Wakeup Date: Use number buttons to input your wakeup date. On Time: Use number buttons to input your wakeup time.
GB 5. SYSTEM SETUP • Summer: Press [Vol ] to switch this function “On” or “Off”. • “Date” and “Time” items are only available when the “GMT Usage” is set to “Off”. Press [Vol ] to select one item and use number buttons to input time and date directly. • Time Display: Press [Vol ] to switch this function “On” or “Off”. NOTE: If the current channel provides the correct time information, you will see the current time after you entered “Local Time Setting” menu.
5. SYSTEM SETUP GB 5.5 Parental Lock You can set a password for anyone who wishes to operate the “Installation” menu. You can also set the password to lock channels. Below you find how to set and change the password. 1. On “Parental Lock” press [OK] to open a dialogue box and input the password. After you entered the correct password, you will see a screen like beside: 2. Menu Lock: If Menu Lock is set to “Yes” then you need to enter the password every time you want to open the menu.
GB 5. SYSTEM SETUP 5.6 Power setting When you select this option, you will see a screen like beside: LNB Power: If your receiver is connected to the LNB directly then you need to set the LNB Power to “On”. If your receiver is connected to a multi switch (SMATV signal distribution system) then it may be that you don’t need to provide the power to the LNB.
6. TOOLS GB When you enter to “Tools” menu, you will see a screen like beside: In “Tools” menu: 1. Press [CH ] to select the wanted item among Information, Quick Setup, Game, Factory Default, Software Upgrade, SatcoDX Auto Programming Smart and Smart Card. 2. Press [OK] to enter the selected item. 6.1 Information 1. When you select the “Information” menu you will see a screen like beside. The screen displays data about the current channel. 2. Press [Exit] button to leave the information display. 6.
GB 6. TOOLS 6.3 Game When you enter “Game” menu, you will see three games include Tetris, Snake and Othello. Basic operation statement: 1. Tetris Mark “Setup” and press [Vol ] to select the level (speed). Mark “Start” and press [OK] to start the game. Mark “Cancel” and press [OK] to leave the game.
6. TOOLS GB 2. Snake Mark “Setup” and press [Vol ] to select the level (speed). Mark “Start” and press [OK] to start the game. Mark “Cancel” and press [OK] to leave the game. Play the game: • Press [Vol ]/[CH ] to guide the snake to the red blocks. Every block you ate increases the length of the snake. If the snake runs against a wall or against itself then it dies. • Press [OK] to Pause/Play the game • Press [Exit] to quit the game and return to the game menu. 3.
GB 6. TOOLS 6.4 Factory Default When you press [OK] on the “Factory Default” item: 1. A dialogue box will occur where you need to enter the password. 2. After you input the correct password a warning message will be displayed like the one beside. 3. If you select “Yes” then all changes you made will be reset to default values. Make sure you really want to do this! 4. Press [Exit] in both steps will close the window without resetting the receiver. 6.
6. TOOLS GB 2. Connect master receiver or PC to the slave receiver via serial interface (0-Modem cable). Enter the “Software Upgrade” menu of the master receiver and press [Vol ] to change the upgrade mode. Upgrade modes include: All code / Main code / CAS-data / Script GUI / Radio Back / default DB / Userdb. 3. Switch on the slave receiver. 4. Mark “Start” on the master reeciver and press [OK] to start upgrade. Wait until the display on the front panel shows “-END”.
GB 6. TOOLS 3. Once the file has been loaded, it requires the conformity to end the upgrading process, writing into the receiver “Are you sure to burn flash ?”. Press [OK] to upgrade the receiver. In case during the reading of the file, it is corrupted or it would be a not appropriated for this model of receiver, an alert message would appear “Error reading the USB disk”. 4. After pressing [OK] the receiver will write into the Flash memory, and it will reboot to end the upgrading process. NOTE: 1.
7. MEDIA MANAGEMENT GB When you enter to “Media Management” menu, you will see a screen like beside: In “Media Management” menu: ] to select the Media 1. Press [CH List, Media Control, Disk Information and Upgrade. 2. Press [OK] to enter the selected item. 7.1 Media List Press [CH ] to select the wanted item partition. Press [Red] button to open the “Rename” window like showed beside. ] /[Vol ], to select the Press [CH leading character of the channel name and press [OK] to confirm it.
GB 7. MEDIA MANAGEMENT 7.1.1 All [Edit] Press [Red] button to open the “Edit” window like showed beside. The color buttons offer further functions to manage. 1. Rename • Press [Red] button to open the “Rename” window like showed beside. Press [CH ] /[Vol ] to select the leading character of the channel name and press [OK] to confirm it. • After entering the character(s) highlight “OK” in the window and press [OK] on the RCU.
7. MEDIA MANAGEMENT GB 3. Move • Press [Yellow] button to show a moving icon behind the “mp3 / image / video / folder” name. • Move the “mp3 / image / video / folder” to the desired folder list with [CH ]. Press [OK] to confirm the position. 4. Folder • Press [Blue] button to open the “New Folder” window like showed beside. Press [CH ] /[Vol ] to select the leading character of the folder name and press [OK] to confirm it.
GB 7. MEDIA MANAGEMENT Find Press [Blue] button to open the “Find” window like showed beside. Press [CH ] /[Vol ] to select the leading character of the channel name and press [OK] to confirm it. After entering the character(s) highlight “OK” in the window and press [OK] on the RCU. Press [Exit] button to close the find window and brings you back to the all list. play The play offer further functions to manage. If you enter the play menu a window like the one below will open.
7. MEDIA MANAGEMENT GB 7.1.3 Image Basically the operation of “image” is same as “all”, except that in the Yellow buttons offer further functions to manage. In image menu press [Yellow] button will open another window. press [OK] to set the image as background. Select “Cancel” press [OK] to cancel the operation. 7.1.4 Video Basically the operation of “video” is same as “all”. 7.1.5 Music List The color buttons offer further functions to manage.
GB 7. MEDIA MANAGEMENT 7.1.6 Picture List Basically the operation of “Picture List” is same as “Music List”, except that in the Yellow (Setup) buttons offer further functions to manage. Press [Yellow] button to open the “Serup” window. Select the item you want to adjust with [CH ] and change the value with [Vol ] Size: Full and Real. Time: 0 Sec, 1 Sec, 2 Sec, 3 Sec, 4 Sec, 5 Sec, 6 Sec, 7 Sec, 8 Sec and 9 Sec. Repeat: On and Off. Effect: Normal, Shutters, Brush, Slide, Random and Fade. Mp3: On and Off. 7.
7. MEDIA MANAGEMENT GB Lock In channel Record menu, press [Green] button to place a lock icon behind the name of the highlighted Record. Marked Records will be locked and displayed only after password has been entered if you confirm to save the changes when you leave this menu. Copy In channel Record menu, press [Yellow] button copy the recorded programme to another disk. Press [Vol ] to switch select copy path, Select “OK” to add all image. Select “Cancel” to cancel the operation.
GB 7. MEDIA MANAGEMENT 7.2 Media Control 1. Reserved TMS Size: Press [Vol ] to switch between “0 MB / 200 MB and 500 MB”. Select “MENU / EXIT”, press [MENU / EXIT] to reset to make tms size valid now. Select “Cancel” press [OK] to cancel the operation. 2. Jump Step Value: Press [Vol ] to switch between “1 mins / 3 Mins / 5 Mins / 10 Mins / 15 Mins”. The value control the step of operation.00 3. Record Type: Press [Vol ] to switch between “TS and PS”. 4.
8. TECHNICAL SPECIFICATION GB VIDEO Decoding ...................................................................MPEG-2 & MEPG-1 compatible Bit rate .......................................................................Max 15Mbps Output.........................................................................PAL/NTSC Aspect ratio .............................................................4:3, 16:9, Auto Active pixel ................................................................
GB DigitalBOX Europe GmbH Sandstraße 65 · D-40878 Ratingen Installation Guide 54