
Installation guide

5–4 Installing the SF72 Storage Enclosure in an SF200 Storage Array
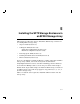
The last part explains the steps to:
• Power up the SF72 enclosure, run the power-on self-test, and run the
configuration programs
• Label all cables and operator control panels
• Verify the operation of the enclosure after a successful installation
Follow all the steps in each of these parts in the order they are presented
and do not skip any steps.
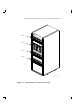
When the array is to operate in a single-host configuration, remember
that the enclosure in positions 1, 2, 4, and 7 operates in the through-bus
mode. To ensure that the SF72 storage enclosure you are installing is
in the through-bus mode after the installation is complete, observe the
bottom indicator on the OCP. It should be off. Positions 3 and 8 operate
in the split-bus mode and require you to reconfigure their transition
termination module (TTM). That same indicator should be on once the
enclosure is set for split-bus mode. The procedure to accomplish this is
presented later in this chapter.
When the array is to operate in a dual-host configuration, remember that
all enclosures operate in the through-bus mode.
5.1.1 Unpacking the SF72 Storage Enclosure
Unpack the SF72 shipping container. The enclosure is shipped in an
environmental barrier bag with desiccant.
NOTE
After unpacking, retain the container and all packing materials.
At this time, examine the enclosure for physical damage. If you find
any damage, do not attempt to install the enclosure. Notify your office
immediately.
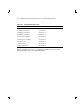
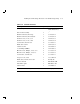
If there is no damage, then unpack all the boxes and bags, and identify
all the parts by using Table 5–2.