
Specifications
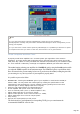


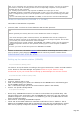

TRX-Acom
TOP button keeps TRX-Acom always on top of all other windows.
TRACKbutton connects TRX-Manager and TRX-Acom together via OLE. Once TRACK is ON,
internal ACOM2000A's frequency counter is overcome, all frequency changes are controlled by
TRX-Acom and selected segments are displayed.
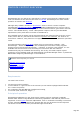
Note about RCU's PROT Led
When an error happens, the amplifiers goes to StandBy. If you press Esc on RCU, error message
will be cancelled and RCU's PROT Led will stop flashing. However, if you cancel the error message
from TRX-Acom by pressing OPR, RCU'S PROT Led will continue flashing while TRX-ACOM's PROT Led
will stop flashing. This is normal since the RCU's PROT Led is a kind of "reminder for the local
operator", if any at the RCU side, about a problem that has happened during the remote control
operation.
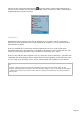
Measurements
Press SET to select DATA to measure. Press START to start measurements.
Note
While in Measurement mode, TRX-Acom stops reading the RCU. Press STOP to resume RCU
reading.
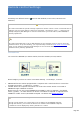
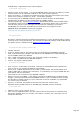
Auto-Tune
TRX-Acom uses ACOM2000A's AUTO-TUNE function under the control of TRX-Manager.
AUTO-TUNE panel opens by clicking the >>> button.
if you use TRX-Acom as a stand alone program (not using TRX-Manager), leave TUNE via
CAT unchecked,
if your transceiver allows switching PTT ON/OFF via TRX-Manager, please check PTT VIA
Page 184