
User's Manual


8
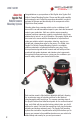
Mounting the Spyder Pod to your vehicle (continued)
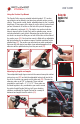
2) Mount the Spyder Pod: Construct your custom Spyder Pod
configuration by attaching three legs to the suction cup mounts at
one end and to the camera base plate at the other end (34). Figure
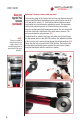
out the best placement of the three suction cup mounts on the
vehicle, taking into account where the smoothest surfaces and best
adhesion will be. Pump the suction cup mounts to
achieve vacuum adhesion in the desired positions.
Your aim is to form a solid balanced three-legged
base for the camera platform and for your attached
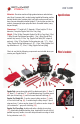
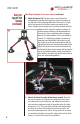
camera (35). Adjust the leg lengths, if required, by
swapping in and out different rod lengths on each
leg, in order to get the camera plate level and at the
right distance from your shooting subject and vehicle.
Adjust the ball joints on the top of each suction cup
and the ratchet joints on the camera plate to place the
legs in the position needed to create a level base for
your camera. Lock down the ball and ratchet joints to
form your solid shooting platform.
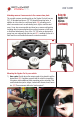
3) Identify & attach the safety kit hardware needed: Now that
the camera position and Spyder Pod attachment points have
been determined, you will want to add additional security for
your prescious equipment using the provided safety kit straps
and anchors (36). There are many methods and combinations
possible, all of which will provide secure anchor points, but
some offer advantages over others. Anchor points on a vehicle
can include hood edges, door jambs, wheel wells and the front
chassis, to name just a few of the possibilities.
User’s GUide
SPYDER
POD
VEHICLE CAMERA
MOUNTING SYSTEM
Using the
Spyder Pod
System
(continued)
34
35