
User Manual


7
USER’S GUIDE
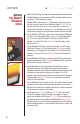
MiniBurst 504
Controllers &
Connectors
(continued)
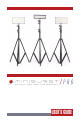
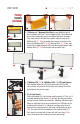
3-POINT LED LIGHTING SYSTEM
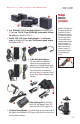
e. Battery Plate & Integrated Charging System (38): This is where
the provided 2600mAh Lithium-ION rechargeable batteries are
mounted (39), for portable use and for charging when the unit
is connected to a power outlet. The battery release button (40)
allows you to easily remove and replace the battery.
39
The batteries supplied with the Digital Juice MiniBurst PRO 3-Point
LED Lighting System are not completely charged on delivery. Batteries
should be charged for 4-6 hours before first use. There may be an
additional burn-in period before rapid charging takes place.
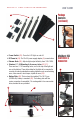
For the MiniBurst 504 lights:
a. Plug one of the 2600mAh 14.8V Li-ion
Battery Packs (2) into the battery plate (38)
on back of the MiniBurst 504 light.
b. Attach the provided 18V DC adapter (4)
to the light (34, 35) and plug it into an
available electrical outlet.
c. With the light powered on, you can follow
the charging progress by looking at the OLED display on the back
of the light, which displays the current battery charge state (41).
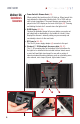
For the MiniBurst 256 light:
a. Plug battery pack (3) into the charger unit (42).
b. Plug the charger into the electrical outlet using the AC power
cord or to a 12-volt power source with the 12V DC adapter. Both
cables are provided in the MiniBurst 256 Battery Charger Kit (9).
c. While charging, the light on the charging unit will show red. When
the battery is fully charged, the light will be green and the charger
will switch into maintenance mode.
Charging
the Batteries
41
42
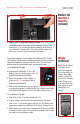
NOTE: The MiniBurst
504 lights do not
need to be powered
ON for the battery to
charge. When light
power is turned OFF,
the unit is in Standby
mode. If light is not
to be used for a long
time, please remove
battery from the
device.