RAID Array 3000 Storage Subsystem Expansion Pedestal Option Installation Guide EK–SM3KA–IG.
First Edition, January, 1998 The disclosure of this information does not grant to the user a license under any patents, pending patents, trademarks, or copyrights or other rights of Digital Equipment Corporation, or of any third party. This software is proprietary to and embodies the confidential technology of Digital Equipment Corporation.
Contents Revision Record ............................................................................................... v About This Guide .......................................................................................... vii Chapter 1 Expansion Pedestal Option 1.0 Introduction........................................................................................................... 1–1 2.0 2.1 2.2 2.3 Product Description..........................................................................
Revision Record This Revision Record provides a concise publication history of this guide. It lists the revision levels, release dates, and summary of changes. The following revision history lists all revisions of this publication and their effective dates. The publication part number is included in the Revision Level column, with the last entry denoting the latest revision. This publication supports the StorageWorks RAID Array 3000 Expansion Pedestal Enclosure. Revision Level EK–SM3KA–IG.
About This Guide This section identifies the audience of this guide and describes the contents (chapter-bychapter) and structure. In addition, this section includes a list of associated documents and the conventions used in this guide. Intended Audience This guide is intended for installers and operators of the RAID Array 3000 storage subsystem. Installing the subsystem requires a general understanding of basic SCSI terminology and product installation procedures.
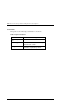
RAID Array 3000 Storage Subsystem Expansion Pedestal Option Conventions This guide uses the following documentation conventions: Table 2 Style Conventions Style viii Meaning plain monospace type Text boldface type For the first instance of terms being defined in text, or both. italic type For emphasis, manual titles, chapter summaries, keyboard key names. EK–SM3KA–IG.
About This Guide Support and Services Who to contact in the Americas Information and Product Questions: Local Sales Office / StorageWorks Hotline 1-800-786-7967 Installation Support: Contact the DIGITAL Distributor where the Storage Solution was Purchased / Local Digital Sales Office. DIGITAL Multivendor Customer Service (MCS): Installation Contact the DIGITAL Customer Support Center (CSC).
1 Expansion Pedestal Option This guide describes how to install the Expansion Pedestal Option to expand the storage capability of the RAID Array 3000 subsystem. The guide provides a product description of the option and how to connect it to the base pedestal to create an enhanced storage subsystem. 1.0 Introduction This guide contains installation instructions needed to interface the expansion pedestal to the base pedestal to create your expanded storage subsystem.
RAID Array 3000 Storage Subsystem Expansion Pedestal Option Figure 1–1 Expansion Pedestal 2.1 Expansion Pedestal Cabinet The expansion pedestal cabinet is a modular free-standing storage cabinet that is completely self contained with dual fan-cooled power supplies, an internal UltraSCSI single-ended extender module, and an internal EMU circuit board.
Chapter 1.
RAID Array 3000 Storage Subsystem Expansion Pedestal Option Figure 1–3 Rear Panel Power Supplies 2.2 Expansion Pedestal Components The expansion pedestal contains a 16-bit, wide/differential UltraSCSI bus, an Environmental Monitor Unit (EMU), a SCSI bus extender module, and two universal 50/60 Hz, 100 – 240 Vac fan-cooled power supplies. The single-ended UltraSCSI bus is factory-configured as one continuous bus that runs along the backplane between the disk drive connectors and the internal cables.
Chapter 1. Expansion Pedestal Option The EMU (Figure 1-4) is an internal circuit board, which monitors the operation of the pedestal. The EMU monitors power supply voltages, fans, temperatures that are reported to the user, and controls (turns on and off) the audible alarm and status LED on the front panel of the pedestal. It is connected to the SCSI bus and powered by internal cabling.
RAID Array 3000 Storage Subsystem Expansion Pedestal Option The RAID Array 3000 base pedestal is factory-configured for split-bus operation. You must reconfigure the bus in the base subsystem from split-bus to a “throughbus” configuration prior to connecting the expansion cabinet to the base subsystem. The components needed to reconfigure the split-bus in the base subsystem are included with your pedestal expansion kit option.
Chapter 1. Expansion Pedestal Option Figure 1–5 Remove Side Cover from Base Pedestal 8. Remove the bus terminator from backplane connector J11 (Figure 1-6). Figure 1–6 Remove SCSI Bus Terminator R e m o v e Te rm in ato r 9. 3000-40 Remove the SCSI cable from device # 1 connector and backplane connector J16 (see Figure 1-7). EK–SM3KA–IG.
RAID Array 3000 Storage Subsystem Expansion Pedestal Option Figure 1–7 Disconnect SCSI Cable R em ove SC S I C a ble 3000- 41 10. Connect jumper cable 17-04166-03 between the backplane connector J11 and the backplane connector J16 (see Figure 1-8). Figure 1–8 Connect SCSI Jumper J11 J16 C onnect Jum pe r C able 1–8 3000- 42 EK–SM3KA–IG.
Chapter 1. Expansion Pedestal Option 11. Remove the “knock-out” plate located above the D1 OUT label on the rear panel of the base pedestal (see Figure 1-9). Figure 1–9 Remove Connector Knockout Plate R em ove Kn ockou t from D 1 O ut 3 0 0 0 -4 5 12. Connect cable assembly 17-04454-01 between the D1 OUT bulkhead opening and the device # 1 backplane connector (see Figure 1-10). Secure the bulkhead connector by tightening the two 6-32 SEM screws. EK–SM3KA–IG.
RAID Array 3000 Storage Subsystem Expansion Pedestal Option Figure 1–10 Connect SCSI Cable C o n n e c t S C S I C a b le 30 00 -43 13. Set the bus configuration switch to “7” (see Figures 1-11 and 1-12). Figure 1-13 shows the reconfigured SCSI bus addresses of the expanded subsystem. Figure 1–11 Set Configuration Switch to 7 7 3 00 0- 44 1–10 EK–SM3KA–IG.
Chapter 1. Expansion Pedestal Option Figure 1–12 Configuration Switch Figure 1–13 Reconfigured SCSI Bus Addresses EK–SM3KA–IG.
RAID Array 3000 Storage Subsystem Expansion Pedestal Option 14. Reinstall the side panel on the base pedestal. 15. Connect the HD68-to-HD68 SCSI cable from the D1 OUT connector on the base pedestal to the D1 IN connector on the rear of the expansion pedestal as shown in Figure 1-14. Figure 1–14 Connect SCSI Cable Between Pedestals Base P e d es ta l E xpa ns io n P e de stal 3000-4 7 16. Make the power cable connections between the expansion pedestal, the UPS, and the ac power source (see Figure 1-15).
Chapter 1. Expansion Pedestal Option Figure 1–15 Power Cable Connections UPS C on n ec to r B as e P e d e stal AC P o w er Ex pa nsio n P e de sta l AC Power AC Power U PS 30 00-5 0 CAUTION If you want to maintain the existing RAID level configuration, three drives must be relocated from the base pedestal to specific slots in the expansion pedestal as described in step 17. 17.
RAID Array 3000 Storage Subsystem Expansion Pedestal Option Figure 1–16 Transfer Drives from Base to Expansion Pedestal ID = 8 ID = 8 ID = 9 ID = 9 ID = 10 ID = 10 ID = 11 ID = 11 ID = 8 ID = 12 ID = 9 ID = 13 ID = 10 ID = 14 B ase Pedestal E xpansion P edes ta l 3 0 00 -4 6 18. Install the new drives in the remaining slots each pedestal to complete the installation. 19.
Reader’s Comments Manual Order Number: EK–SM3KA–IG. A01 RAID Array 3000 Expansion Pedestal Option Installation Guide Digital is committed to providing the best possible products and services. Since our manuals are important components of our products, we value your comments, corrections, and suggestions for improvements. Please take a few minutes to fill out and return this form, attaching additional sheets, if needed. Thank you.