LevelOne FCS-1030/WCS-2030 IP Network Cameras User Manual Ver 2.2.
Before You Use This Product The use of surveillance devices may be prohibited by law in your country. The Network Camera is not only a high-performance web-ready camera but also can be part of a flexible surveillance system. It is the user’s responsibility to ensure that the operation of such devices is legal before installing this unit for its intended use. It is important to first verify that all contents received are complete according to the list in the "Package Contents" chapter.
Table of Contents Before You Use This Product ............................................................................ 2 Package Contents ......................................................................................... 5 Installation ................................................................................................... 6 Hardware installation................................................................................. 6 Software installation.....................................
Image Settings ................................................................................ 31 Email & FTP ......................................................................................... 32 Email ............................................................................................ 32 FTP.............................................................................................. 32 Motion detection ....................................................................................
Package Contents z FCS-1030 or WCS-2030 (Wireless) IP Network Camera z Dipole Antenna (WCS-2030 Only) z Power Adapter z Camera Stand z CD Manual/Utility z Quick Installation Guide 5
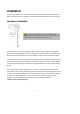
Installation In this manual, "User" refers to whoever has access to the Network Camera, and "Administrator" refers to the person who can configure the Network Camera and grant user access to the camera. Hardware installation Connect the power adapter jack to the Network Camera before plugging in to the power socket. This will reduce the risk of accidental electric shock. Please verify you’re your product package contains all the accessories listed in the foregoing Package Contents.
To install in Ethernet Make sure the Ethernet is firmly connected to a switch hub. After attaching the Ethernet cable plug in the power adapter. If the LED turns out to be steady blue, go to next paragraph “Software installation”. If the Ethernet is not available, Network Camera will switch to wireless LAN mode. To install in wireless LAN If the Ethernet is not available while power on, the Network Camera will search for any access point with the SSID “default”.
Initial Access to the Network Camera Check Network Settings The Network Camera can be connected either before or immediately after software installation onto the Local Area Network. The Administrator should complete the network settings on the configuration page, including the correct subnet mask and IP address of gateway and DNS. Ask your network administrator or Internet service provider for the detail information.
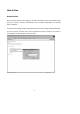
How to Use Authentication After opening the Web browser and typing in the URL of the Network Camera, a dialogue window pops up to request a username and password. Upon successful authentication, the following figure is displayed. The foreground is the login window and the background shows the message if authentication fails. The user may check the option box to save the password for future convenience. This option is not available to the Administrator for obvious reason.
Installing plug-in For the initial access to the Network Camera in Windows, the web browser may prompt for permission to install a new plug-in for the Network Camera. Permission request depends on the Internet security settings of the user’s PC or notebook. If the highest security level is set, the computer may prohibit any installation and execution attempt. This plug-in has been registered for certificate and is used to display the video in the browser. Users may click on to proceed.
Primary user’s capability Main Screen with Camera View The main page layout has two parts: Configuration functions: The camera can be configured using these user interfaces. Camera View: What the camera sees. Click on the configuration link to the left of the image window to enter the configuration page.
Digital Zoom Click on the magnifier icon under the camera view then the digital zoom control panel will be shown. Uncheck “Disable digital zoom” and use the slider control to change the zoom factors. 1 2 3 Snapshot Click on “Snapshot”, web browser will pop up a new window to show the snapshot. Users can point at the snapshot and click the right button of mouse to save it.
Client settings At the initial access to the “Connection type” page in Windows, the web browser will ask for a new plug-in installation, the plug-in being the Network Camera. This plug-in has been registered for certification and can be used to change the parameters at the client’s site. The user may click on to install the plug-in. If the web browser does not allow the user to complete the installation, check the Internet security to lower the security level or contact your IT or networking supervisor.
There are two settings for the client side. One is “Media Options” for users to determine the type of media to be streaming. The other is “Protocol Options” which allows choices on connection protocol between client and server. There are two protocols choices to optimize your usage – UDP and TCP. The UDP protocol allows for more real-time audio and video streams. However, some packets may be lost due to network burst traffic and images may be obscured.
Administrator’s capability Fine-tuning for Best Performance Best performance generally equates to the fastest image refresh rate with the best video quality, and at the lowest network bandwidth as possible. The three factors, “Maximum frame rate”, “Constant bit rate”, and “Fix quality” on the Audio and Video Configuration page, are correlative to allow for achieving the best performance possible. For Viewing by Mobile Phone Most 3GPP cell phone supports media streaming with MPEG4 video and GSM-AMR audio.
* This feature depends on local telecom system and the model of mobile phone; LevelOne do not guarantee this feature works in all area. For Best Real-time Video Images To achieve good real-time visual effect, the network bandwidth should be large enough to allow a transmission rate of greater than 20 image frames per second. If the broadband network is over 1 Mbps, set the “Fix bit rate” to 1000Kbps or 1200Kbps, and set “Fix quality” at the highest quality. The maximum frame rate is 30.
Opening accounts for new users Protect Network Camera by passwords The Network Camera is shipped without any password by default. That means everyone can access the Network Camera including the configuration as long as the IP address is known. It is necessary to assign a password if the Network Camera is intended to be accessed by others. Type a new word twice in ○1 to enable protection. This password is used to identify the administrator.
Build a security application The Administrator can use the built-in motion detection to monitor any movement to perform many useful security applications. To upload the snapshots, users can choose either email or FTP according to user’s needs. Both e-mail and FTP use the network settings on the Email and FTP page. Refer to the definition section for detail configuration. 1. Click on “Configuration” on homepage, 2. Click on “Motion detection” at the left column, 3. Check “Enable motion detection”, 4.
2. Run the Upgrade Wizard and proceed following the prompts. 3. Or upgrade firmware from HTTP web page directly 4. The whole process will finish in a few minutes and it will automatically restart the system. If power fails during the writing process of Flash memory, the program in the memory of the Network Camera may be destroyed permanently. If the Network Camera cannot restart properly, ask your dealer for technical service.
Definitions in Configuration Only the Administrator can access system configuration. Each category in the left column will be explained in the following pages. The bold texts are the specific phrases on the Option pages. The Administrator may type the URL below the figure to directly enter the frame page of configuration. If the Administrator also wants to set certain options through the URL, read the reference appendix for details. http:///setup/config.
System parameters "Host name" The text displays the title at the top of the main page. “Turn off the LED indicator” Check this option to shut off the LED on the rear. It can prevent the camera’s operation being noticed. "Keep current date and time" Click on this to reserve the current date and time of the Network Camera. An internal real-time clock maintains the date and time even when the power of the system is turned off.
Security settings “Root password” Change the Administrator’s password by typing in the new password identically in both text boxes. The typed entries will be displayed as asterisks for security purposes. After pressing , the web browser will ask the Administrator for the new password for access. “Add user” Type the new user's name and password and press to insert the new entry. The new user will be displayed in the user name list. There is a maximum of twenty user accounts.
Network settings Any changes made on this page will restart the system in order to validate the changes. Make sure every field is entered correctly before clicking on . Network type “LAN” & “PPPoE” The default type is LAN. Select PPPoE if using ADSL "Get IP address automatically" & “Use fixed IP address” The default status is “Get IP address automatically”. This can be tedious having to perform software installation whenever the Network Camera starts.
8080, the users must type in the web browser “http://192.168.0.100:8080” instead of “http://192.168.0.100”. RTSP Streaming “Access name” This is the access URL for making connection from client software. Using rtsp:/// to make connection “RTSP port” This can be other than the default Port 554 http:///setup/network.html is the domain name or original IP address of the Network Camera.
WLAN Configuration (WCS-2030 only) “SSID” (Service Set Identifier), it is a name that identifies a wireless network. Access Points and wireless clients attempting to connect to a specific WLAN (Wireless Local Area Network) must use the same SSID. The default setting is default. Note: The maximum length of SSID is 32 single-byte characters and SSID can’t be any of “, <, > and space character.
Note: When 22(“), 3C(<) or 3E(>) are input in network key, the key format can’t be changed to ASCII format. “Algorithm” Choosing one of the following algorithm for WPA-PSK modes ▶ “TKIP” ▶ “AES” “Pre-shared Key” Entering a key in ASCII format. The length of the key is 8 ~ 63 Some invalid settings may cause the system failing to respond. Change the configuration only if necessary and consult with your network supervisor or experienced users for correct settings.
DDNS “Enable DDNS” This option turns on the DDNS function. “Provider” The provider list contains four hosts that provide DDNS services. Please connect to the service provider’s website to make sure the service charges. “Host Name” If the User wants to use DDNS service, this field must be filled. Please input the hostname that is registered in the DDNS server. “Username/E-mail” The Username or E-mail field is necessary for logging in the DDNS server or notify the User of the new IP address.
Access List The access list is to control the access permission of clients by checking the client IP address. There are two lists for permission control: Allow List and Deny List. Only those clients whose IP address is in the Allow List and not in the Deny List can connect to the Network Camera for receiving the audio/video streaming. Both Allow List and Deny List consist of a list of IP ranges.
Audio and Video General “Configure for computer viewing” To make quick setting for computer viewing “Configure for mobile viewing” To make quick setting for cell phone viewing Video Settings “Video title” The text string can be displayed on video “Color” Select either for color or monochrome video display. “Frame Size” There are four options for video sizes. “160x120”. “176x144”, “320x240”, “640x480”.
“Audio type” Select audio codec “AAC” or “GSM-AMR” and the bit rate http:///setup/audiovideo.html is the domain name or original IP address of the Network Camera.
Image Settings Click on this button to pop up another window to tune “Brightness”, “Contrast”, “Hue” and “Saturation” for video compensation. Each field has eleven levels ranged from -5 to +5. In “Brightness” and “Contrast” fields the value 0 indicates auto tuning. The user may press to fine-tune the image. When the image is O.K., press to set the image settings. Click on this to recall the original settings without incorporating the changes.
Email & FTP Email When the SMTP server support SMTP authentication, users need to give the valid user name and password to send email via the server. “Sender email address”, the email address of the sender. There are two external mail server can be configured, primary and secondary email server, The network camera will use primary server as default , and use secondary server when primary server is unreachable. “Server address” The domain name or IP address of the external email server.
that of the external FTP server. Some FTP servers cannot accept preceding slash symbol before the path without virtual path mapping. Refer to the instructions for the external FTP server for details. The folder privilege must be open for upload. http:///setup/mailftp.html is the domain name or original IP address of the Network Camera. Motion detection “Enable motion detection” Check this option to turn on motion detection. Click on this button to add a new window.
"Window Name" The text will show at the top of the window. “Sensitivity” This sets the endurable difference between two sequential images. “Percentage” This sets the space ratio of moving objects in the monitoring window. Higher sensitivity and small percentage will allow easier motion detection. The following figure shows the screen when is clicked. The monitoring window has been outlined in red and the graphic bar goes red since the goldfish is moving.
Application settings The server provides two kinds of applications, snapshot and videoclip. There are two independent snapshot items to set, and they are named as Snapshot #1 and Snapshot #2. The status, schedule, trigger condition, and action of three applications are summarized in the application page. The user can click on Snapshot #1, Snapshot #2 or Video Clip to enter the detail setting page. Snapshot “Enable snapshot” Enable/Disable snapshot application.
Send out the snapshot while motion detection There are three windows for motion detection each can be assigned a name. Select the windows which need to be monitored. If motion detection has not been set up, “undefined” will be shown instead of the window title. If this happens, clicking on “Motion detection” and a note will show to direct the User to the configuration page for motion detection. “Send pre-event image(s)” The number of pre-snapshots will be captured and send when a condition is triggered.
Video Clip The setting for video clip is mostly the same as snapshot. “Video clip max file size” This indicates the maximum file size for video clip (Kbytes).
System log The Network camera support log the system messages on remote server. The protocol is compliant to RFC 3164. If you have external Linux server with syslogd service, use “-r” option to turn on the facility for receiving log from remote machine. Or you can use some software on Windows which is compliant to RFC 3164. Check “Enable remote log” and input the “IP address” and “port” number of the log server to enable the remote log facility. In the “Current log”, it displays the current system log file.
Viewing system parameters Click on this link on the configuration page to view the entire system’s parameter set. The content is the same as those in CONFIG.INI.
Maintenance Three actions can be selected “reboot” click the reboot button to restart system “factory default” Click on Factory default button on the configuration page to restore the factory default settings. Any changes made so far will be lost and the system will be reset to the initial factory settings. The system will restart and require the installer program to set up the network again.
Appendix A. Troubleshooting Status LED The following table lists the LED patterns in general.
There is a button in the back of the Network Camera. It is used to reset the system or restore the factory default settings. Sometimes resetting the system sets the system back to normal state. If the system problems remain after reset, restore the factory settings and install again. RESET: Restoring the factory defaults will erase any previous settings. Reset or restore the system after power on. Click on the button. RESTORE: 1. Press on the button continuously. 2. Wait for self-diagnostic to run twice.
Context-Length: \r\n \r\n where is =\r\n [] is the actual length of content. Example: request IP address and it’s response Request: http://192.168.0.123/cgi-bin/admin/getparam.cgi?network_ipaddress Response: HTTP/1.0 200 OK\r\n Content-Type: text/html\r\n Context-Length: 33\r\n \r\n network.ipaddress=192.168.0.
(note: The return page can be a general HTML file(.htm, .html) or a LevelOne server script executable (.vspx) file. It can not be a CGI command. It can not have any extra parameters. This parameter must be put at end of parameter list) Return: HTTP/1.0 200 OK\r\n Content-Type: text/html\r\n Context-Length: \r\n \r\n where is =\r\n [] Only the parameters that you set and readable will be returned.
(r/w) characters> <Network Camera > ledoff 0 Do not turn off the led indicator (r/w) 1 Turn off the led indicator date year, month and date separated by slash. (r/w) keep date unchanged Using NTP to sync date/time automatically time hour, minute and second separated by colon.
(r/w) 14 characters> The UserPass_0 is root’s password. userattr_<1~20> [conf] show user’s privilege. The privilege can be (r) - only permit to view live media conf – Permit to change server’s configuration usercount 1 ~ 21 The current account number on the server (r) including root.
(r/w) characters> smtp2 name or IP secondary SMTP server 40 characters> mailto2 mailuser2 mailpass2 returnemail localftpport <
ftppasvmode2 1 Enable passive mode of primary FTP server (r/w) 0 Disable passive mode of primary FTP server httpport rtspport videoport audioport accessname <80> <554> <555
key1 (depends on <0000000000> keyformat & keylength) key2 (depends on <0000000000> keyformat & keylength) key3 (depends on <0000000000> keyformat & keylength) key4 (depends on <0000000000> keyformat & key
(r) 2 half x 2 3 normal 4 normal x 2 5 double 256 This field is obsolete (use resolution) resolution 176x144 (for mobile) Video resolution 176 x 144 (r/w) 160x120 Video resolution 160 x 120 320x240 Video resolution 320 x 240 640x480 (for computer) Video resolution 640 x 480 color 0 monochrome (r/w) 1 color quality 0 fix bit rate (r/w) 1 fix quantization quant 1 lowest quality of video (r/w) 2 lower quality of video 3 normal quality of video 4 higher quality of video
(in set maximum frame rate to 15 fps 20 set maximum frame rate to 20 fps 25 set maximum frame rate to 25 fps 30 (for 60Hz only) set maximum frame rate to 30 fps 50 synchronize with 50Hz utility CMOS 60 synchronize with 60Hz utility mode (r/w) 15 version only) whitebalance (r/w) (in 0 CMOS 1 version only) auto white balance fixed indoor(3200K) 2 fixed fluorescent (5500K) 3 fixed outdoor( > 5500K) flip 1 flip image (r/w) 0 normal image mirror 1 mirror image (r/w) 0 normal im
Group: Image NAME VALUE DESCRIPTION brightness <-5 ~ 5> Adjust brightness of image according to mode (r/w) saturation settings. <0> <-5 ~ 5> Adjust saturation of image according to mode (r/w) contrast settings. <0> <-5 ~ 5> Adjust contrast of image according to mode (r/w) hue settings. <0> <-5 ~ 5> Adjust hue of image according to mode settings.
provider 1~6 dyndns.org (dynamic) (r/w) dyndns.org (custom) tzo.com dhs.org safe100.net dyn-interfree.it <1> hostname Text string shorter than 127 Your dynamic hostname. (r/w) characters. usernameemail Text string shorter than 63 Your user or email to login ddns service provider (r/w) characters. passwordkey Text string shorter than 20 Your password or key to login ddns service (r/w) characters.
NAME VALUE DESCRIPTION enableremotelog 0 disable remote log (r/w) 1 enable remote log serverip Log server IP address <514> Server port used for log (r/w) serverport (r/w) Application page CGI command Note: This request requires administrator privilege. Method: GET/POST Syntax: http:///cgi-bin/admin/gen-eventd-conf.
Application page contents } parameter Value description snapshot_enable 0 Enable snapshot application 1 Disable snapshot application weekday 0,1,2,3,4,5,6 The array indicate weekly schedule time_method always 24 hours full day interval Select begin time and end time begin_time hh:mm Begin time of weekly schedule end_time hh:mm End time of weekly schedule ss_prefix operation motion Set
Return: HTTP/1.0 200 OK\r\n Content-Type: image/jpeg\r\n [Content-Length: \r\n] Account management Note: This request requires administrator privilege Method: GET/POST Syntax: http:///cgi-bin/admin/editaccount.cgi? method=&username=[&userpass=][&privilege=] [&privilege=][…][&return=] parameter value Description method add Add an account to server. When using this method, “username” field is necessary.
return Redirect to the page after the parameter is assigned. The can be a full URL path or relative path according the the current path. If you omit this parameter, it will redirect to an empty page. System logs Note: This request require administrator privilege Method: GET/POST Syntax: http:///cgi-bin/admin/syslog.cgi Server will return the up-to-date system log. Return: HTTP/1.
Return: HTTP/1.0 200 OK\r\n Content-Type: text/plain\r\n Content-Length: \r\n \r\n \r\n Upgrade firmware Note: This request requires administrator privilege Method: POST Syntax: http:///cgi-bin/admin/upgrade.cgi Post data: fimage=[&return=]\r\n \r\n Server will accept the upload file named to be upgraded the firmware and return with if indicated.
D. Technical specifications - System CPU: VVTK-1000 RAM: 32MB SDRAM ROM: 4MB FLASH ROM - Networking Protocol TCP/IP, HTTP, SMTP, FTP, DDNS, UPnP, Telnet, NTP, DNS, DHCP and RTSP Physical 10 baseT or 100 baseT Fast Ethernet auto negotiation WLAN (WCS-2030 only) 802.
- LED indicator Dual color status indicator - Dimension 35mm(D) * 108mm(W) * 76mm(H) - Weight NET. 170g - Power Input: 100-240VAC, 50/60Hz, 0.5A Output: 5VDC, 2A - Operating Environment Temperature: 0-50°C/32-122°F Humidity: 95%RH - EMI & Safety CE, FCC - Viewing system requirement Operating system Microsoft Windows 98SE/ME/2000/XP Browser Internet Explorer 5.
Technology License Notice AMR Technology This product includes AMR narrowband speech coding technology licensed by VoiceAge. Please refer to http://www.voiceage.com/ for more details. MPEG-4 AAC Technology This product includes MPEG-4 AAC audio coding technology licensed by Via Licensing. Please refer to http://www.vialicensing.com/ for more details. MPEG-4 Visual Technology This product includes one MPEG-4 encoder and one MPEG-4 decoder license. Installation of more than one decoder is prohibited.
Electromagnetic Compatibility (EMC) This device compiles with FCC Rules Part 15. Operation is subject to the following two conditions. • • This device may not cause harmful interference, and This device must accept any interference received, including interference that may cause undesired operation. USA - This equipment has been tested and found to comply with the limits for a Class B digital device, pursuant to Part 15 of the FCC Rules.
GNU GENERAL PUBLIC LICENSE Version 2, June 1991 Copyright (C) 1989, 1991 Free Software Foundation, Inc. 59 Temple Place, Suite 330, Boston, MA 02111-1307 USA Everyone is permitted to copy and distribute verbatim copies of this license document, but changing it is not allowed. Preamble The licenses for most software are designed to take away your freedom to share and change it.
Finally, any free program is threatened constantly by software patents. We wish to avoid the danger that redistributors of a free program will individually obtain patent licenses, in effect making the program proprietary. To prevent this, we have made it clear that any patent must be licensed for everyone's free use or not licensed at all. The precise terms and conditions for copying, distribution and modification follow.
c) If the modified program normally reads commands interactively when run, you must cause it, when started running for such interactive use in the most ordinary way, to print or display an announcement including an appropriate copyright notice and a notice that there is no warranty (or else, saying that you provide a warranty) and that users may redistribute the program under these conditions, and telling the user how to view a copy of this License.
compilation and installation of the executable. However, as a special exception, the source code distributed need not include anything that is normally distributed (in either source or binary form) with the major components (compiler, kernel, and so on) of the operating system on which the executable runs, unless that component itself accompanies the executable.
It is not the purpose of this section to induce you to infringe any patents or other property right claims or to contest validity of any such claims; this section has the sole purpose of protecting the integrity of the free software distribution system, which is implemented by public license practices.
NO WARRANTY 11. BECAUSE THE PROGRAM IS LICENSED FREE OF CHARGE, THERE IS NO WARRANTY FOR THE PROGRAM, TO THE EXTENT PERMITTED BY APPLICABLE LAW. EXCEPT WHEN OTHERWISE STATED IN WRITING THE COPYRIGHT HOLDERS AND/OR OTHER PARTIES PROVIDE THE PROGRAM "AS IS" WITHOUT WARRANTY OF ANY KIND, EITHER EXPRESSED OR IMPLIED, INCLUDING, BUT NOT LIMITED TO, THE IMPLIED WARRANTIES OF MERCHANTABILITY AND FITNESS FOR A PARTICULAR PURPOSE. THE ENTIRE RISK AS TO THE QUALITY AND PERFORMANCE OF THE PROGRAM IS WITH YOU.