7” Wide TFT-LCD TV User’s Manual Model : DCM-17WT Thank you for selecting our 17” TFT-LCD TV monitor. Please take a few minutes to read this user’s manual for the best performance of this TV. Please keep this user’s manual for future reference. The present home appliance is certified and approved by EMC/EMI and can be used in all places including residency area. Information in this manual is subject to change without prior notice. Ver1.
DCM-17WT FCC Information This equipment has been tested and found to comply with limits for a class B digital device, pursuant to Part 15 of the FCC Rules. These limits are designed to provide reasonable protection against harmful interference in a residential installation. This equipment can generates, uses, and radiate radio frequency energy and, if not installed and used in accordance with the instructions, may cause harmful inteference to radio Communications.
DCM-17WT Safety Instructions To reduce the risk of fire, electrical shock, and other injuries, keep these safety precautions in mind when installing, using, and maintaining your machine. Here is Notice mark with & and its meanings are as followed; : If you manipulate against the notice, it may cause serious injury or death to user. : If you manipulate against the notice, it may cause slight injury to user or appliance. for Installation 1.
DCM-17WT for Installation 1.Place the TV at a certain distance from the wall for ventilation. If not, it may cause a fire by increasing internal temperature of the TV. 2. Do not cover the vents on the monitor cabinet. Bad ventilation may cause a breakdown or fire. CONTENTS 3. Place the monitor on a flat and stable surface. Main Features 5 Package Contents 6 for Use TV Parts 7 1.
DCM-17WT Main Features Package Contents ■ Easy & convenient Installation Please make sure the following items are included with your LCD TV. If any Unlike conventional CRT TV, its slim size and design allow user to install and items are missing, contact with your dealer. use without much limitation.
DCM-17WT TV Parts Connection 1.Power Connection • The present unit adjusts the voltage automatically. If you use 110V power, please connect the adapter convertible to 110V to AC cord before use. • Please check that the AC cord is plugged in correctly when you connect it to an outlet or DC adapter. 2.
DCM-17WT 3.Connecting of Composite Connector / S-Video connector ViDEO L- AUDIO- R S- VIDEO Audio Video 4.Connecting of Audio Line IN / OUT S- Video LINE IN LINE OUT Audio Output Audio Input • Connect a set of audio cables between the L, R AUDIO INPUT jacks on the TV and various players (VTR, DVD, Set Top Box, etc). 5.
DCM-17WT Remote Control 3. Power On/Off • Turns the TV on and off 1. Buttons ① POWER : Turns the LCD TV on and off ② SELECT : Change input source ③ CHANNEL UP / DOWN : Change TV channel ④ MENU : MENU control ⑤ VOLUME UP / DOWN : Volume control ⑥ PC / TV : Change PC / TV signal ⑦ 0 ~ 9 : Select TV channels directly ⑧ AUTO : Auto adjustment of PC Mode ⑨ ‖ : Pause 4. TV mode / Monitor mode • Power on and press TV button to enter the TV mode.
DCM-17WT 8. Changing TV Channel • In sub-menu, use button to select up • If some channels are stored, you have only and down menu like main menu operation. stored channels to explore by pressing • To control function of menu, use these buttons. If you have not saved any button. • If you finished all controls of menu, press channel yet, you go through all the channels with these buttons.
DCM-17WT 11. Freezing the Picture • Press button to freeze the picture and Function Button press again to continue. Function button work as follows 12. PIP function and changing the screen size • Press button to create PIP screen. • Press < PIP > button to change the screen size. The size changes as following order (off->small-> middle->large) • PIP is only available in PC monitor mode. • PIP is available with TV mode and external signals (Composite, S-Video).
DCM-17WT ■ Advanced TV MENU ■ Picture 1) Sharpness This adjusts the clarity and the focus of screen image. SHARP 1 -> 2 -> 3 -> 4 -> 5 SOFT 1) Brightness This controls the brightness of the LCD. 2) Gamma Linear : It shows gamma pattern of LCD TV type. 2) Contrast CRT : It shows gamma pattern of CRT TV type. This controls the contrast of the LCD. 3) Color temp 3) Color This provides three preset color adjustments. This adjusts the depth of TV image color.
DCM-17WT 1) osd 5) Source It provides nine preset OSD positions. You can select a source. PC -> TV -> Composite -> S-Video 2) osd h / v pos 6) Factory reset It controls OSD position. This allows you to reset all the OSD control settings back to the factory 3) osd timeout settings. User can select the time up to 60 seconds. For this, either press the VOL button of remote control or turn the OSD power button to the right. 4) osd background It controls the color of OSD background.
DCM-17WT 6) Channel search This searches and stores channels as remote control (SCAN button function). To search for channels, either press the < VOL > button on the right side of the remote control or turn the rotary button to the right. PC Monitor Menu ■ Picture To stop channel search, press the < MENU > button on the remote control or on the function button. ✽ 2Channels 2~69 are for “off-air”(antenna) and channels 1 and 14~69 are for cable channels.
DCM-17WT ■ Advanced ✽ PIP mode is available only in PC monitor mode. 1) Size It selects the PIP size. 2) Pos It selects the PIP position. 3) SOURCE It selects the source of video signal. (1) Auto: It searches and selects automatically the signal currently being inserted among Composite, S-video and TV signals. The priority is given in the following order: TV, Composite, S-Video. 1) Sharpness It adjusts the clarity and the focus of screen image.
DCM-17WT ■ Adv PIP 2) osd h / v pos This controls the position of OSD. 3) osd timeout You can select the time up to 60 seconds. 4) osd background This controls the color of OSD background. 5) Opaque, translucent This provides the current PC signal resolution and vertical frequency. ■ Utilities ✽ You can control adv pip menu only when the PIP mode is “ON”. 1) H Position It controls the horizontal PIP screen position. 2) V Position It controls the vertical PIP screen position.
DCM-17WT 5) Source 4) Fine tuning You can select a source in the following order: PC -> TV -> Composite -> S-video Please change to manually to mathch the OSD description. 5) Volume 6) Factory reset Control volume of TV signal. This allows you to reset all the OSD control settings back to the factory settings. ✽ Some points to keep in mind when using Menu For this adjustment, press the VOL button of the right side of remote control ✽ You must check if all menus are adjusted properly before use.
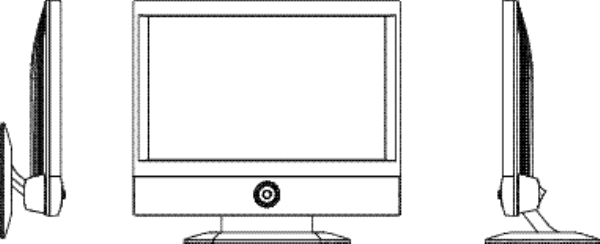
DCM-17WT SIZE Specification 1.Specification Design and all specifications are subject to change without notice. 422mm 422mm Product Name LCD 382mm 338mm 373mm 338mm 96mm 47mm 24mm Type a-Si TFT-LCD Screen Size 17” Wide (diagonal length) Pixel Pitch 0.291mm x 0.291mm Contrast Ratio 400 : 1(Typ.) Luminance 450 cd/m2 Active Display Area 372.48 mm (H) x 223.
DCM-17WT Troubleshooting 2.The Standard Signal Mode for PC Monitor If the signal from the system corresponds to the standard signal mode, the screen is adjusted automatically. However, if the signal discords with it, the screen may go blank with the power LED on or display error message. Refer to the display card manual and adjust the screen as follows. If the TV seems to have a problem, follow the list of possible problems and solutions presented below.
DCM-17WT Concerning services • Unable to turn on the equipment ─ Check if the AC cord is plugged in correctly and retry to turn on the unit. ─ Plug the monitor AC cord off the power socket. Connect the AC cord again in 10~20 minutes. For the product’s functional trouble occurred in use, client can benefit from the warranty during one year from the date of purchase.
The pla c es of na ils to insta ll the unit on the wa ll Fixing hole Fixing hole 92 mm 162 mm Fixing hole The head size of nail or screw : 3.7mm ~ 4.5mm The thickness of nail or screw : less than 2.