
User's Manual
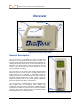
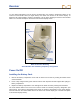
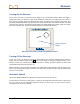
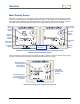
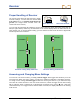
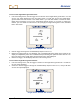
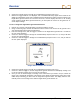
Table Of Contents
- Safety Precautions and Warnings
- Dear Customer:
- Introduction
- Receiver
- Transmitter
- Remote Display
- Battery Charger
- Locating Instructions
- Appendix A: System Specifications and Maintenance Requirements
- Appendix B: Projected Depth Versus Actual Depth and the Fore/Aft Offset
- Appendix C: Calculating Depth Based on Distance Between FLP and RLP
- LIMITED WARRANTY

Receiver
To turn on the height-above-ground function:
1. From the locating screen, click the trigger once to advance to the height-above-ground menu. You will
see the “On” option displayed as the first setting option. You will also see the last height-above-
ground number that was entered or the default value. If you want that number to remain the same,
follow these instructions to turn on the height-above-ground function. If you want to change this
number, you must follow the instructions to set (change) the height-above-ground value, described
later in this section.
Height-Above-Ground “On” Screen
2. Hold the trigger in through the countdown/beep sequence from 2 to 0.
3. Release the trigger when the 0 is displayed, and a checkmark will briefly appear at the bottom of the
display accompanied by three short confirmation beeps indicating this option has been selected. You
have now turned on the height-above-ground function to the value displayed.
4. Release the trigger, and the display will return to the locating screen.
To turn off the height-above-ground function:
1. From the locating screen, click the trigger to advance to the height-above-ground menu. You will see
the “On” option displayed.
2. Continue to hold the trigger in through the countdown/beep sequence from 2 to 0, and you will then
see the “Off” option displayed.
Height-Above-Ground “Off” Screen
DigiTrak
®
LT2™ Operator’s Manual 19