User Manual
Table Of Contents
- Operator’s Manual
- Digital
- Control
- Incorporated
- Safety Precautions and Warnings
- Introduction
- System Components
- Startup and Operating Instructions
- SST Operating Procedure
- Setting Up SST Laptop
- Setting Up Equipment and Site
- 2. Establish Borepath Reference Line and Mark Borepath
- 3. Assemble and Torque-up Non-Magnetic Housing to Non-Mag Tool
- 4. Align Drill to Marked Borepath
- 5. Position & Align Non-mag Tooling Assembly onto Marked Borepath
- 6. Stage SST Equipment and Power Sources Adjacent to Tooling Assembly
- 7. Power Up Eclipse SST Equipment
- 8. Measure SST Transmitter Current Draw
- 9. Install SST Transmitter into Aligned Non-mag Tooling Assembly
- Setting Reference Heading (Ref Yaw) and Roll Offset
- Calibrating SST Tool and Confirming Proper System Operation
- Logging Drill Run
- Summary of Basic Operating Procedure
- SST Operating Procedure
- Computer Software Instructions
- Inputting and Changing Drill Data
- APPENDIXImporting Topography, Drill Plan, and Planned Deviation from Excel File
- LIMITED WARRANTY

DIGITAL CONTROL INCORPORATED
Inputting and Changing Drill Data
You can manually edit SST project files by plotting topography (topo), planned bore (drill plan), and
planned deviation (tool deviation) into the SST software either before, during, or after a bore. You can
also import this information from an Excel file, but it must be done prior to logging a SST bore. The
instructions for importing information from an Excel file are provided in the Appendix.
The Data Editor
is used to enter topo, drill plan, or planned deviation data manually in either the
Profile or Deviation plot. To open the Data Editor, click on the icon in the toolbar or, if the toolbar is not
displayed, right click in the plot area and then select the Data Editor from the popup menu.
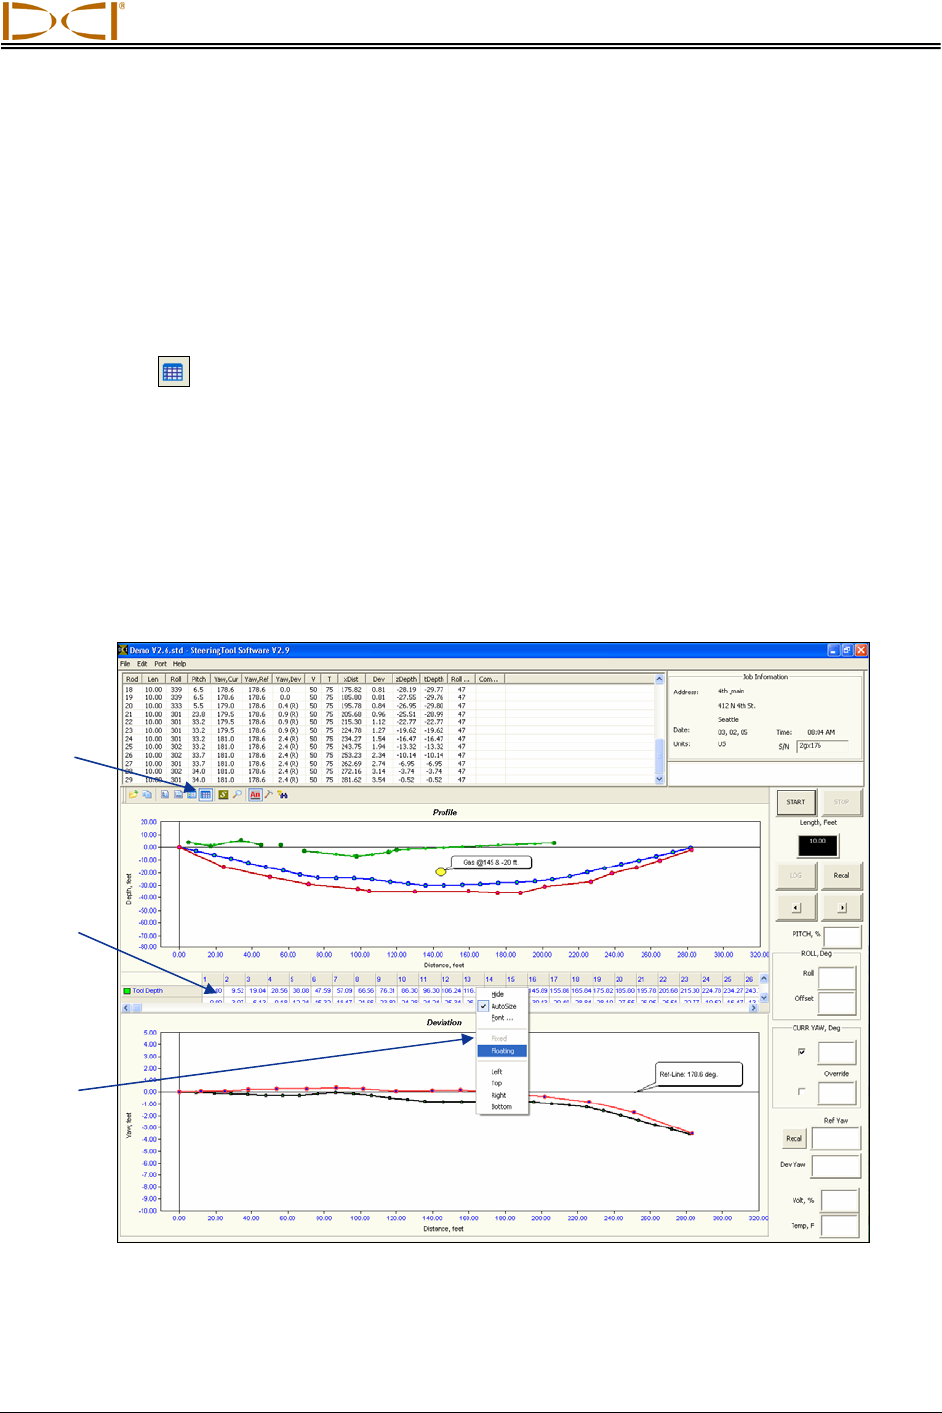
Clicking on the Data Editor icon will open the Data Editor table at the bottom of the plot area. The table
will be partially hidden and will have scroll bars to allow viewing of the hidden data. To move the Data
Editor table for easier viewing and editing, place the cursor in the table area and right click, then select
the Floating option from the popup menu. The data table will then be in a box that you can move around
the plot area; place your cursor on the top blue title bar, then click and hold the left mouse button while
dragging the box to a new location. The following graphics show the data table as it appears when you
first open it and as it appears after you have selected the Floating option.
Data Editor
Icon
Fixed
Data
Table
Popup
Menu
Locating Toolbars and Data Tables
Eclipse
®
SST
®
Operator’s Manual 47


