
User Manual
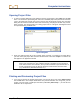
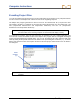
Table Of Contents
- Operator’s Manual
- Digital
- Control
- Incorporated
- Safety Precautions and Warnings
- Introduction
- System Components
- Startup and Operating Instructions
- SST Operating Procedure
- Setting Up SST Laptop
- Setting Up Equipment and Site
- 2. Establish Borepath Reference Line and Mark Borepath
- 3. Assemble and Torque-up Non-Magnetic Housing to Non-Mag Tool
- 4. Align Drill to Marked Borepath
- 5. Position & Align Non-mag Tooling Assembly onto Marked Borepath
- 6. Stage SST Equipment and Power Sources Adjacent to Tooling Assembly
- 7. Power Up Eclipse SST Equipment
- 8. Measure SST Transmitter Current Draw
- 9. Install SST Transmitter into Aligned Non-mag Tooling Assembly
- Setting Reference Heading (Ref Yaw) and Roll Offset
- Calibrating SST Tool and Confirming Proper System Operation
- Logging Drill Run
- Summary of Basic Operating Procedure
- SST Operating Procedure
- Computer Software Instructions
- Inputting and Changing Drill Data
- APPENDIXImporting Topography, Drill Plan, and Planned Deviation from Excel File
- LIMITED WARRANTY
Computer Instructions
4. Make any adjustments needed in the Print dialog box, then click OK. If you have the Adobe
Acrobat PDF writer software, you can select the Adobe PDF printer to print to a PDF file (see
your software documentation). This allows you to save the file as a PDF, which can be e-mailed
to and viewed by anyone with Adobe Acrobat reader (available at no charge on the Internet).
Saving Project Files
1. To save an open project file, select Save from the File menu. The file will automatically be saved
under its current file name (shown on the left in the title bar) and location. If the project has not
yet been saved and named, then the file will automatically save to the default file name
Untitled.std in the default location for storing project files (C:\Program Files\Digital Control
Incorporated\Steering Tool\Drill Data).
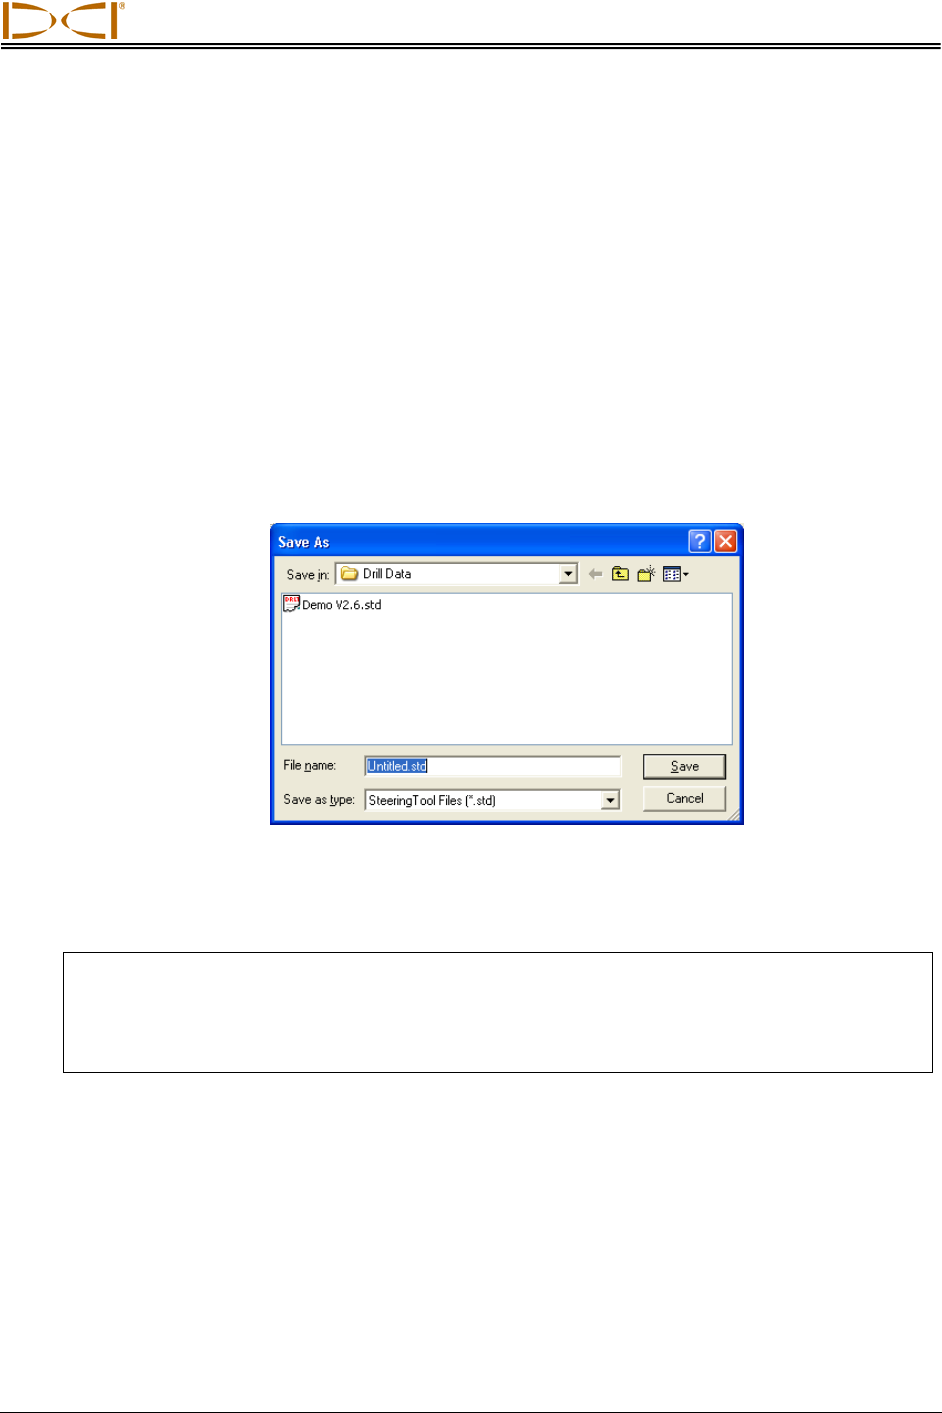
2. To save a file with a different file name or location, select Save As from the File menu. You will
see the Save As dialog box, which automatically opens to the folder where the current file is
stored.
Save As Dialog Box
3. Change the file name and location as desired, then click Save. The open file will now have the
new file name and/or location.
NOTE: Recorded bore data can only be opened with the exact same version of software as
when it was recorded. If the SST software is upgraded, do not overwrite or erase older
versions of the software, since you will need them to open old bore files. It may be a
good idea to save the bore file using the version number in the file name (e.g.,
Bore1v26.std, Bore1Rev1v26.std, etc.)
When you save a project file, the file name will end with “std” (e.g., Projectname.std). The Eclipse
SST program also generates four accompanying files: two “chd” files (Projectname PlanView.chd
and Projectname Profile.chd) and two “txt” files (Projectname PlanView.txt and Projectname
Profile.txt).
Eclipse
®
SST
®
Operator’s Manual 45