
User guide


89
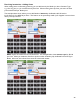
Receiving Inventories (cont.)
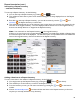
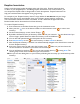
10. If you do not want to search for Items to add to your Inventory, press Cancel at the upper part of the
screen.
11. You can start scanning Items by pressing Scan. The scanning steps are the same as with other
types of Inventories.
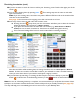
Note: If you are scanning cases, some Items may have a different UPC barcode on the outside of the
case than on the actual bottle.
See page 34 for instructions for assigning more than one barcode to an Item.
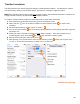
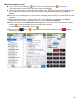
12. At the top of the screen you will notice the Location menu:
• Pressing the menu drops down your list of Locations and allows you to select the Location
where the delivery was received (e.g., Walk-in Cooler).
• If you place the received Items in more than one Location (e.g., Store Room and Walk-in
Cooler
) be sure to switch Locations for those Items as needed during the Inventory.
• We recommend adding all the Items for each Location before switching Locations.
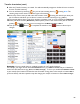
Most bars and clubs will be receiving Items to storage Locations such as a Store Room or Walk-in
Cooler
. As Items are moved to various Bar Locations, you will need to create a Transfer Inventory
when you move those Items if you intend to track liquor usage by Location.
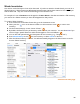
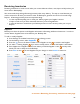
13. If you add Items by searching, or scanning, the final step for every Item is always to press the
button
to add the Item to the Receiving Inventory or the
button to discard the Item.
Note: As soon as a Receiving Inventory is complete, we recommend that you verify that the amount of beer
and liquor on the Invoice matches the amount of beer and liquor that you actually received (see page 93).
This step will help you to immediately spot and correct an error in your Barkeep data.