
User guide

69
Changing Inventory Locations
If you are adding Items to multiple Locations within a single Inventory, you can easily switch between
Locations in the middle of an Inventory.
To change an Item’s Location you have two options:
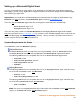
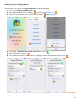
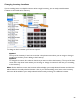
Option 1
The top of the Inventory’s Item List screen has a drop down menu where you can assign or change a
Location for the Item you are adding to the Inventory.
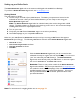
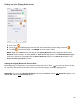
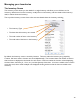
Option 2
To change the Location, first select an Item that you want to add to the Inventory. The top of the Item
screen has a drop down menu where you can assign or change a Location for the Item you are adding
to the Inventory.
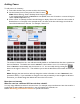
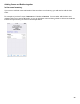
Note: On the Add Item screen, the Location will now display your newly selected Location and this Item
will be added to the newly selected Location. Also, if you continue adding more Items to the Inventory,
the Items will be added to your newly selected Location until you change to a different Location.