High Security and Access System EVO48 V1.2 EVO192 V1.2 Programming Guide Includes LCD Keypad Programming We hope this product performs to your complete satisfaction. Should you have any questions or comments, please visit www.paradox.com and send us your comments.
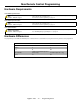
New Remote Control Programming Hardware Requirements If the EVO48 System Includes: Up to 96 remote controls can now be programmed into the EVO control panel and configured using a master code or installer code. See “Remote Control Programming” on page 35. MG-RTX3 Wireless Expansion Module And EVO641 / EVO641R keypad If the EVO192 System Includes: Up to 999 remote controls can now be programmed into the EVO control panel and configured using a master code or installer code.
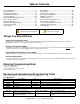
Table of Contents Dialer Options .............................................................. 38 Other Options .............................................................. 38 Communication Settings .............................................. 39 System Event Call Direction ........................................ 40 VDMP3 Voice Module .................................................. 41 Partition Settings .......................................................... 42 Special and Trouble Report Codes .
Serial Number List Module Type, Serial Number & Details Module Type, Serial Number & Details Module Type, Serial Number & Details Module Type, Serial Number & Details 1:______________________________________ 13:_____________________________________ 25:_____________________________________ 37:_____________________________________ 2:______________________________________ 14:_____________________________________ 26:_____________________________________ 38:_____________________________________ 3:_________
Module Type, Serial Number & Details Module Type, Serial Number & Details Module Type, Serial Number & Details Module Type, Serial Number & Details 49:_____________________________________ 62:_____________________________________ 75:_____________________________________ 88:_____________________________________ 50:_____________________________________ 63:_____________________________________ 76:_____________________________________ 89:_____________________________________ 51:___________________________
Module Type, Serial Number & Details Module Type, Serial Number & Details Module Type, Serial Number & Details Module Type, Serial Number & Details 101:____________________________________ 114:____________________________________ 127:____________________________________ 140:____________________________________ 102:____________________________________ 115:____________________________________ 128:____________________________________ 141:____________________________________ 103:__________________________
Module Type, Serial Number & Details Module Type, Serial Number & Details Module Type, Serial Number & Details Module Type, Serial Number & Details 153:____________________________________ 166:____________________________________ 179:____________________________________ 192:____________________________________ 154:____________________________________ 167:____________________________________ 180:____________________________________ 193:____________________________________ 155:__________________________
Module Type, Serial Number & Details Module Type, Serial Number & Details Module Type, Serial Number & Details Module Type, Serial Number & Details 205:____________________________________ 218:____________________________________ 231:____________________________________ 244:____________________________________ 206:____________________________________ 219:____________________________________ 232:____________________________________ 245:____________________________________ 207:__________________________
Zone Programming Section [0400] is accessible only when using EVO641 and EVO641R keypads. Without section [0400], you can only program the first 96 zones of the system using sections [0001] to [0096] for the zone’s serial number and input, sections [0101] to [0196] for zone parameters, sections [0201] to [0296] for report codes and sections [0301] to [0396] for zone labels. In addition, with a EVO48 panel, you can only program the first 48 zones with or without section [0400].
Zone Information Zone Programming Digiplex -EVO- 10 Programming Guide Zone 1 __________________________________________ _______________ Description Module ___/___/___/___/___/___/___/___ 8-digit Serial Number ___/___/___ Input# 2 __________________________________________ _______________ ___/___/___/___/___/___/___/___ ___/___/___ 3 __________________________________________ _______________ ___/___/___/___/___/___/___/___ ___/___/___ 4 __________________________________________ __________
Digiplex -EVO- 11 Programming Guide Zone 38 __________________________________________ _______________ Description Module ___/___/___/___/___/___/___/___ ___/___/___ 39 __________________________________________ _______________ ___/___/___/___/___/___/___/___ ___/___/___ 40 __________________________________________ _______________ ___/___/___/___/___/___/___/___ ___/___/___ 41 __________________________________________ _______________ ___/___/___/___/___/___/___/___ ___/___/___ 42 _____
Digiplex -EVO- 12 Programming Guide Zone 79 __________________________________________ _______________ Description Module ___/___/___/___/___/___/___/___ ___/___/___ 80 __________________________________________ _______________ ___/___/___/___/___/___/___/___ ___/___/___ 81 __________________________________________ _______________ ___/___/___/___/___/___/___/___ ___/___/___ 82 __________________________________________ _______________ ___/___/___/___/___/___/___/___ ___/___/___ 83 _____
Digiplex -EVO- 13 Programming Guide Zone 120 __________________________________________ _______________ Description Module ___/___/___/___/___/___/___/___ ___/___/___ 121 __________________________________________ _______________ ___/___/___/___/___/___/___/___ ___/___/___ 122 __________________________________________ _______________ ___/___/___/___/___/___/___/___ ___/___/___ 123 __________________________________________ _______________ ___/___/___/___/___/___/___/___ ___/___/___ 124
Description Module 8-digit Serial Number Input# Digiplex -EVO- 14 Programming Guide Zone 161 __________________________________________ _______________ ___/___/___/___/___/___/___/___ ___/___/___ 162 __________________________________________ _______________ ___/___/___/___/___/___/___/___ ___/___/___ 163 __________________________________________ _______________ ___/___/___/___/___/___/___/___ ___/___/___ 164 __________________________________________ _______________ ___/___/___/___/___/
Zone report codes Zone # Alarm Report Codes Alarm Restore Report Codes Tamper Report Codes Tamper Restore Report Codes Zone # Alarm Report Codes Alarm Restore Report Codes Tamper Report Codes Tamper Restore Report Codes 1 __/__ __/__ __/__ __/__ 43 __/__ __/__ __/__ __/__ 2 __/__ __/__ __/__ __/__ 44 __/__ __/__ __/__ __/__ 3 __/__ __/__ __/__ __/__ 45 __/__ __/__ __/__ __/__ 4 __/__ __/__ __/__ __/__ 46 __/__ __/__ __/__ __/__ 5 __/__ __/__ __/__ __/__
85 __/__ __/__ __/__ __/__ 130 __/__ __/__ __/__ __/__ 86 __/__ __/__ __/__ __/__ 131 __/__ __/__ __/__ __/__ 87 __/__ __/__ __/__ __/__ 132 __/__ __/__ __/__ __/__ 88 __/__ __/__ __/__ __/__ 133 __/__ __/__ __/__ __/__ 89 __/__ __/__ __/__ __/__ 134 __/__ __/__ __/__ __/__ 90 __/__ __/__ __/__ __/__ 135 __/__ __/__ __/__ __/__ 91 __/__ __/__ __/__ __/__ 136 __/__ __/__ __/__ __/__ 92 __/__ __/__ __/__ __/__ 137 __/__ __/__ __/__
5 __/__ __/__ __/__ __/__ 184 __/__ __/__ __/__ __/__ 176 __/__ __/__ __/__ __/__ 185 __/__ __/__ __/__ __/__ 177 __/__ __/__ __/__ __/__ 186 __/__ __/__ __/__ __/__ 178 __/__ __/__ __/__ __/__ 187 __/__ __/__ __/__ __/__ 179 __/__ __/__ __/__ __/__ 188 __/__ __/__ __/__ __/__ 180 __/__ __/__ __/__ __/__ 189 __/__ __/__ __/__ __/__ 181 __/__ __/__ __/__ __/__ 190 __/__ __/__ __/__ __/__ 182 __/__ __/__ __/__ __/__ 191 __/__ __/__
Digiplex -EVO- 18 Programming Guide 91 __/__/__/__/__/__/__/__/__/__/__/__/__/__/__/__ 126 __/__/__/__/__/__/__/__/__/__/__/__/__/__/__/__ 161 __/__/__/__/__/__/__/__/__/__/__/__/__/__/__/__ 92 __/__/__/__/__/__/__/__/__/__/__/__/__/__/__/__ 127 __/__/__/__/__/__/__/__/__/__/__/__/__/__/__/__ 162 __/__/__/__/__/__/__/__/__/__/__/__/__/__/__/__ 93 __/__/__/__/__/__/__/__/__/__/__/__/__/__/__/__ 128 __/__/__/__/__/__/__/__/__/__/__/__/__/__/__/__ 163 __/__/__/__/__/__/__/__/__/__/__/__/__/__
Keyswitch Programming Digiplex -EVO- 19 - Keyswitch 1 _______________________ _______________ Section [0501] 8-digit Serial Number ___/___/___/___/___/___/___/___ Input# ___/___/___ Section [0601] 2 _______________________ _______________ [0502] ___/___/___/___/___/___/___/___ ___/___/___ [0602] Programming Guide Description Module 3 _______________________ _______________ [0503] ___/___/___/___/___/___/___/___ ___/___/___ [0603] 4 _______________________ _______________ [0504] ___
_______________________ _______________ Section [0522] 8-digit Serial Number ___/___/___/___/___/___/___/___ Input# ___/___/___ Section [0622] 23 _______________________ _______________ [0523] ___/___/___/___/___/___/___/___ ___/___/___ [0623] 24 _______________________ _______________ [0524] ___/___/___/___/___/___/___/___ ___/___/___ [0624] 25 _______________________ _______________ [0525] ___/___/___/___/___/___/___/___ ___/___/___ [0625] 26 _______________________ _______________
Programmable Outputs PGM Test Mode Section Description [0901] Test PGM1: Activates PGM1 for 8 seconds to verify if the PGM is functioning correctly. [0902] Test PGM2: Activates PGM2 for 8 seconds to verify if the PGM is functioning correctly. [0903] Test PGM3: Activates PGM3 for 8 seconds to verify if the PGM is functioning correctly. [0904] Test PGM4: Activates PGM4 for 8 seconds to verify if the PGM is functioning correctly.
Event Group 004 Event Non-reportable Event 005 User Code entered on Keypad 006 User/Card Access on Door 007 Bypass Programming Access 008 TX Delay Zone Alarm 009 Arming with Master 010 Arming with User Code 011 Arming with Keyswitch 012 Special Arming Feature Group 000 255 000 001 002 003 255 000 255 000 000 001 002 003 255 000 255 000 001 002 003 255 000 001 002 003 255 000 255 000 255 Digiplex -EVO- Feature Smoke detector reset Arm with no entry delay Arm in Stay mode Arm in Away
Event Group Event 013 Disarm with Master 014 Disarm with User Code 015 Disarm with Keyswitch 016 Disarm after alarm with Master 017 Disarm after alarm with User Code 018 Disarm after alarm with Keyswitch 019 Alarm Cancelled with Master 020 Alarm Cancelled with User Code 021 Alarm Cancelled with Keyswitch 022 Special Disarming 023 024 025 026 027 Zone Bypassed Zone in Alarm Fire Alarm Zone Alarm Restore Fire Alarm Restore Feature Group 000 001 002 003 255 000 001 002 003 255 000 255 0
Event Group Event 029 Late to Disarm by User 030 Special Alarm 031 Duress Alarm by User 032 033 034 035 Zone Shutdown Zone Tamper Zone Tamper Restore Special Tamper 036 Trouble Event Feature Group 000 001 002 003 255 000 255 000 001 002 003 255 000 255 = any zone # 000 Trouble Restore 000 000 255 038 Module Trouble 000 255 039 Module Trouble Restore 000 255 Digiplex -EVO- Zone Numbers Keypad Lockout Future Use AC Failure Battery Failure Auxiliary Current Limit Bell Current Limit
Event Group Event 040 Fail to Communicate on Telephone Number 041 042 043 044 Low Battery on Zone Zone Supervision Trouble Low Battery on Zone Restored Zone Supervision Trouble Restored 045 Feature Telephone Number Any telephone number 000 255 = any Zone # Zone Numbers 255 000 001 002 003 255 000 001 002 003 255 000 255 Early to Arm by User 047 Late to Arm by User 048 Utility Key 049 050 051 052 053 054 Request for Exit Access Denied Door Left Open Alarm Door Forced Alarm Door Left Open Res
Event Group Event Feature Group 064 Status 1 See Note 1 on page 27 065 Status 2 See Note 1 on page 27 066 Status 3 See Note 1 on page 27 Feature Armed Force Armed Stay Armed Instant Armed Strobe Alarm Silent Alarm Audible Alarm Fire Alarm Ready Exit Delay Entry Delay System in Trouble Alarm in Memory Zones Bypassed Bypass, Master, Installer Programming Keypad Lockout Intellizone Delay Engaged** Fire Delay Engaged Auto Arm Arming with Voice Module (set until Exit Delay finishes) Tamper Zone Low B
Event Group Event Feature Group 067 Special Status N/A 070 NOTE 1: Clock Feature Future Use Module Tamper Trouble Module ROM error Module TLM error Module Failure to Communicate Module Printer Trouble Module AC Failure Module Battery Trouble Module Auxiliary Failure Missing Keypad Missing Module Future Use Global Combus Failure Combus Overload Future Use Dialer Relay N/A 000 = Occurs in all partitions enabled in the system (see section [3031]).
Input Speeds Section Data - Decimal Value (001 - 255) Description Default [0961] __/__/__ (001 to 255) x 30 msec. INPUT SPEED OF INPUT 01 600 msec. [0962] __/__/__ (001 to 255) x 30 msec. INPUT SPEED OF INPUT 02 600 msec. [0963] __/__/__ (001 to 255) x 30 msec. INPUT SPEED OF INPUT 03 600 msec. [0964] __/__/__ (001 to 255) x 30 msec. INPUT SPEED OF INPUT 04 600 msec. [0965] __/__/__ (001 to 255) x 30 msec. INPUT SPEED OF INPUT 05 600 msec. [0966] __/__/__ (001 to 255) x 30 msec.
User Code Options Sections [1001] to [1999] The instructions that follow detail how to program access codes when using an LCD keypad. Program User Code Options, Partition Assignment and Access Control features for users 001 to 999. Refer to the appropriate keypad User’s Manual for instructions on how certain users can program these values. For instructions on how to program users when using a Grafica keypad, refer to Grafica’s User Manual.
Arming and Disarming Report Codes Ademco slow, Silent Knight fast, SESCOA, Ademco express or Pager formats: Key-in desired 2-digit hex values from 00 to FF. Ademco format: Use section [4033] to program a set of default Ademco report codes from the Automatic Report Code Programming on page 50. Then to program the remaining report codes or to change some of the defaults, enter the individual sections and key-in the desired 2-digit hex value found in the Contact ID Report Code List on page 53.
[2125] __/__ Access Code 25 [2144] __/__ Access Code 44 [2163] __/__ Access Code 63 [2182] __/__ Access Code 82 [2126] __/__ Access Code 26 [2145] __/__ Access Code 45 [2164] __/__ Access Code 64 [2183] __/__ Access Code 83 [2127] __/__ Access Code 27 [2146] __/__ Access Code 46 [2165] __/__ Access Code 65 [2184] __/__ Access Code 84 [2128] __/__ Access Code 28 [2147] __/__ Access Code 47 [2166] __/__ Access Code 66 [2185] __/__ Access Code 85 [2129] __/__ Access Code 29 [2
Door 19 [2219] __/__/__/__/__/__/__/__ [2269] 1 2 3 4 5 * * * [2319] __/__/__/__/__/__/__/__/__/__/__/__/__/__/__/__ Door 20 [2220] __/__/__/__/__/__/__/__ [2270] 1 2 3 4 5 * * * [2320] __/__/__/__/__/__/__/__/__/__/__/__/__/__/__/__ Door 21 [2221] __/__/__/__/__/__/__/__ [2271] 1 2 3 4 5 * * * [2321] __/__/__/__/__/__/__/__/__/__/__/__/__/__/__/__ Door 22 [2222] __/__/__/__/__/__/__/__ [2272] 1 2 3 4 5 * * * [2322] __/__/__/__/__/__/__/__/__/__/__/__/__/__/__/__ Door 23 [2223]
SECONDARY SCHEDULES Section Schedule Intervals Start Time (from) End Time (to) Days (turn ON or OFF) [2413] 013 Schedule A ___ ___ : ___ ___ ___ ___ : ___ ___ Schedule B ___ ___ : ___ ___ ___ ___ : ___ ___ 1 2 3 4 5 6 7 8 [2414] 014 Schedule A ___ ___ : ___ ___ ___ ___ : ___ ___ 1 2 3 4 5 6 7 8 Schedule B ___ ___ : ___ ___ ___ ___ : ___ ___ 1 2 3 4 5 6 7 8 [2415] 015 Schedule A ___ ___ : ___ ___ ___ ___ : ___ ___ 1 2 3 4 5 6 7 8 Schedule B ___ ___ : _
Backup Schedules Each programmed schedule (see Schedule Programming on page 32) can be backed up or linked to another schedule. The backup will be used in the event that the first schedule is invalid. Enter the 3-digit number of the schedule you wish to use as the backup. Ex: You wish to backup schedule 001 to schedule 011. In section [2501], you would enter 011. The control panel will verify up to 8 linked schedules, one after another, until it determines whether the card or code is valid.
Keypad Numbering Sections [2801] to [2832] are used solely for the purpose of identifying a keypad in the event buffer. Enter the 8-digit serial number of the keypad you wish to label as keypad x (1 to 32). The event buffer will then display any events pertaining to a keypad as keypad 1 or keypad 2, etc.
Control Panel Settings Section Data Description Default [3001] __/__/__ (147 = Locked, 000 = Unlocked) INSTALLER LOCK 000 [3010] __/__/__/__/__/__/__/__/__/__/__/__/__/__/__/__/__/__/__/__/__/__/__/__/__/__/__/__/__/__/__/__ PC PHONE NUMBER (32 DIGITS) [3011] __/__/__/__ PANEL IDENTIFICATION 0000 [3012] __/__/__/__ PC PASSWORD 0000 [3013] __/__/__/__ NEWARE TCP/IP PASSWORD 0000 [3020] __/__ PANEL PARTITION (00 - 08) 00 [3021] __/__ TROUBLE SHUTDOWN (00 - 15) 00 DAYLIGHT SAVINGS
= Default setting SECTION [3031] : Partition Options 1 SECTION [3032] : Partition Options 2 OFF Option [1] Partition 1 N Disabled [2] Partition 2 Disabled [3] Partition 3 Disabled [4] Partition 4 Disabled [5] Partition 5 (EVO192 only) Disabled [6] Partition 6 (EVO192 only) Disabled [7] Partition 7 (EVO192 only) Disabled [8] Partition 8 (EVO192 only) Disabled ON Enabled N Enabled N Enabled N Enabled N Enabled N Enabled N Enabled N Enabled SECTION [3033] : System Options 3 [1] B
Dialer Options = Default setting SECTION [3036]: Dialer Options 1 OFF Option Telephone Line Monitoring (TLM) [1]&[2] (see table below) [3] Dialer (reporting to monitoring station) [4] Dialing method Pulse ratio [5] (E.U. = Europe; N.A. = North America) [6] SECTION [3037] : Dialer Options 2 Busy tone detection ON Disabled N Enabled N Pulse Disabled [2] Automatic event buffer transmission Disabled N Enabled Disabled N Enabled N See Table N See Table N See Table N See Table 1:1.5 (N.A.
Schedule Tolerance Window Section [3039] Data Description __/__/__ ( x 1 minute) SCHEDULE TOLERANCE Default 000 WINDOW Auto Test Report Settings Section Data Description Default [3040] __/__/__ ( x 1 day; 000 = disabled) AUTO TEST REPORT 000 [3041] __/__ : __/__ Hrs (00-23) & Mins (00-59) AUTO TEST REPORT TIME OF DAY 00 : 00 [3042] __/__/__ (000 - 255 x 1 minute) ARMED REPORT DELAY 5 minutes [3043] __/__/__ (000 - 255 x 1 minute) DISARMED REPORT DELAY 60 minutes Data Description
Reporting Formats Section Description [3070] ___ ___ ___ ___ REPORTING FORMATS FOR TELEPHONE NUMBERS 1 TO 4 Use the same format for each number. Only the pager format can be used with other reporting formats. For more information, refer to Automatic Report Code Programming on page 50.
VDMP3 Voice Module Program up to 8 telephone numbers which the VDMP3 will call in sequence in the case of an alarm. Telephone numbers should be programmed in priority sequence as the VDMP3 will start with telephone number 1.
Partition Settings Section [3100] [3200] Partition Label __/__/__/__/__/__/__/__/__/__/__/__/__/__/__/__ Partition 1 Section [3500] Partition Label __/__/__/__/__/__/__/__/__/__/__/__/__/__/__/__ Partition 5 __/__/__/__/__/__/__/__/__/__/__/__/__/__/__/__ Partition 2 [3600] __/__/__/__/__/__/__/__/__/__/__/__/__/__/__/__ Partition 6 [3300] __/__/__/__/__/__/__/__/__/__/__/__/__/__/__/__ Partition 3 [3700] __/__/__/__/__/__/__/__/__/__/__/__/__/__/__/__ Partition 7 [3400] __/__/__/__/__/__/__/__/
Partition Timers Description Decimal Values from 000 to 255 Arming/Disarming Schedule Tolerance Window (Data x 1 minute; Default = 000) # of Invalid Codes Before Lockout (Data x 1 attempt; Default = 005 attempts) Keypad Lockout Duration (Data x 1 minute, 000 = Report Only; Default = 015) No Movement Timer (Data x 5 minutes; Default = Disabled) Exit Delay Timer (Data x 1 second; Default = 060 seconds) Recent Closing Delay (Data x 1 second; Default = Disabled) Intellizone Delay (Data x 1 second; Default
SECTION [3421] : Partition 4 Option ( SECTION [3521] : Partition 5 = Default Setting) [1] Arm/Disarm with Partition 1 [2] Arm/Disarm with Partition 2 [3] Arm/Disarm with Partition 3 [4] Switch to Stay Arm (if no Delay zone opened) [5] Arm/Disarm with Partition 5 [6] Arm/Disarm with Partition 6 [7] Arm/Disarm with Partition 7 [8] Arm/Disarm with Partition 8 OFF ON Disabled Enabled N N N N N N N N Digiplex -EVO- SECTION [3721] : Partition 7 Option ( - 44 Programming Guide Arm/Disa
Partition Panic Alarm Options Partition 1 [3123] Option ( = Default Setting) [1] Panic 1 (Keys 1 & 3) [2] Panic 2 (Keys 4 & 6) [3] Panic 3 (Keys 7 & 9) [4] Panic 1 Alarm Type (OFF = Report Only; ON = Audible Alarm) [5] Panic 2 Alarm Type (OFF = Report Only; ON = Audible Alarm) [6] Panic 3 Alarm Type (OFF = Report Only; ON = Fire Alarm) [7] Always Report Disarming (OFF = Always; [8] Auto-Force on Regular Arming OFF ON N Partition 2 [3223] OFF N N OFF N N N OFF N OFF OFF N N
Partition Special Options Partition 1 [3126] Option ( = Default Setting) [1] Intellizone Delay [2] Intellizone Double Knockout and Zone Crossing [3] Intellizone Zone Crossing OFF ON N Partition 2 [3226] OFF N Auto Force on Stay Arming Police Code is Generated on Zone Crossing Only [6] Future Use N N/A OFF OFF ON N Partition 5 [3526] OFF N N OFF N OFF N OFF N N N N ON N N N N ON Partition 8 [3826] N N N N ON Partition 7 [3726] N N N N ON Partition 6 [3626] N
Partition Tamper / Tamper Restore Event Call Direction Partition 1 [3129] Option ( [1] Call Telephone Number 1 [2] Call Telephone Number 2 [3] Call Telephone Number 3 [4] Call Telephone Number 4 [5] Backup on Telephone Number 1 [6] Backup on Telephone Number 2 [7] Backup on Telephone Number 3 [8] Backup on Telephone Number 4 = Default Setting) OFF ON N N Partition 2 [3229] OFF ON N N N Partition 3 [3329] OFF ON N N N N N OFF N Partition 8 [3829] OFF N N N N N N N N
Special and Trouble Report Codes Ademco slow, Silent Knight fast, SESCOA, Ademco express or Pager formats: Key-in desired 2-digit hex values from 00 to FF. Ademco format: Use sections [4034] (Special System Report Codes), [4035] (Special Arming/Disarming Report Codes), [4036] (Special Alarm Report Codes) and [4037] (Trouble/Trouble Restore Report Codes) to program a set of default Ademco report codes from the Automatic Report Code Programming on page 50.
[3966] __/__ Phone Number 2 Fail to Communicate [3978] Future Use [3967] __/__ Phone Number 3 Fail to Communicate [3979] Future Use [3968] __/__ Phone Number 4 Fail to Communicate [3980] __/__ Combus Fault Restore [3969] Future Use [3981] __/__ Module Tamper Restore [3982] __/__ ROM Check Error Restore [3983] __/__ Module TLM Restore Trouble Restore Report Codes Section Report Code [3984] __/__ Module Failure to Communicate Restore [3970] __/__ TLM1 Restore [3985] __/__ Printer Fa
[4022] Copy the control panel user label to the Memory Key. (See warning on page 50) [4023] Copy the control panel installer default to the Memory key. Cannot overwrite content Can copy and download content Download Memory Key to Control Panel. 1) Insert the Memory Key (PMC-5) onto the control panel’s connector labelled “MEM KEY”. 2) To download the contents of the Memory Key except zone numbering and sections [0501] to [0532], enter installer programming mode and then enter section [4010].
Section Description [4040] Entering this section will reset all programmable sections from [0001] to [3999] to factory default values. [4041] Entering this section will reset the system master code to 123456. [4042] Entering this section will reset all Zone programming (including sections [0961] to [0984]) programming to default values. [4043] Entering this section will reset all access control sections from [2201] to [2712], excluding door labels, to default values.
System Event Default Contact ID Report Code when using sections [4032] to [4037] Default SIA Report Code when using sections [4032] to [4037] Cancel Alarm with PC Software Voice Disarm Disarm with PC software Disarm after an alarm with PC software Quick Disarm 1 4A6 - Cancel 1 4A7 - Remote arm/disarm 1 4A7 - Remote arm/disarm 1 4A7 - Remote arm/disarm 1 4A8 - Quick Disarm OR - Disarm From Alarm OQ - Remote Disarming OQ - Remote Disarming OQ - Remote Disarming OP - Opening Report Zone Bypassed (##) Zon
System Event Default Contact ID Report Code when using sections [4032] to [4037] Default SIA Report Code when using sections [4032] to [4037] Module TLM restore Early to Arm by User Late to Arm by User Zone Excluded on Force Arming Zone Went Back to Arm Status Printer fault restore Module AC restore Module battery restore Module Auxiliary supply restore 3 352 - Telco 2 fault restore 3 451 - Early to Close 3 452 - Late to Close 1 57A - Zone Bypass 3 57A - Zone Bypass Restore 3 336 - Local printer failure
CID# Reporting Code SYSTEM TROUBLES - 300 & 310 300 System Trouble 301 AC Loss 302 Low System Battery 303 RAM Checksum Bad 304 ROM Checksum Bad 305 System Reset 306 Panel Program Changed 307 Self-Test Failure 308 System Shutdown 309 Battery Test Failure 310 Ground Fault 311 Battery Missing/Dead 312 Power Supply Over Current 313 Engineer Reset Prog.
VDMP3 Installation Instructions VDMP3 Installation Instructions Step EVO section VDMP3 Installation Diagram English Attach support pin to EVO panel and VDMP3 • Power down the EVO control panel. • Install the VDMP3 directly on the EVO control panel’s DIALER and EBUS connectors as shown in "VDMP3 Installation Diagram" • Power up the EVO control panel.
LCD Keypad Programming The keypad’s serial number can be found on the keypad’s PC board. The keypad’s serial number can also be viewed by pressing and holding the [0] key, entering the [INSTALLER CODE] and then entering section [0000] The version of the keypad’s firmware can also be seen in that section.
SECTION [006]: General Options 3 (EVO641R only) Option OFF [1] Card Activates Door Unlocked Schedule [2] Door Left Open Alarm [3] Door Forced Open Alarm [4] Future Use [5] Keypad Tamper [6] Relock Door [7] Future Use [8] Unlock on REX Section ON N Disabled.
Message Programming Each section from [101] to [148], [200] to [204] and [301] to [396] contains one message with a maximum of 16 characters.
Using the Memory Key [510] Download all from the Memory Key (LCD keypad sections [001] to [396] and all labels and messages) to the LCD keypad. [520] Copy the LCD keypad sections [001] to [396] and all labels and messages to the Memory Key. Download Contents of the Memory Key to the LCD Keypad 1) Insert the Memory Key onto the keypad’s connector labelled “KEY”. 2) To download the contents of the Memory Key, enter the keypad’s programming mode and enter section [510].
Access Control Connections (EVO641R only) EVO641R EVO641R Fused external power supply (recommended) No EOL required for Z2. Paradoor (460) Request to Exit device. Must be connected to Z2 terminal. IN4007 Diode Door Lock EVO641R Door Contact Must be connected to Z1 terminal * Follows control panel’s EOL definition If a door contact is not being used, install a jumper or a 1k9 resistor across the BLK and Z1 terminals depending on the control panel’s EOL definition.
Control Panel Hardware Connections Single Zone Inputs ATZ - Double Zone Inputs Digiplex -EVO- - 61 - Programming Guide
Connections As indicated in Table 6 on page 64, this run of wire can support 700mA. Total mA on this run of wire: (A) 25mA + (B) 30mA = 55mA<700mA = OK As indicated in Table 6 on page 64, this run of wire can support 454mA. Total mA on this run of wire: (D) 110mA + (E) 30mA + (F) 110mA + (G) 110mA = 360mA<454mA = OK As indicated in Table 6 on page 64, this run of wire can support 136mA.
Telephone Line Connections For TBR-21 compliance, please note the following: 1) The EVO panel can be connected to the telephone network via an RJ-11 connector. 2) The Maximum Dialing Attempts cannot exceed 15 attempts (section [3056] on page 39). Table 5: Milliamp Consumption Table Description QTY.
STEP 2: If the Grand Total is less than 700mA, go to step 3. If the value is greater, you will require an external power supply (see External Power Supply Connections drawing on page 62) to provide the additional power needed. Proceed with step 3 and refer to the example (Sample Power Requirement Calculations drawing) on page 62.
PCB Layout Built-in RTC See page 64 (See “VDMP3 Installation Instructions” on page 55.) See “Updating Firmware Using WinLoad” on page 59. The sum of the current drawn from the BELL and AUX must be limited to 2.0A. Exceeding this limit will overload the panel power supply and lead to complete system shutdown. 40VA transformer strongly recommended PLEASE NOTE: When powering up the EVO control panel, the panel will begin a module scan to verify if all the modules connected to the panel are operational.
Notes_________________________________________________ ______________________________________________________ ______________________________________________________ ______________________________________________________ ______________________________________________________ ______________________________________________________ ______________________________________________________ ______________________________________________________ ______________________________________________________ _________________
Warranty For complete warranty information on this product please refer to the Limited Warranty Statement found on the website www.paradox.com/terms. Your use of the Paradox product signifies your acceptance of all warranty terms and conditions. © 2002-2007 Paradox Security Systems Ltd. All rights reserved. Specifications may change without prior notice.
Trouble Display To view the Trouble Display on LCD or LED keypads: 1) Press the [TRBL] key. 2) For LEDs: Press the Numerical Symbol corresponding to the Group heading to view the specific trouble. For LCDs: Press the number representing the trouble and use the [ ] and [ ] keys to view the specific trouble. To view the Trouble Display on Grafica Keypads: 1) Enter your [ACCESS CODE]. 2) Using the scroll keys, highlight Trouble and then press the center action key (Ok).