LCD Keypad Module DGP2-641/DGP2-641R DGP2-641BL/DGP2-641RB System Manager’s Manual for DGP-848 Systems Also includes Operating Instructions
Table of Contents Introduction .................................................................. 1 Legend ............................................................................ 1 Basic Operation ........................................................... Auditory Feedback (Beep Tones).................................... Confidential Mode ........................................................... Partitioned System .......................................................... Area Status Display........
1.0 Introduction Thank you for choosing Paradox Security Systems. Digiplex security systems offer advanced technology and provide reliable security protection and powerful features that are easy to use. The elegant and user-friendly LCD keypad allows you easy access to your security system's functions and information at the touch of a button. The 32character LCD screen displays messages and menus to guide you through the system’s operations.
2.2 Confidential Mode Your installer can program keypads to not display the status of your system automatically by changing the LCD screen to Confidential Mode. In Confidential Mode: • The zones and status messages will NOT be displayed • The indicator lights will NOT illuminate • Depending on how your keypad was programmed by your installer, you must either press a button or enter your user access code to illuminate the indicator lights and activate Normal Mode. 2.
3.3 Stay Arming Stay arming partially arms your system, permitting you to remain in your home or office by arming only the outer zones (perimeter) of the protected area (i.e. doors and windows). To Stay arm: 1. Enter your [ACCESS CODE]. 2. Press the [STAY] button. 3. If you have access to more than one area, select the area(s) you wish to Stay arm (refer to section 2.3 on page 2). 3.4 Instant Arming This feature is the same as Stay arming except that there is no Entry Delay.
3.7 One-Touch Buttons If enabled by your installer, you can access the following features without using your user access code by pressing and holding the desired One-Touch button. 3.
To disarm a system in alarm: 1. Enter your [ACCESS CODE]. 2. In the case of a false alarm, call your monitoring station quickly to advise them of the false alarm. In the case of a burglar alarm, leave the premises and call the Police from a safe place. 4.3 Alarm Memory Display Your system will record all of the alarms that occurred during the last armed period. The zones in alarm will remain in the Alarm Memory until the next time that area is armed.
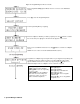
Figure 2: Programming User Access Codes Enter your [ACCESS CODE] (System Master Code or user access code with Master feature). Press [0] to enter the Programming Menu. From Programming Menu, press [ACC]. Enter the 2-digit User Number you want to program; press the [T] button to scroll the list of codes then press [ACC] once the desired code appears on the screen. Enter a user code within the brackets. Press the [S] button to reach the User Options screen.
Users are able to perform actions (arming, disarming, etc.) only in the area(s) they are assigned. To assign an area(s) to a user access code, enter the number corresponding to the area you wish to assign (i.e. [1] = area 1...[4] = area 4). Press the [T] button to return to the User Options; press the [S] button to proceed to step 8; or press the [ENTER] button to save and exit programming mode. NOTE: If no area is assigned, and if PGMs are programmed by your installer, the User can only control the PGMs.
5.4 User Options Options [1] and [2]: Master Feature When option [1] is OFF, the user cannot program other users into the system. When option [1] is ON and option [2] is OFF, the user can only modify existing user access codes. When both options [1] and [2] are ON, the user has Full Master rights. The user can create or modify user access codes, User Options, User Access Control Options, Access Card Numbers and Area Assignments according to their own programming.
Option [8]: Access to Armed Access Control Doors When option [8] is enabled, the Access Control Card can be used to open an armed Access Control Door. When a valid Access Control Card is presented to a reader that is assigned to a zone and the zone is armed, access will be granted and the Entry Delay will begin. When option [8] is ON, extra security is provided since a user must enter a user access code to disarm the area.
6.3 How Access Control Works To illustrate how Access Control functions, we will use three simple Access Control System examples: Figure 3: Example A Bonnie’s Access Control Card is programmed with Access Level 01 and Schedule 01. If she presents her card to the reader or the DGP2-641R/DGP2-641RB keypad on Door 02 on Tuesday, August 3 at 3 p.m., she will gain access to the room.
7.0 Trouble Display If your system experiences any problems, Trouble(s) [TRBL] to View will appear on the LCD screen. The Trouble Display will only display the troubles that occur in the area(s) to which the keypad has been assigned. Potential troubles have been sorted into eight groups. Only the troubles which are relevant to you are listed and described below. If a trouble that is not described or listed below appears, contact your installer. To View the Trouble Display: 1.
To view the Event Record: 1. Enter your [ACCESS CODE]. 2. Press the [7] button. 3. If you have access to more than one area, select the area(s) you wish to view (refer to section 2.3 on page 2). 4. Use the [S] and [T] buttons to scroll between the events. 5. Press the [CLEAR] button to exit. Once you have entered Event Record Display mode, you can change the order that the Event Record screens appear by pressing the [7] button.
8.4 Programming Chime Zones You can program the keypad to emit a rapid, intermittent beep tone whenever designated zones are opened or only when opened between certain hours. These zones are referred to as Chime Zones. Your installer can also program your Chime Zones to beep upon closure. 1. Enter your [ACCESS CODE] 2. Press the [9] button. 3. Press the [1] button to chime a zone. Then enter the number corresponding to the zone to be chimed, or use the [S] and [T] buttons to scroll the list of zones.
9.3 System Maintenance Under normal use your system requires no maintenance other than regular testing. We recommend that your installer change the battery every three years. 9.4 System Test Speak to your installer before conducting a System Test since the system must be programmed to respond to the test instructions. It is normally recommended that you conduct the system test once a week, but contact your installer for instructions concerning your particular system. To conduct a system test: 1.
Figure 7: Delayed Fire Zone 10.3 Fire Safety Tips How should you prepare in case of a fire in your home or business? • • • • • • • • 10.4 Remind everyone to escape first, then call for help. Develop a fire escape plan and designate a meeting place outside. Practice the escape plan frequently. Plan two ways to escape from every room, if possible. Practice feeling the way out with eyes closed. Instruct everyone never to stand up during a fire, always crawl under the smoke and keep mouths covered.
Voice-Assisted Arm/Disarm Module Operating Instructions 11.0 Introduction Congratulations on choosing the Paradox InTouch Voice-Assisted Arm/Disarm Module (APR3-ADM2). InTouch turns any touch-tone telephone into a keypad. With InTouch, you can now arm or disarm your Digiplex security system as well as activate or deactivate your InTouch’s output all from your telephone. Using detailed voice prompts to guide your way, the InTouch is as simple as picking up your telephone. 12.
• If the InTouch’s output is not operational, you will not be able to activate or deactivate the output. • Your installer can program the output to deactivate either manually or follow a timer. If programmed to be deactivated manually, the output will remain activated until you deactivate it. If programmed to follow a timer, the output will deactivate after the timer has elapsed. 14.4 When Using your InTouch...
The InTouch then prompts Nelson with the following: “Area 1 Disarmed” “Area 2 Armed” “Output is Deactivated” “To modify, enter Area number” Nelson presses the [2] key on his telephone to disarm Area 2. The InTouch then prompts Nelson with the following: “Area 1 Disarmed” “Area 2 Disarmed” “Output is Deactivated” “To modify, enter Area number” Nelson then presses the [#] key and then the [0] key on his telephone to activate the output which in turn will activate the garage door.
Warranty Paradox Security Systems Ltd. (“Seller”) warrants its products to be free from defects in materials and workmanship under normal use for a period of one year. Except as specifically stated herein, all express or implied warranties whatsoever, statutory or otherwise, including without limitation, any implied warranty of merchantability and fitness for a particular purpose, are expressly excluded.
Index A Chime Zones Access Codes Deleting .............................................................5 InTouch Access Codes ........................................16 Programming ......................................................5 System Master ....................................................5 User ..................................................................5 Access Control Card Assignment .................................................7 Entering & Exiting ...............................
Keyswitch Arming ......................................................4 L System Maintenance ..........................................14 System Test .....................................................14 Time, Set LCD Keypad Level, Access .............................................................1 ............................................................7 M .............................................................5 Master Feature, in User Options ...................................
Notes
780 Industriel Blvd., Saint-Eustache (Quebec) J7R 5V3 CANADA Tel.: (450) 491-7444 Fax: (450) 491-2313 www.paradox.