LCD Keypad Module DGP2-641 System Manager’s Manual Also includes Operating Instructions
TABLE OF CONTENTS INTRODUCTION ........................................................... 5 Legend.......................................................................................... 5 BASIC OPERATION ..................................................... Auditory Feedback (Beep Tones) ................................................ Confidential Mode ....................................................................... Partitioned System .............................................................
© 2002-2003 Paradox Security Systems Ltd. Digiplex, InTouch and WinLoad are trademarks or registered trademarks of Paradox Security Systems Ltd. or its affiliates in Canada, the United States and/or other countries. All rights reserved. Specifications may change without prior notice.
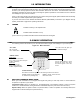
1.0 INTRODUCTION Your Digiplex Security System is an advanced technology security system that will provide you with reliable security protection and powerful features that are easy to use. The elegant and user-friendly LCD keypad will allow you easy access to your security system's functions and information at the touch of a button. The 32-character LCD screen will display messages and menus to guide you through the system’s operations.
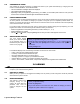
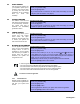
2.2 CONFIDENTIAL MODE Your Installer can program keypads to not display the status of your system automatically by changing the LCD screen to Confidential Mode. In Confidential Mode: • The zones and status messages will NOT be displayed • The indicator lights will NOT illuminate • Depending on how your keypad was programmed by your installer, you must either press a button or enter your User Access Code to illuminate the indicator lights and activate Normal Mode. 2.
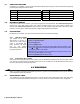
3.3 STAY ARMING Stay arming will partially arm your system to permit you to remain in your home or office by arming the outer zones (perimeter) of the protected area (i.e. doors and windows). 3.4 3.5 INSTANT ARMING This feature is the same as Stay arming except that there is no Entry Delay. Therefore, any armed zone that is breached will immediately generate an alarm. 2) Press the [STAY] button. 3) If you have access to more than one area, select the area(s) you wish to Stay arm (refer to section 2.
3.7 3.8 3.9 ONE-TOUCH BUTTONS If enabled by your Installer, you can access the following features without using your User Access Code by pressing and holding the desired One-Touch button.
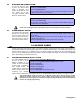
4.2 DISARMING AN ARMED SYSTEM How do I disarm the system? 1) Enter your [ACCESS CODE]. 2) Press the [DISARM] button. If you have access to more than one area, select the area(s) you wish to disarm (refer to section 2.3 on page 6). You can only disarm an area to which your User Access Code is assigned. User Access Codes with the “Arm Only” (section 5.5 on page 14) option enabled cannot disarm an armed system. How do I disarm a system in alarm? 1) Enter your [ACCESS CODE].
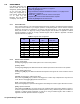
5.2 USER LABELS User labels personalize User Access Codes and can be assigned by pressing [ENTER] at any point after step 4 during the programming of User Access Codes (Figure 5.1 on page 12). For Example, the LCD keypad can display “John Smith”. 5.2.1 How do I program a user label? At any point after step 4 in Figure 5.1 on page 12: 1) Press the [ENTER] button. 2) Type the desired characters as detailed in section 5.2.1 on page 10 and section 5.2.2 on page 10.
Table 2: Special Characters Catalogue 5.3 DELETING USER ACCESS CODES To delete User Access Codes, follow steps 1 to 5 in Figure 5.1 on page 12, but press the [CLEAR] button in step 5. Once the information is erased, press the [ENTER] button to save and exit.
5.4 PROGRAMMING USER ACCESS CODES The System Master and Users with the Master feature can program User Access Codes with User Options and Area Assignments. Figure 5.1 on page 12 describes the steps you would follow to program User Access Codes. If the keypad emits a Rejection Beep at any point during the programming procedure, you may have chosen an existing User Code or you do not have access to certain User Options (section 5.5) and Area Assignments (step 7 in Figure 5.1 on page 12).
Users are able to perform actions (arming, disarming, etc.) only in the area(s) they are assigned. To assign an area(s) to a User Access Code, enter the number corresponding to the area you wish to assign (i.e. [1] = area 1, ...[4] = area 4). Press the [T] button to return to the User Options; press the [S] button to proceed to step 8; or press the [ENTER] button to save and exit programming mode. NOTE: If no area is assigned, and if PGMs are programmed by your Installer, the User can only control the PGMs.
5.5 USER OPTIONS Options [1] and [2]: Master Feature When option [1] is OFF, the User cannot program other Users into the system. When option [1] is ON and option [2] is OFF, the User can only modify existing User Access Codes. When both options [1] and [2] are ON, the User has Full Master rights. The User can create or modify User Access Codes, User Options, User Access Control Options, Access Card Numbers and Area Assignments according to their own programming.
Option [8]: Access to Armed Access Control Doors When option [8] is enabled, the Access Control Card can be used to open an armed Access Control Door. When a valid Access Control Card is presented to a reader that is assigned to a zone and the zone is armed, access will be granted and the Entry Delay will begin. When option [8] is ON, extra security is provided since a user must enter a User Access Code to disarm the area.
6.3 HOW ACCESS CONTROL WORKS To illustrate how Access Control functions, we will use three simple Access Control System examples: Figure 6.1: Example A Bonnie’s Access Control Card is programmed with Access Level 01 and Schedule 01. If she presents her card to the reader on Door 02 on Tuesday, August 3 at 3 p.m., she will gain access to the room. Figure 6.2: Example B If Bonnie presents her card to the reader on Door 02 on Saturday or on a Holiday at 3 p.m., she will be denied access. Figure 6.
7.0 TROUBLE DISPLAY If your system experiences any How do I view the Trouble Display? problems, “Trouble(s) [TRBL] to 1) Press the [TRBL] button when “Trouble(s) [TRBL] to View” appears on the View” will appear on the LCD LCD screen. The Group Heading with the trouble will appear on the screen. screen. The Trouble Display will only display the troubles that 2) Press the [S] and [T] buttons to scroll between the Groups experiencing a trouble. occur in the area(s) to which the keypad has been assigned.
8.0 ADDITIONAL FEATURES 8.1 PROGRAMMABLE OUTPUTS (PGMS) Your system includes Programmable Outputs (PGMs) that can be programmed by your Installer. A PGM triggers when a predetermined event or series of events occurs in your system. The PGMs can be programmed to reset smoke alarms, turn on light switches, open or close garage doors and much more. Ask your Installer about this useful feature. 8.2 KEYPAD SETTINGS You can modify the keypad settings to suit your needs (Refer to Figure 8.1 on page 18).
8.4 PROGRAMMING CHIME ZONES How do I program chime zones? 1) Enter your [ACCESS CODE]. 2) Press the [9] button. 3) Press the [1] button to chime a zone. Then enter the number corresponding to the zone to be chimed, or use the [S] and [T] buttons to scroll the list of zones. Press the [ACC] button to chime or unchime the zone that appears on the screen. Press [ENTER] to save. OR Press the [2] button to set the time period a chimed zone will beep.
9.3 9.4 SYSTEM MAINTENANCE Under normal use your system requires no maintenance other than regular testing. We recommend that your Installer change the battery every three years. SYSTEM TEST Speak to your Installer before conducting a System Test since the system must be programmed to respond to the test instructions. It is normally recommended that you conduct the system test once a week, but contact your Installer for instructions concerning your particular system.
Figure 10.1: Delayed Fire Zone 10.3 FIRE SAFETY TIPS How should you prepare in case of a fire in your home or business? • • • • • • • • 10.4 Remind everyone to escape first, then call for help. Develop a fire escape plan and designate a meeting place outside. Practice the escape plan frequently. Plan two ways to escape from every room, if possible. Practice feeling the way out with eyes closed. Instruct everyone never to stand up during a fire, always crawl under the smoke and keep mouths covered.
Voice-Assisted Arm/Disarm Module Operating Instructions 11.0 INTRODUCTION Congratulations on choosing the Paradox InTouch Voice-Assisted Arm/Disarm Module (APR3-ADM2). InTouch turns any touch-tone telephone into a keypad. With InTouch, you can now arm or disarm your Digiplex security system as well as activate or deactivate your InTouch’s output all from your telephone. Using detailed voice prompts to guide your way, the InTouch is as simple as picking up your telephone. 12.
• Your installer can program the output to deactivate either manually or follow a timer. If programmed to be deactivated manually, the output will remain activated until you deactivate it. If programmed to follow a timer, the output will deactivate after the timer has elapsed. 14.4 WHEN USING YOUR INTOUCH... • In some cases, your telephone’s tone may not be powerful enough to interrupt the InTouch’s voice prompt.
The InTouch then prompts Nelson with the following: “Area 1 Disarmed” “Area 2 Armed” “Output is Deactivated” “To modify, enter Area number” Nelson presses the [2] key on his telephone to disarm Area 2. The InTouch then prompts Nelson with the following: “Area 1 Disarmed” “Area 2 Disarmed” “Output is Deactivated” “To modify, enter Area number” Nelson then presses the [#] key and then the [0] key on his telephone to activate the output which in turn will activate the garage door.
18.0 APPENDIX 1: HEBREW SPECIAL CHARACTERS Refer to the following tables when programming the user labels (refer to section 5.2 on page 10) of a Hebrew keypad.
19.0 APPENDIX 2: RUSSIAN SPECIAL CHARACTERS Refer to the following tables when programming the user labels (refer to section 5.2 on page 10) of a Russian keypad.
Warranty The Seller warrants its products to be free from defects in materials and workmanship under normal use for a period of one year (except as indicated otherwise). Except as specifically stated herein, all express or implied warranties whatsoever, statutory or otherwise, including without limitation, any implied warranty of merchantability and fitness for a particular purpose, are expressly excluded.
INDEX A Chime Zones Access Codes Deleting ...........................................................11 InTouch Access Codes ........................................22 Programming ....................................................12 System Master ....................................................9 User ..................................................................9 Access Control Card Assignment ...............................................13 Entering & Exiting ..................................
Buttons ..............................................................5 Lights ................................................................5 Messages ...........................................................5 Settings ...........................................................18 Keyswitch Arming ......................................................8 L LCD Keypad ..............................................................5 Level, Access ..........................................................