
User manual


132.0 Megapixel H.264 Network IP Camera User Manual
SECTION 2: INSTALLATION AND SETUP
If you have other compatible, network settings you want to apply to the device, enter them in the appropriate locations. Click
Setup to save settings.
5. In the Login window, enter the ID and PW (password) for your camera and click Login. The default administrator values for
the ID and PW are root and pass. After entering ID and PW, the IP Setup window closes.
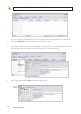
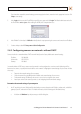
6. In the IPAdmin Tool window, click Refresh and verify that the entry representing the camera now shows the new IP address.
7. Continue with procedure 2.7 Setup camera Basic Conguration.
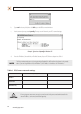
2.6.2 Conguring cameras on networks without DHCP
Cameras installed on a network without a DHCP server will initially use the factory default static network settings:
IP address: 192.168.0.100
Subnet mask: 255.255.255.0
Gateway: 192.168.0.1
In networks without a DHCP server, cameras must be powered on and recongured one at a time to avoid addressing conicts
between other cameras, or possibly with another device on the network. Conguring the network settings of your cameras includes
these steps:
— Determine the network settings of your computer.
— Check the network for compatibility with the default static network settings of your camera.
— Find network settings (IP addresses) that are not in use and can be assigned to your camera.
— Attach your camera to the network, power it on, and conguring it with new network settings.
Determine the network settings of your computer
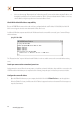
1. At a PC attached to the same LAN that will be shared with your camera, determine the IP address, subnet mask, and default
gateway of your PC and record it in Table 1. To nd this information, do the following at the Windows desktop:
a. Hold down the Windows key and press r to open the Run dialog box.