
User manual


10
www.digiop.com
SECTION 2: INSTALLATION AND SETUP
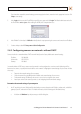
1. Attach a LAN cable to the Ethernet connector on the back of the camera. If the camera is powered through the LAN cable,
DO NOT apply power to the camera at this time.
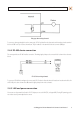
2. Attach the DC jack adapter cable to the DC 12V power adapter terminals on the back of the camera. Connect the red wire of
the adapter cable to the + terminal, and the black (or white) wire to the - terminal.
DC jack
adapter
cable
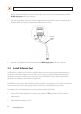
3. Attach the DC jack Adapter to the DC power adapter provided. DO NOT apply power to the camera at this time.
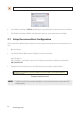
2.5 Install IPAdmin Tool
The IPAdmin Tool, included on the CD mini disk, is a utility that will discover cameras installed on your network and enable you
to perform the initial network setup for each camera. After a camera is setup on the network, the Microsoft Internet Explorer
®
web browser can be used to see video from the camera, set the camera’s password, date and time, nalize camera hardware
adjustments, and congure the camera for functional requirements.
The IPAdminTool can be loaded on a Microsoft Windows XP, Vista or Windows 7 operating system (32- or 64-bit). To use this utility
for the initial setup of your camera, your computer must be connected to the same network subnet as your camera.
At a computer on the same LAN (subnet) where your cameras will be installed, do the following:
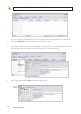
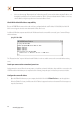
1. Insert the CD mini disk provided with your camera into your computer’s CD ROM drive and open the CD in a Windows
Explorer window.
2. Find the IPAdminTool directory on the CD.