
Specifications


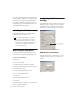
Table Of Contents
- Contents
- Welcome to Mbox
- Windows Configuration
- Macintosh Configuration
- Mbox Hardware and Connections
- Working with Pro Tools LE
- Windows System Optimizations
- Digidesign ASIO Driver (Windows Only)
- Digidesign WaveDriver (Windows Only)
- Digidesign CoreAudio Driver (Macintosh Only)
- Configuring Midi Studio Setup (Windows Only)
- Configuring AMS (Mac OS X Only)
- Index

Chapter 5: Working with Pro Tools LE 59
Selection or Track Length If you make a selec-
tion in a track, the bounced mix will be the
length of the selection. If there is no selection in
any track, the bounce will continue until it
reaches the end of the session.
To Bounce to Disk:
1 Choose File > Bounce to Disk.
2 Select any mono or stereo output or bus path
as the source for the bounce.
3 Select the File Type (such as WAV), Format
(such as mono or stereo), Resolution (such as 16-
bit), and Sample Rate (such as 44.1 kHz).
4 Click Bounce.
Using Dither on Mixdown
You should use a dither plug-in when using the
Bounce To Disk command, or when mastering
to an external device. Bounce to Disk does not
automatically apply dither. To dither a bounce
file, insert an included Digidesign Dither plug-
in, or another dither plug-in, on a Master Fader
assigned to the bounce source path. Master Fad-
ers are often preferable to Auxiliary Inputs be-
cause Master Fader inserts are post-fader (which
is better for dither applications).
To create a mixdown that can be written to
an audio CD, be sure to select WAV, stereo
interleaved, 16-bit, 44.1 kHz.
For more information on using dither, refer
to the
Pro Tools Reference Guide.