
Programming instructions

Integration Technical Note 15
MITEL D/82 Station Set Emulation ©June 2003 Ericsson Enterprise AB
EN/LZT 108 6655 R1A
Configuring OneBox
Configuring OneBoxConfiguring OneBox
Configuring OneBox
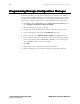
Once the telephone system is programmed, you must configure OneBox for the
integration. During setup, you’ll need the following information, specific to this
integration, to configure OneBox.
1. In the Installation Configuration dialog box, enter the name of your site in
the Site Name box, the mailbox length in digits in the Mailbox Length box,
and the first extension number for the first line in the First Extension box.
Select MITEL as the manufacturer, SX-200D or SX-2000 as the model, and
Dialogic D/82 430 set emulation as the integration type.
2. In the Switch Section Options dialog box, enter the hunt group access code
you configured previously in the Programming the Telephone System section. This
is the pilot number users will dial to reach OneBox.
3. Once setup is complete, go to the Lines tab to verify that the extension
numbers are assigned to the correct lines, and enable callouts to suit your
application. For information on configuring callout settings, see the topic
“Configure callout settings,” in the online help system.
The settings related to the telephone system on the Switches tab are filled in
correctly when you select the correct telephone system during setup. You might
need to customize other settings on the Switch Sections and Integrations
Options dialog boxes to suit the requirements of each application. Refer to
Installing OneBox, Administering OneBox, or the online help system for more details
about setting these parameters. Or, to display a tooltip that briefly describes a
setting, pause the mouse over the setting for which you want more information.