
User Manual


User Manual-5.0
93
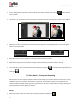
Original and Before and After Images
Original Image: In the course of working on your photos, you might decide to retain an original image or
make a fresh set of changes. In such cases, you could load the original image once again by clicking on
.
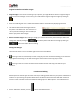
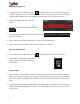
Once the ‘Load Original’ icon is clicked the software asks for confirmation by displaying a text box.
This text box warns that all changes made on
the photo so far will be lost. You could click on
‘Yes’ to proceed. Clicking on ‘No’ will take you
back to your photo with changes.
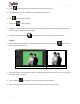
Before and After Images: After making a change, you could view how the photo looked just before the
change was made by clicking on and how the photo looks after the change by clicking on
. This aids in better decision-making.
Saving the Changes
There are two ‘Save’ icons on the lower right-hand corner of the Album.
: Clicking on this icon will allow you to save a copy of your work. A text box allowing you to name the
copy appears and clicking on ‘Ok’ after entering the name creates a new copy of your work.
: Clicking on this icon causes the old file to be rewritten and the new copy now exists for your
reference.
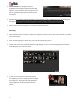
6.2 Advanced Editing
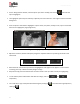
Album Xpress has several types of ‘filters’ that help in adding special effects to your photos and Album to
make for an eye-catching end product. Basic Filters and Artistic Filters have been dealt with in detail in
section 6.1. We now take a look at the advanced editing option in Album Xpress – the Advance Filters.
On the ‘Edit Photo’ window, click on to access the advance filters. *