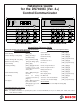
Reference Guide for the DS7400Xi (Ver.
7.4 Table of Contents Fire Safety ..................................................................... 27 7.4.1 7.4.2 7.4.3 Keypad Quick Reference Guide ........................................ 1 1.0 Specifications ............................................................. 4 1.1 1.2 1.3 1.4 1.5 1.6 1.7 1.8 1.9 1.10 1.11 1.12 1.13 Enclosure Housing ........................................................ Temperature ................................................................... Power .........
10.16 Commercial Fire Mode Programming: Program Address (2733) ............................................. 48 10.17 Open/Close Report Control Programming: Program Address (3149) ............................................. 49 10.18 Open/Close & Zone Report Control Programming: Program Address (3151) ............................................. 49 10.19 Report Control Programming: Program Address (3152) ............................................. 49 10.
1.0 Specifications 1.1 Enclosure Housing The standard enclosure is manufactured from 20 Guage (1.0 mm), cold-rolled steel, and measures 12.5 by 14.5 by 3 inch (31.8 by 36.8 by 7.6 cm) (HxWxD). A keyed lock is included, and this enclosure has provision for an optional tamper switch (required for commercial burglary applications) for monitoring the door. NOTE: Fire Systems installed under NFPA-72 or UL Listed Fire Systems require the use of 18 AWG or larger wire. 1.
1.15 Max. Load Currents Max. Load Currents UL Installations Standby Alarm 1.5 A 2.5 A Maximum Current By Output: Not to exceed the maximum load currents listed above in Standby or Alarm 1.16 Backup Battery Calculation Aux. Power & Keypad (Combined) 1.0 A Option Power 1.0 A 1.0 A X 1.
1.18 Options • DS7412: RS232 Serial Interface module. The DS7412 module allows the panel to send event information, in an ASCII format, directly to a serial printer or computer. In addition, the interface allows the direct connection of a computer to the panel for programming via the WDSRP programming software. • Current Draw= 25 mA; 35 mA with LEDs on. • DS7416i: Advanced Radio Communications Module provides a means of communicating alarm and supervision signals using the Motient radio network.
• DS7460: Dual Zone Module (up to 60 per system. Requires a DS7430 Multiplex Expansion Module). The DS7460 provides a means of monitoring conventional Normally Open or Normally Closed contacts. It reports their status to the control panel as multiplex addresses. It occupies two multiplex zones on the system and can monitor up to two separate loops. • Current Draw = 1 mA, Standby; 1 mA, Alarm. • DS7465: Input/Output Module (up to 60 per system. Requires a DS7430 Multiplex Expansion Module).
• MX794 The MX794 is a Long Range Multiplex PIR intrusion (DS7474) Detector with Self-test. The standard ranges are 80 ft. by 50 ft. (24.0 m by 15.0 m) and 200 ft. by 10 ft. (61.0 m by 3.1 m). Requires a DS7430 and occupies one multiplex zone. • Current Draw = 800 μA, Standby; 2 mA, Alarm. • MX934 Multiplex Passive Infrared (PIR) intrusion detector with (DS7471) a standard range of 35 by 35 feet (10.7 m by 10.7 m). Requires a DS7430 and occupies one multiplex zone.
Wiring The Battery Terminals and Wires are NOT Power Limited. A ¼ in. (6.4 mm) spacing must be maintained between the battery terminals, battery wiring and all other wiring. Battery wiring may not share the same conduit, conduit fittings or conduit knock-outs with other wiring. Option or Keypad Wires ¼ in. (6.
3.0 Control Terminal Wiring TYPICAL BURGLAR AND FIRE WIRING Zone Loop + Input Z– Zone Loop + Input L+ Z– Zone Loop + Input or PO2 L+ Z– Before servicing, remove all power including the transformer, battery and phone line. A complete functional test is required after any programming. WARNING Aux. Power (—) (terminal 5 or 7) – L+ in + + out Power – Alarm NO Incorrect connections may result in damage to the unit. NC CAUTION in + System is Power Limited except for battery terminals.
4.0 Hardware Layout Example DS7416i Communications Module R B G Y + – + –1 2 3 4 5 6 7 + – + –1 8 POWER BUS Keypads #11 - #15 must be connected to the Options Bus. Keypads #1 - #10 must be connected to the Keypad Bus.
5.0 System Worksheet Account Number Information Name Contact Person Address Voice Phone Number Panel Phone Number City, State, Zip Panel Answers Phone Armed Disarmed Equipment Location and Notes AC Voltage VAC Battery Standby Battery Voltage Ah VDC Bell Current AUX Current A A Control Panel Transformer Telephone Jack Telephone On Same Line as Panel Earth Ground Connection Alarm Sounder (s) Misc.
5.0 System Worksheet (continued) PIN Worksheet Personal Identification Number Information Example PIN Information User Pin # Auth. Parti- Name Level tions # 002 PIN Information User Pin # Auth. Parti- Name Level tions # 001 1001 6 1, 2, 4 James L. PIN Information User Pin # Auth. Parti- Name Level tions # 034 PIN Information User Pin # Auth.
5.0 System Worksheet (continued) PIN Worksheet Personal Identification Number Information PIN Information User Pin # Auth. Parti- Name # Level tions 100 134 PIN Information User Pin # Auth.
5.0 System Worksheet (continued) Zone Location and Notes Zone Location and Notes Worksheet * = SZ: Single Zone Input MZ: Multiple Zone Input IO: DS7465 (see section 10.3) Example Type * Zone/Output Partition & Location Function # Zone # 1 SZ Zn Funct.
5.0 System Worksheet (continued) Page 16 P/N: F01U035325-01 Copyright © 2007 Bosch Security Systems, Inc.
5.0 System Worksheet (continued) DS7400Xi ( 4+) Reference Guide Copyright © 2007 Bosch Security Systems, Inc.
5.0 System Worksheet (continued) Zone Location and Notes Worksheet Page 18 P/N: F01U035325-01 Copyright © 2007 Bosch Security Systems, Inc.
6.0 Glossary 6.2 6.1 General Control Programming • Zone Function A Zone Function is the description of how a particular zone will behave (e.g. steady alarm output, bypassing allowed, alarm on short, trouble on open, perimeter instant). - There are many possible zone functions. Up to 30 different zone functions are allowed per control. - Zone functions may be custom made as needed. - Each zone must be programmed as a specific zone function.
• Entry/Exit Delay #2: This is a zone programmed to behave identical to the Entry/Exit Delay #1 zone function except that it uses entry delay time #2 (address 4029). NOTE: If both entry delays have been activated, the control will use the shorter entry delay. • Entry/Exit Delay Cancel Zone Functions Entry/Exit Delay Cancel 1 and Entry/Exit Delay Cancel 2 Zone Functions cause the exit delay to expire as soon as the premises is vacated.
- Smoke alarm. This must be the odd numbered zone of the zone pair required for these devices. The zone must be programmed with a zone function that is set for Fire Zone and Trouble on Open. - Low Temperature Alarm. This must be the even numbered zone of the zone pair required for these devices. This zone must be programmed with a zone function that is set as Supervisory and Trouble on Open. 6.
- For example: When using only one partition, it is partition one. When using three partitions, they are partitions one, two, and three. - Partitioning allows the system to act as up to 8 different systems. - Zones, keypads, outputs, and other items may be assigned to particular partitions. - Access to partitions may be through each partition’s keypad or through a Master keypad (see the User’s Guide P/N: 43851 for more details).
• Pulsing Fire Zone: This is a zone programmed to output a pulse for a fire alarm in the normal manner (one second ON, one second OFF). • California March Time: This is a zone programmed to output a pulse for a fire alarm in the California Time cadence (ten 1/2 second pulses, followed by one second of quiet time). • Keypad Emergency Alarm: This report is sent when an emergency alarm has been activated using the “B” emergency key.
• Low Battery: This report is sent when a low battery condition occurs. • Battery Restoral: This report is sent when a low battery condition restores. • AC Fail: This report is sent when an AC failure condition occurs. This report may be delayed in address 4034. • A/C Failure Report Delay The A/C power loss report can be programmed to delay for up to 254 minutes (see address 4034). (The same delay would also apply to the A/C restoral report.
6.16 FCC Compliance Notice 6.18 This equipment has been tested and found to comply with the limits for a Class A digital device, pursuant to Part 15 of the FCC Rules. These limits are designed to provide reasonable protection against harmful interference in a residential installation. This equipment generates, uses and can radiate radio frequency energy and if not installed and used in accordance with the instructions, may cause harmful interference to radio communications.
7.0 Operating Guide For additional information on operating this system, consult the DS7400Xi (Ver. 4+) User’s Guide (P/N: 43851) and the front cover of this Reference Guide. 7.1 7.2 Emergency Procedures Fire Reset/Fire Trouble 7.1.1 Identifying Alarm Sounds 7.2.1 Fire Reset Your alarm system may be programmed for a steady alarm sound or a pulsed alarm sound.
7.4 Fire Safety No fire detection device or system should be considered 100% foolproof. This fire alarm system can provide early warning of a developing fire. Such a system, however, does not ensure protection against property damage or loss of life resulting from a fire. Any fire alarm system may fail to warn for any number of reasons (e.g. smoke not reaching a detector that is behind a closed door).
7.5 Personal Identification Numbers 7.5.1 General Information 6 = Access Code: When a PIN with an Access Code is entered, any output programmed for Access Output (i.e. door strikes) will pulse on for 10 seconds (works when the system is armed or disarmed). A PIN (Personal Identification Number) is the 4- or 6-digit code users must enter at the keypad to gain access to the system. Your system has the capability to assign up to 200 PINs, each four or six digits long.
NOTE: User Number 001 can not be disabled in this manner. 7.6 The Master Keypad 7.6.1 General Information Your system may include a Master keypad. A Master keypad is a DS7447/DS7447E keypad programmed to give a user access to all the partitions the user has access to, not just the partition in which the Master keypad is located. This is different from a Standard keypad in that Standard keypads only give access to the single partition in which they are located.
least two seconds. The system will also drop out of Single Partition Mode after 40 seconds without a keypad entry. 7.7 Keypad Error Displays 7.7.
7.8 Testing Your System 7.8.1 Zone (System Walk) Test The Zone Test is used to confirm that detectors will report alarms to the keypad. A Zone Test works on all zones, except 24-hour zones and fire zones. While the keypad is in a Zone Test, no control panel alarms will activate an alarm, except 24-hour zone alarms and fire alarms; these will override the Zone Test function. To perform a Zone Test: • Press [PIN] + [#] [8] [1]. - The DS7445/DS7445i zone LEDs of any untested zones will flash.
8.0 How to Program the Control Panel 8.1 Entering the Programmer’s Mode To enter the Programmer’s Mode, enter the Programmer’s Code followed by [#] [0]. Shorting the program pads (see section 2.0 for location) on the control panel will also activate Programmer’s Mode. NOTE: The factory set default Programmer’s Code is [9] [8] [7] [6]. If the system has been reprogrammed for 6-digit PINs, the default Programmer’s Code will be [9] [8] [7] [6] [5] [4]. 8.
9.0 Understanding the Programming Charts The Programming Reference Guide makes use of three types of charts. Each is described below. If the chart looks like this, a combination of features is available to be programmed for that particular address.
10.0 Programming 10.1 General Control Programing: Program Address (0000) General Control programming defines the system-wide general operating parameters. See Glossary (section 6.1) for further details.
Programming a Zone Programming a Zone is a four step process. These steps must be performed, in order, to program a zone. • • • • Step 1 is programming Zone Functions (what the zone will do in alarm), Step 2 is assigning a Zone Function to the zone. Step 3 is assigning a Zone Type to the zone. Step 4 is assigning the zone to a partition. Step 1: Programming the Zone Functions 10.2 Zone Function Programming: Program Addresses (0001-0030) A Zone Function is the description of how a zone will behave.
Step 2: Assigning a Zone Function to the Zone In this step, a Zone function is assigned to the Zone. 10.3 Zone Programming: Program Addresses (0031-0278) In Zone Programming, each zone is defined according to its input (single or multiple zone input, or a DS7465) and its Zone Function (1-30) or Output Function (1-24). The DS7465’s relay is the only device that will follow the output functions; its input loop will follow a zone function. All single and multiple zone inputs will follow a zone function.
Step 3: 10.4 Assigning a Zone Type to the Zone Zone Programming: Zone Type Program Addresses (0415-0538) In Zone Programming, each zone is defined according to its Input (single or multiple zone input, or a DS7465) and its Zone Function or Output function (1-24). The DS7465’s relay is the only device that will follow the output functions; its input loop will follow a zone function. All single and multiple zone inputs will follow a zone function. See section 6.3 for further details.
Step 4: Assigning a Partition to the Zone 10.5 Zone Partition Assignment: Program Addresses (0287-0410) In Zone Partition Assignment, each zone is assigned to a partition. By default, all zones are assigned to partition 1. The partition assignment for odd numbered zones is programmed in the first data digit of these addresses. The partition assignment for even numbered zones is programmed in the second data digit of these addresses.
10.6 Zone Bypass Programming: Program Addresses (2721-2724) Zone Bypass programming determines which zone functions can be bypassed. Zone functions that can not be bypassed can not be force armed either. Fire zones can never be manually bypassed, but can be force armed. The Default of [0] or [8] means those zones can be bypassed. PA 2721 Data Digit Note: This programming item does not affect Custom Arming Programming (PA 2725-2778) or Swinger Shunt Bypasses (see programming for Program Address 0000).
PA 2723 Data Digit 1 2 Enter the Data Digit as a: Select Options 1 2 3 4 5 6 7 8 9 *0 *1 *2 *3 *4 *5 Zone Function 17 Can Be Bypassed Zone Function 18 Can Be Bypassed Zone Function 19 Can Be Bypassed Zone Function 20 Can Be Bypassed *0 - *5 are Hex values. They will display as A - F at the keypads.
10.7 Output Programming: Program Addresses (2734, 2735, 2736) Output programming defines the event, partition, and type of alarm (burglary or fire) that will trigger each of the three physical outputs on the control panel. See section 3.0 for the location of the physical outputs on the control panel. See Glossary (section 6.4) for further details. Programmable Output 1 will be ON for 10 seconds after pressing [System Reset]. Programmable Output 2 will be OFF for 10 seconds after pressing [System Reset].
10.8 Output Partition Assignment: Program Addresses (2737-2738) In Output Partition Assignment, each On-board output is assigned to a partition. By default, outputs are assigned to all partitions.
10.10 Quick Arm Control Programming: Program Address (3477) Quick Arm Control programming defines which partitions can be quick armed (armed without requiring a PIN to be entered). DS7400Xi ( 4+) Reference Guide Copyright © 2007 Bosch Security Systems, Inc.
10.11 Keypad Assignment Programming: Program Addresses (3131-3138) Keypad Assignment Programming is where you assign the keypad type and the partition to which it belongs. See Glossary (section 6.6) for further details. Each keypad must have its own Bus address. This must also be selected on the keypad via its address pins. See DS7445/ DS7447 Installation Guide (P/N: 22235). One keypad must be selected as keypad 1.
10.13 Emergency Key Programming: Program Addresses (3147-3148) Emergency Key and Panic Key programming disables or activates these keys (the A, B, and C keys) located on the keypads and/or keyfobs. It also determines a silent, pulsed, or steady alarm. See Glossary (section 6.7) for further details.
10.14 Custom Arming Programming: Program Addresses (2725-2728) (Continued) PA 2728 Data Digit Enter the Data Digit as a: Select Options 0 1 2 3 4 5 6 7 8 9 *0 *1 *2 *3 *4 *5 1 2 Bypass Zone Function 25 Bypass Zone Function 26 Bypass Zone Function 27 Bypass Zone Function 28 Enter the Data Digit as a: *0 - *5 are Hex values. They will display as A - F at the keypads.
10.15 Force Arming and Ground Fault Detect Programming: Program Address (2732) Force Arming programming defines how many zones may be Force Armed using an Arming sequence followed by the [Bypass] key. With this entry, all violated zones (up the programmed limit) will automatically be Force Armed (bypassed). Ground Fault Detect programming determines whether or not the control will detect a ground fault condition. See Glossary (sections 6.9 and 6.10) for further details.
10.16 Commercial Fire Mode Programming: Program Address (2733) This section describes how to define the parameters for the Commercial Fire Mode. See Glossary (section 6.11) for further details. When programming Fire zones, it is recommended that they be zone functions 12 and 13 (see sections 10.2, 10.4 and 10.16.3). 10.16.1 When Central Station Commercial Fire Mode is chosen, address 4021 (DS7420i: Dual Phone Line/Bell Supervision Module Output Programming), will be forced to a value of 5. 10.16.
10.17 Open/Close Report Control Programming: Program Address (3149) Data Digit 1 See Glossary (section 6.12) for further details.
10.20 Timer Programming: Program Addresses (4028-4030, 4032-4033) Entry and Exit Delay Timers are in 5 second intervals (the maximum delay time is 255 seconds). For example: 5 sec. = 01 15 sec. = 03 20 sec. = 04 30 sec. = 06 45 sec. = 09 60 sec. = 12 255 sec. = 51 Data Digit 1 2 Exit Delay Time Address 4030 0 to 51 (0 to 255 sec.*) Default = 12 (60 sec.) *5 second intervals Data Digit 1 2 Data Digit 1 2 May be forced to a different value when in Commercial Fire Mode. See section 10.18.3.
10.22 General Authority Programming: Program Address (3421-3424) This allows for a user with a General Authority level to Arm, Disarm and Bypass specified zones. See Glossary (section 6.1) for further details.
10.24 DS7412 RS232 Interface Control Programming: Program Address (4019) DS7412 RS232 Interface Control Programming allows you to enable or disable the DS7412 and to select which history events are sent to the printer as they occur. Selecting “No Events” will cause the history to be printed only on command. To print the History Buffer starting from the most recent event, enter the Master Code followed by [#] [0] [8]. To stop printing, enter Master Code [#] [0] [8] again. 10.
10.27 Report Programming: Program Addresses (3207-3419) • To send the User number along with open, close, or partial close reports: place an ‘F’ (*5) in the extended digit. • To disable a report (meaning that nothing will be sent), place a ‘0’ in the reporting digit. • When using SIA or Contact ID format, place a ‘1’ in the reporting digit of each report you wish to enable. It is not necessary to program the extended digit. • For suggested values for 4/2, BFSK and Pager format, see section 12.1-12.3.
Report Programming (Continued) Page 54 P/N: F01U035325-01 Copyright © 2007 Bosch Security Systems, Inc.
Report Programming (Continued) 10.28 Phone/DS7416i Routing Control: Program Addresses (3153-3154) If address 3155 is programmed to “Try DS7416i first”, the following addresses can be used to control report routing. If address 3155 is set to “Send alarms via both DS7416i and digital”, this will force alarms to go to the phone even if the Phone/DS7416i report routing for alarms does not specify phone usage. Phone/DS7416i report routing (3153). First digit: Open and Close Reports.
10.29 Account Code Programming: Program Addresses (3429-3459) Account Code programming defines the number transmitted to the central station that identifies this panel. It also identifies which partition is reporting from this panel. 1. Account Codes are programmed from left to right. If programming a 3 digit Account Code, the fourth digit of the address must be “0.” For example: If the Account Code is 121, program 1210 in the programming address. 2.
10.30 Phone Number General Control Programming: Program Address (3155) See Glossary (section 6.14) for further details. Data Digit Enter the Data Digit as a: 0 1 2 3 4 5 6 7 8 9 *0 *1 Select Options 1 2 Enable remote programmer call-back Dial pulse on all phone numbers Dial tone on all phone numbers** Dial tone, switch to pulse if required ΔΔ Try DS7416i first *0 - *1 are Hex values. They will display as A - B at the keypads. ΔΔ = If this option is selected, see address 3153-3154.
10.31.1 Compatible Receivers The following table lists those Digital Alarm Communicator Receivers and Formats that are compatible with the DS7400Xi. NOTE: Contact your central station regarding which format to use and if a special line card is required. l = The Format type the DS7400Xi supports and the Digital Alarm Communicator Receiver accepts. 10.32 Phone Answering Programming: Program Address (3158) See Glossary (section 6.15) for further details.
10.33 Pager Delay Time: Program Address (4038) When using the Pager Dialing Format (selected in Addresses 3156 and 3157), you may insert a delay time after the phone number is dialed and before the reports are sent to the pager system. This delay can be used to allow for greeting and instruction messages in the pager system. This delay will not affect any other report formats. Data Digit 1 2 Pager Delay Time Address 4038 Default = 10 seconds 0 to 99 seconds 10.
10.36 Octal Relay Module Output Programming 10.36.1 Follow Action: Program Addresses (2740-2771) To program an Octal Relay Module for Follow Action, follow the steps below. 1. Select Octal Relay to program. 2. Program Data Digit 1 of Program Address A as 1 for Follow Action. 3. Program Data Digit 2 of Program Address A for the desired function. 4. Program Data Digit 1 and 2 of Program Address B for the desired function.
10.36 Octal Relay Module Output Programming (continued) 10.36.2 Follow System Wide Event: Program Addresses (2740-2771) To program an Octal Relay Module for Follow System Wide Event, follow the steps below. 1. Select Octal Relay to program. 2. Program Data Digit 1 of Program Address A as 2 for Follow System Wide Event. 3. Program Data Digit 2 of Program Address A for the desired function. 4. Program Data Digit 1 and 2 of Program Address B for the desired function.
10.36 Octal Relay Module Output Programming (continued) 10.36.3 Follow Function: Program Addresses (2740-2771) To program an Octal Relay Module for Follow Output Function, follow the steps below. 1. Select Octal Relay to program. 2. Program Data Digit 1 of Program Address A as 3 for Follow Function. 3. Program Data Digit 2 of Program Address A for the desired function. 4. Program Data Digit 1 and 2 of Program Address B for the desired function.
10.36 Octal Relay Module Output Programming (continued) 10.36.4 Follow Zone: Program Addresses (2740-2771) To program an Octal Relay Module for Follow Zone, follow the steps below. 1. Select Octal Relay to program. 2. Program Data Digit 1 of Program Address A as 4 for Follow Zone. 3. Program Data Digit 2 of Program Address A for the desired function. 4. Program Data Digit 1 and 2 of Program Address B for the desired zone.
Page 64 P/N: F01U035325-01 Copyright © 2007 Bosch Security Systems, Inc.
10.36 Octal Relay Module Output Programming (continued) 10.36.
10.37 Output Function Programming: Program Addresses (2772-2843) Output programming allows you to have the Outputs follow status events by partition or system-wide, or follow zone outputs in an Input/ Output Cross Matrix. See the Programming Addresses Worksheet (P/N: 43850) for a description of each address. See Glossary (section 6.4) for further details. Select Option DD Latch ON after Zone Alarm 0 ON during Entry Pre-Alert 1 ON when system is armed 3 Zone alarm 6 Zone Alarm delayed by 20 sec.
10.37.1 Output Function Partition Assignment: Program Addresses (2852-2863) 10.38 Dual Phone Line/Bell Supervision Module Output Programming: Program Address (4021) The Dual Phone Line/Bell Supervision Module is the DS7420i. See section 1.18 for further details. When in Central Station or Local Commercial Fire Mode, this address will be forced to specific values (see sections 10.16.1 and 10.16.2). DS7400Xi ( 4+) Reference Guide Copyright © 2007 Bosch Security Systems, Inc.
10.39 Call-Out Timer Programming: Program Addresses (4022-4025) This section allows you to define the Hour and Minute for the Communicator Test Report and Remote Programmer Call-Out. The default time for the Communicator Test Report to be sent and for the control to call the Remote Programmer is Midnight. 10.
10.41 Alpha Description Programming: Program Addresses (0545-2720, 5001-6920) Alpha Description Programming allows up to 16 characters to be programmed for the description of each partition or zone (e.g. “J. Hill’s Office”). If a description is less than 16 characters, leave the remaining address(es) blank. Once programmed, the descriptions will be displayed on the alpha keypads.
10.41.1 Alpha Description Programming: A Worksheet Page 70 P/N: F01U035325-01 Copyright © 2007 Bosch Security Systems, Inc.
10.41.1 Alpha Description Programming: A Worksheet (Continued) DS7400Xi ( 4+) Reference Guide Copyright © 2007 Bosch Security Systems, Inc.
10.41.1 Alpha Description Programming: A Worksheet (Continued) Page 72 P/N: F01U035325-01 Copyright © 2007 Bosch Security Systems, Inc.
10.41.1 Alpha Description Programming: A Worksheet (Continued) DS7400Xi ( 4+) Reference Guide Copyright © 2007 Bosch Security Systems, Inc.
10.42 Phone Number Programming: Program Addresses (3159, 3175, 3191) 10.42.1 Phone Number 1 Programming: Program Address (3159) 1 2 3 4 5 6 7 8 9 10 11 12 13 14 15 16 17 18 19 20 21 22 23 24 25 26 27 28 29 30 31 32 10.42.2 Phone Number 2 Programming: Program Address (3175) 1 2 3 4 5 6 7 8 9 10 11 12 13 14 15 16 17 18 19 20 21 22 23 24 25 26 27 28 29 30 31 32 10.42.
11.0 Installation Guide for UL Listed Systems 11.
11.2 be programmed for not less than 4 minutes. Installation Considerations • Failure to install and program the control in accordance with the requirements in this section voids the listing mark of Underwriters Laboratories, Inc. • The maximum standby battery capacity is 35 Ah @ 12 VDC. • The total nominal standby current must not exceed 1.5 A nor 2.5 A when in alarm. • The control must be mounted indoors and within the protected area.
11.4 General System Requirements Applies to the following grades only: Local Burglary Grade A using Digital Alarm Communicator Alarm Transmitter (DACT) Police Station Connection - Grades AA and A using DACT and DS7416i Communications module. Grade A using DACT and local Bell. • An DS7416i (or DataTAC) interface module. • The DS7416i module and antenna should be mounted within the protected area. • The Detection Systems’ model DS7481 Phone Line Monitor. 1.
11.5 • Open Report (Program Address 3331) must be programmed. • Close Report (Program Address 3332) must be programmed. • 24-Hour Check-In Reports (Program Addresses 3340 and 3347) must be programmed. Commercial Fire Alarm A. Central Station (DACT) and Local The control must be installed in accordance with NFPA 72. Required Accessories: • DS7420i Dual Phone Line/Bell Supervision Module. • For Local Commercial Fire Alarm: A Listed notification appliance such as a Wheelock 46T-G10-12 bell or 34T-12 horn.
12.0 Report Programming 12.
12.
12.3 Personal Dialing Format This is a 2 pulse per second (PPS) 0/2 (no account code/2 report event digits) format intended for manual reception, i.e. the panel will call a phone number where a person is expected to answer. After a call is made, the panel will start sending the first report. If the report was a “Communication Test” and Program Address 3340 had a value of 12 the person answering the phone would hear 1 pulse followed by a 1 second delay, then 2 pulses followed by a 3 second delay.
Pager Format (Continued) Reports with Restorals Suggested Values Report Address Restoral Value Address Trouble Value Address Trouble Restoral Value Address Value Bypass Address Bypass Restoral Value Address Value Zone Function 1 3209 1 1 3241 6 4 3271 3 1 3301 6 5 3358 6 1 3388 6 6 Zone Function 2 3210 1 2 3242 6 4 3272 3 2 3302 6 5 3359 6 1 3389 6 6 Zone Function 3 3211 1 3 3243 6 4 3273 3 3 3303 6 5 3360 6 1 3390 6 6 Zone Function
13.0 Report Programming - Values Sent 13.
13.1 SIA Formats (Continued) Reports Page 84 P/N: F01U035325-01 SIA event code SIA data field Fire walk test report F I Fire walk test restoral F K None Zone Number Zone Number Zone Number Zone Number Dirty Smoke Chamber report M C Dirty Smoke Chamber restoral M O Mux. Smoke low temperature report M F None Mux.
13.
14.0 Multiplex Zone Addressing Guide Before installing a multiplex device, its address and other information must be programmed into the control panel. (To disable or remove a multiplex point, set the program address for 00 [see Section 10.4]). If using a DS7436 Multiplex Expansion Module, programming must be done using bus “A.” Perform the following: • Program the control panel. - Refer to sections 10.2-10.5, Zone Programming.
15.0 Troubleshooting Guide 15.1 Keypad Problems Symptom Probable Cause Possible Solution Entry Error: Please Re-enter will display on keypad. A three beep error tone will sound continuously. a) Two or more keypads share the same address. a) Install keypad jumper properly in back of keypads. b) The DS7430 or DS7433 is installed in the wrong pins. b) Be sure the DS7430 or DS7433 is installed properly. a) The keypad not addressed properly.
Keypad Problems (Continued) Symptom Chime Mode (#7) does not work when a zone is faulted. Some functions won’t work on a Master keypad. 15.2 Probable Cause Possible Solution a) Not activating for interior zones. a) Chime mode only activates for perimeter zones - Chime mode must be programmed. Also, if the perimeter zone has trouble enabled (trouble on open), the chime won’t work if that zone is opening. b) The keypad is not assigned to the same partition as the zone being activated.
Zone Problems (Continued) Symptom Probable Cause Possible Solution Zones 9 and above show Not Ready, Zone Trouble. a) The multiplex expansion module is not installed properly. a) Make sure the multiplex expansion module is seated properly in the upper pins on the DS7400Xi circuit board. b) Multiplex wiring is missing or is not installed properly. b) Check wiring and perform a system reset. c) 8-Input remote module DIP switches are not set properly.
General System Problems (Continued) Symptom Probable Cause Possible Solution Power LED is flashing, keypad A control trouble exists. displays Control Trouble Press #87. Press #87 to determine the trouble condition. #87 display = Oct. Relay Fault #89 display = System Fault 20 a) Check the wiring to the module. a) The octal relay module (DS7488) is defective or the wiring to the module is defective. b) There is no DS7488 or a DS7488 has been removed from the system.
General System Problems (Continued) Symptom Probable Cause Possible Solution #87 display = Aux Power Fault The auxiliary power output has been shorted. Remove wiring from auxiliary power and check for shorts. #87 display = Keypad Fault a) The keypad wiring is defective. a) Check keypad operation and wiring. b) A keypad is missing. b) Install a keypad. c) A keypad has been programmed, but is not intended in this system. c) Remove from programming (3131-3138).
General System Problems (Continued) Symptom #87 display = Battery Trouble #87 display = Zone Trouble Probable Cause Possible Solution a) The battery failed a battery test. a) If there has just been a power failure, wait at least two hours for the battery to recharge then perform a System Reset to re-test the battery and clear the error. b) The battery is defective. b) Replace the battery. c) The wiring to the battery is disconnected. c) Check wiring.
16.
Address Description 0189 Zone Number 159 0190 Zone Number 160 0191 Zone Number 161 0192 Zone Number 162 0193 Zone Number 163 0194 Zone Number 164 0195 Zone Number 165 0196 Zone Number 166 0197 Zone Number 167 0198 Zone Number 168 0199 Zone Number 169 0200 Zone Number 170 0201 Zone Number 171 0202 Zone Number 172 0203 Zone Number 173 0204 Zone Number 174 0205 Zone Number 175 0206 Zone Number 176 0207 Zone Number 177 0208 Zone Number 178 0209 Zone Number 179 0210 Zone Number 180 0211 Zone Number 181 0212 Zone
Address Description 0392 Zone 211 & 212 Partition 0393 Zone 213 & 214 Partition 0394 Zone 215 & 216 Partition 0395 Zone 217 & 218 Partition 0396 Zone 219 & 220 Partition 0397 Zone 221 & 222 Partition 0398 Zone 223 & 224 Partition 0399 Zone 225 & 226 Partition 0400 Zone 227 & 228 Partition 0401 Zone 229 & 230 Partition 0402 Zone 231 & 232 Partition 0403 Zone 233 & 234 Partition 0404 Zone 235 & 236 Partition 0405 Zone 237 & 238 Partition 0406 Zone 239 & 240 Partition 0407 Zone 241 & 242 Partition 0408 Zone 24
Address Description 1377 Alpha for Zone 1393 Alpha for Zone 1409 Alpha for Zone 1425 Alpha for Zone 1441 Alpha for Zone 1457 Alpha for Zone 1473 Alpha for Zone 1489 Alpha for Zone 1505 Alpha for Zone 1521 Alpha for Zone 1537 Alpha for Zone 1553 Alpha for Zone 1569 Alpha for Zone 1585 Alpha for Zone 1601 Alpha for Zone 1617 Alpha for Zone 1633 Alpha for Zone 1649 Alpha for Zone 1665 Alpha for Zone 1681 Alpha for Zone 1697 Alpha for Zone 1713 Alpha for Zone 1729 Alpha for Zone 1745 Alpha for Zone 1761 Alpha f
Address Description 3209 Zone Function 1 Alarm Report 3210 Zone Function 2 Alarm Report 3211 Zone Function 3 Alarm Report 3212 Zone Function 4 Alarm Report 3213 Zone Function 5 Alarm Report 3214 Zone Function 6 Alarm Report 3215 Zone Function 7 Alarm Report 3216 Zone Function 8 Alarm Report 3217 Zone Function 9 Alarm Report 3218 Zone Function 10 Alarm Report 3219 Zone Function 11 Alarm Report 3220 Zone Function 12 Alarm Report 3221 Zone Function 13 Alarm Report 3222 Zone Function 14 Alarm Report 3223 Zone F
Address Description 3402 Zone Func. 15 Bypass Restoral 3403 Zone Func. 16 Bypass Restoral 3404 Zone Func. 17 Bypass Restoral 3405 Zone Func. 18 Bypass Restoral 3406 Zone Func. 19 Bypass Restoral 3407 Zone Func. 20 Bypass Restoral 3408 Zone Func. 21 Bypass Restoral 3409 Zone Func. 22 Bypass Restoral 3410 Zone Func. 23 Bypass Restoral 3411 Zone Func. 24 Bypass Restoral 3412 Zone Func. 25 Bypass Restoral 3413 Zone Func. 26 Bypass Restoral 3414 Zone Func. 27 Bypass Restoral 3415 Zone Func.
Index Symbols D K 24-Hour Zone ............................................... 19 4/2 Format ..................................................... 79 Day Monitor ................................................... 20 Defaults, Factory .......................................... 32 Delayed Arming .............................................. 1 Dirty Chamber/Smoke ........................... 26, 93 Disarming ........................................................ 1 from Master Keypad ....................
Index - continued P Pager Delay .................................................. Panic Key .............................................. 22, Panic/Duress Output .................................... Partition .................................................... 4, Partition Assignment ..................................... Partition Control Programming .............. 21, Perimeter Arming ............................. 1, 19, Perimeter Instant ..............................