
User Manual


Table Of Contents
- Revision History
- Table of Contents
- Figures
- Tables
- 1. About This Manual
- Copyright © 2012 by Despatch Industries.
- Printed and bound in the United States of America.
- Table 1. Operating/Environmental Conditions (For indoor use).
- 2. Safety
- 2.1. Safety Information
- 2.1.1. Lockout
- 2.1.1.1. Lockout Requirements
- 2.1.1.2. Lockout Procedure
- 2.2. Provisions for Lifting and Carrying
- 2.3. Maintenance
- 2.4. Electrical Power
- 2.5. Fire
- 2.6. Equipment Lockout Requirements
- 2.6.1. Emergency Stop
- 2.7. Disconnecting Devices
- 2.7.1. Power Requirements
- 2.7.2. Disconnecting Hard-Wired Units
- 2.7.3. Disconnecting Corded Units
- 2.7.4. Disconnecting Units with Optional Disconnect Switch
- 3. Theory of Operation
- Table 2. Control Instrument Explanations.
- Review the Protocol 3 Controller Owner’s Manual for more information.
- Table 3. High Limit Instrument Explanations.
- 4. Assembly & Setup
- 5. Operation
- Table 4. Control Instrument Operating Parameters.
- Table 5. Control Instrument Set-up Parameters.
- Refer to Table 5 to change tuning parameters, if necessary.
- Table 6. High Limit instrument Setup Parameters.
- 6. Maintenance
- 6.1. Checklist
- 6.2. Lubrication
- 6.3. Cleaning and Decontamination
- 6.3.1. Cleaning the LBB Series Oven
- 6.3.2. Decontaminating the LBB Series Oven
- 6.4. Routine Tests
- 6.4.1. Test Control Instrument
- 6.4.2. Test High Limit Instrument
- 6.5. Replacement Parts
- 6.5.1. Replace the Control Instrument
- 6.5.2. Replace High Limit Instrument
- 6.5.3. Replace (Optional) Protocol 3 Controller
- 6.5.4. Replace Heater Unit
- 6.5.5. Replace Fan Motor
- 7. Troubleshooting
- Table 7. Common Technical Issues and Remedies.
- 8. Appendices
- Each oven schematic (Section 0) shows the wiring for this option.
- Each oven schematic (Section 8.4) shows the wiring for this option.
- Each oven schematic (Section 0) shows the wiring for this option.
- Table 8. LBB1-23A-1 Parts.
- Table 9. LBB1-23B-1 Parts.
- Table 10. LBB1-43A-1 Parts.
- Table 11. LBB1-43B-1 Parts.
- Table 12. LBB1-69A-1 Parts.
- Table 13. LBB1-69B-1 Parts.
- Table 14. LBB2-12-1 Parts.
- Table 15. LBB2-18-1 Parts.
- Table 16. LBB2-27-1 Parts.
OPERATION LBB Series Oven Owner’s Manual
40 Version 15
Copyright © 2012 by Despatch Industries.
All rights reserved. No part of the contents of this manual may be reproduced, copied or transmitted in any form or by any
means including graphic, electronic, or mechanical methods or photocopying, recording, or information storage and
retrieval systems without the written permission of Despatch Industries, unless for purchaser's personal use.
SHif
PV shift value
(offset).
Moves the display temperature to the oven
temperature
0
Filt
PV filter.
If the process value is unstable to read, increasing this
value steadies the input signal.
0
out1
Output 1
function.
Function of the output. Must be set to Hi. for High Limit
control.
Hi.
o1.Hy
Output 1
hysteresis
value.
Amount of degrees the temperature must be below the
setpoint temperature before the High Limit can be reset
2.0
HSP.L
Lower limit of
HSP1.
Minimum temperature setting for the High Limit
0 (32 if F)
HSP.H
Upper limit of
HSP1.
Maximum temperature setting for the High Limit
204 (400 if
F)
out2
Second output
Despatch does not use this function
None
diSP
Normal display
format.
Used to select the display in normal condition:
PV = Process Value
SP! = High Limit Setpoint
SAFE = The word “safe” in normal condition
PV
PuHi
Process value
high
Read-Only Data: Maximum process value since last
UNLOCK operation.
None
PuLo
Process value
low
Read-Only Data: Minimum process value since last
UNLOCK operation.
None
t.Abn
Abnormal time
Total accumulated minutes of abnormal conditions
since last UNLOCK operation.
None
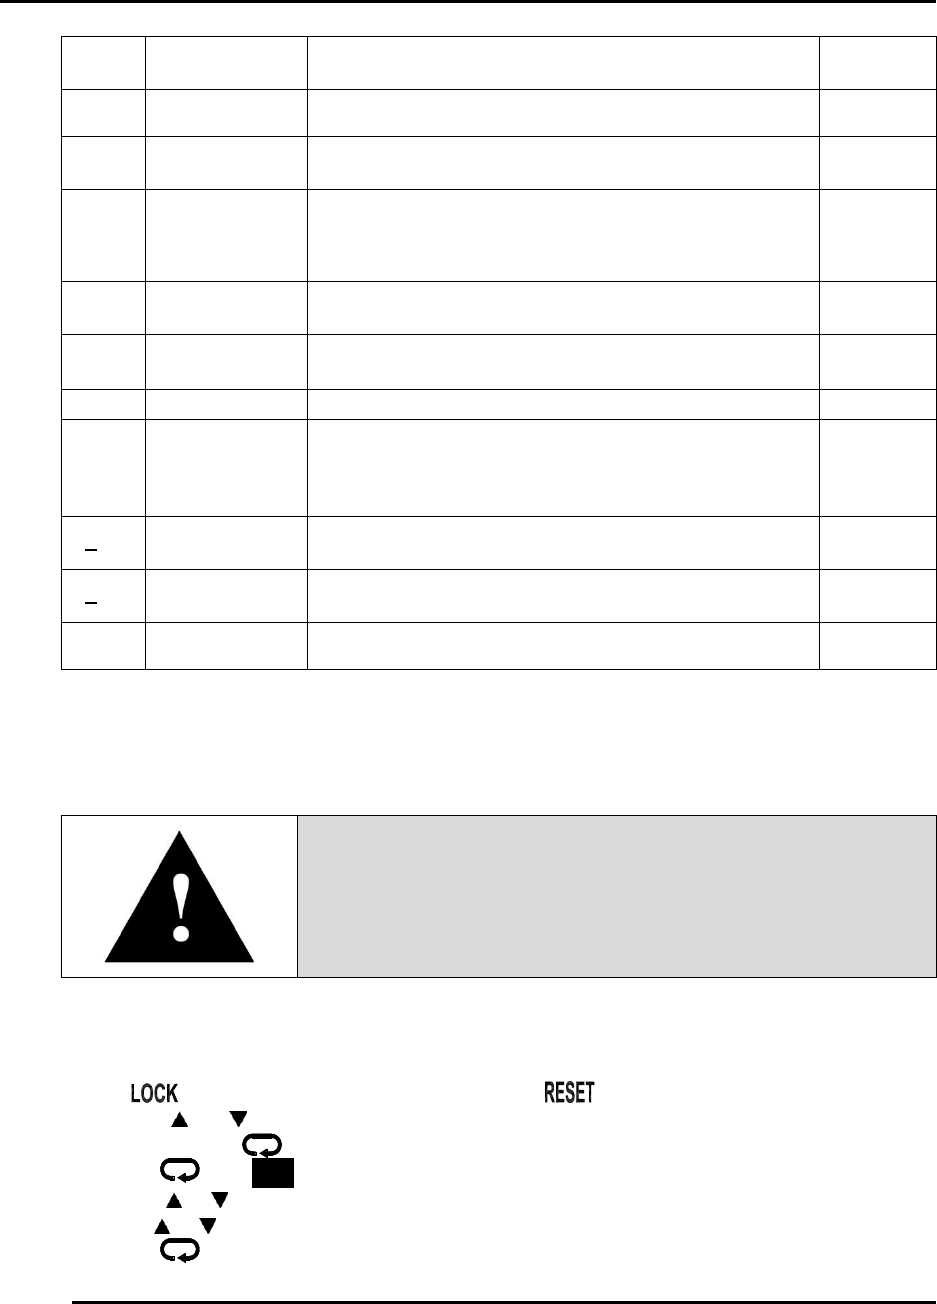
5.4.8. Change High Limit instrument Display from Centigrade to
Fahrenheit
Warning!
Changing program parameters alters the function of the Control.
Proceed carefully and fully understand each parameter before
changing that parameter.
Configure the High Limit instrument for either °C or °F. Use the following steps to change High
Limit instrument from displaying °C to °F (and for changing back):
1. If on the High Limit instrument is lit, press and hold for four (4) seconds to
enable and .
2. Press and hold for four (4) seconds to enter Setup mode.
3. Press until unit displays.
4. Press or to display value.
5. Use or to move to the desired setting.
6. Press to enter the value and advance to the next parameter.