
Instructions / Assembly
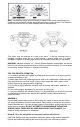


electrical shock.
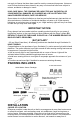
WIRING THE LIGHT CONTROL
Fixture is pre-wired for quick and easy installation for both professionals and
do-it-yourself alike:
DO NOT REMOVE ANY CRIPMP CONNECTORS PREINSTALLED!! ONLY WHITE,
BLACK AND GREEN WIRES WILL NEED TO BE ATTACHED TO INCOMING LINES!!
1. Check local electrical codes before installation. Use only 120 Volt 60hz
power supply.
2. Be sure power is turned off at breaker or fuse box. Turning switch off is not sufficient
to prevent electrical shock!!
3. Remove old light fixture.
4. The new fixture mounts best on standard 4” octagonal electrical box. If your box is an
odd size, you may need to purchase an additional base in a proper size from an
electrical supplier. Check size carefully before attempting to mount fixture.
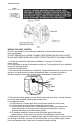
5. Slide the black foam gasket over the white, black and green wires. It seals the base
to the wall when installed, helping keep moisture out.
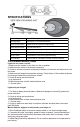
6. See diagram above:
A: Using wirenuts, connect white wire from fixture to white wire from house.
B: Connect black wire from fixture to black wire from house.
C: Connect green ground wire from motion detector to green ground wires from
fixture and house. In the event your wiring has no ground wire, contact a
qualified electrician to provide suitable ground.
D: All wirenuts installed to connect wired should be taped in place with
electrical tape to assure they cannot come off accidentally at a later time.
7. Install base of lamp to the 4” octagonal base using included screws. In the event your
box is deep in the walls, too deep for included screws, you may obtain longer screws
from local hardware store. Make sure you match threads correctly.
MAIN
CIRCUIT BREAKER OR FUSE