
User Guide


MathType User Manual
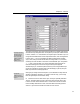
this dialog to the toolbar. You can add as many characters from your fonts to the
toolbar as can fit. Then you can enter these characters at any time into your
equations, regardless of your current style definitions.
That does it for Tutorial 5, so choose Select All (C
TRL+A) from the Edit menu and
press B
ACKSPACE or DELETE to clear the window for the next tutorial.
Tutorial 6: Spacing and Alignment
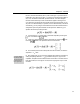
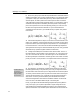
In our next example we introduce some of MathType’s facilities for controlling
spacing and alignment in equations. We are going to create the following pair of
equations:
1
0
1
0
() limsup ()
()() limsup (,)
n
n
n
n
axdx a
axbxdx ab
φ
ψ
→∞
→∞
≤
≤
∫
∫
Note that these equations are arranged so that their ≤ signs are vertically aligned,
and they both contain a “lim sup” construction of a type that we have not used
before. You can create these equations as follows:
Expanding Integrals
Integral signs are
normally a constant
size. You can create an
expanding integral by
holding down the SHIFT
key while you choose an
integral template from
the integrals palette.
Parentheses Template
You may prefer to use
the template instead of
typing ( and ). Using the
template can give your
document a more
consistent look. The
template also includes
more space around it,
so you may not need to
add the thin space as
shown here. We’re
trying to teach you the
different ways to create
equations; obviously the
final choice is up to you!
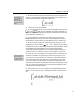
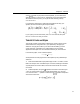
1. Insert a definite integral template by clicking on the icon or by pressing
C
TRL+I, type in the integrand (the large slot), and fill in the 0 and 1 as the limits
of integration (the two small slots). You probably won’t want the parentheses in
the integrand to be of the “expanding” variety, so you can just type them from
the keyboard, rather than using the
template. Your equation should now look
like this:
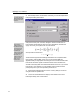
2. To improve the appearance of our equation, we should insert a thin space
(one sixth of an em) in between the a(x) and the dx in the integrand. MathType
can not do this automatically, so we provide you with a convenient way of
manually entering a space of the correct size. The
palette provides a set of
five icons representing commonly used spaces, as shown in the following table.
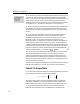
Icon Keystroke Alt. Keystroke Description
SHIFT+SPACE CTRL+K,0 Zero space
CTRL+ALT+SPACE CTRL+K,1 One point space
CTRL+SPACE CTRL+K,2 Thin space (sixth of an em)
CTRL+SHIFT+SPACE CTRL+K,3 Thick space (third of an em)
None CTRL+K,4 Em space (quad)
36
Place the insertion point between the “)” and the “d” by clicking there, and insert
a thin space either by choosing the
icon (it’s on the right in the top row of the
palette) or by pressing C
TRL+SPACEBAR.