
User Guide


MathType User Manual
User 1 typesize
A general-purpose typesize to be used for whatever you want.
User 2 typesize
A second general-purpose typesize.
Automatic Size Assignments
Each slot in a MathType equation has a typesize associated with it. When you
insert characters into a slot, they are assigned the typesize of that slot. When you
insert a template into a slot, the typesizes of the new slots are based on the
typesize of the existing slot. For example, if an integral template is inside a
Subscript typesize slot, its integrand slot is Subscript typesize, its integral sign is
Sub-symbol typesize, and its limits are in Sub-subscript typesize. Although you
may nest templates within templates to many levels, the typesizes automatically
assigned to slots will never be any smaller than the Sub-subscript typesize, in
accordance with standard mathematical typesetting rules.
Explicit Size Assignments
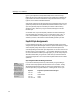
Faster Size Changes
Make use of the User 1
and User 2 typesizes
instead of explicit point
sizes because this
allows you to change
the size of all such text
by simply changing the
definition of the
typesize.
For most equation typing tasks, you will allow MathType to automatically assign
typesizes to characters. Sometimes you might want to explicitly assign either a
typesize or an explicit point size to characters, overriding MathType’s automatic
typesize assignments. You do this in more or less the same way as in a word
processor — you can either change the current size to the desired one before you
begin typing, or you can assign a typesize or point size to selected characters
after you type them. In both cases you choose the desired typesize from the Size
menu (using the Other command for an explicit point size). Of course, there are
keyboard shortcuts for all these operations.
Spacing
MathType’s formatting algorithms are controlled by a number of spacing
dimensions, or measurements. These include subscript depth, numerator height
in fractions, fraction bar overhang — thirty dimensions in all. You can adjust the
values of any of these dimensions by using the Define Spacing command on the
Format menu. This command displays a dialog that lets you scroll through the
list of dimensions and change the value of any of them. For each dimension, it
displays a picture illustrating the aspect of equation formatting that it controls.
100