
Installation manual

11. Saving and Loading Data and Settings
Operation and Installation Manual for SOLIVIA 2.0/2.5/3.0/3.3/3.6/5.0 EU G4 TR
64
11.3 Firmware Updating
The rmware can be updated via the USB interface.
The rmware update is performed in the solar inverter in two steps:
● Manual loading of data from USB drive
● Automatic updating of solar inverter's individual controllers
It is possible to load the data under AC or DC voltage. The data can
also be loaded at night with no DC voltage.
The solar inverter's individual controllers can, however, only be
updated under DC voltage. The DC voltage must be applied for 10
minutes uninterrupted so that the rmware update is automatically
performed.
The following instructions describe loading the rmware data from
a USB drive to the solar inverter. The rmware update is then auto-
matic.
NOTE
The le containing the rmware data must have
the name "Image.hex" and must be located in the
main directory of the USB stick.
Rename the le correctly if necessary! You will
need a PC for this!
➔
USB features
Options
Install settings
-------------------
Production info
SOLIVIA ##
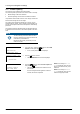
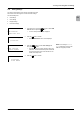
1. In the main menu, press the buttons to select USB
features and then press the
button.
→ A note on IP65 protection is then displayed.
protection.
will lose the IP65
Without cover, you
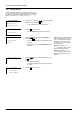
2. Press the button to conrm.
→ The 300 USB features menu is then displayed.
➔
Save swap data
Firmware update
-------------------
300 USB features
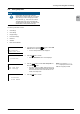
3. Press the buttons to select Firmware Update and
then press the
button.
→ The data is then loaded from the USB drive to the
solar inverter.
Once DC voltage has been applied for at least 10
minutes, the rmware is updated.
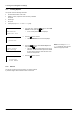
NOTE: If the message File not
found is displayed, make sure the
les are in the main directory of the
USB drive.
NOTE: If the message Pendrive
error is displayed, make sure the
USB drive is properly inserted.