Delphi NAV200 U.S. Edition Welcome Thank you for purchasing the Delphi NAV200 U.S. Edition Portable GPS Navigation System. This system will direct you to virtually any destination without the need for map books or second-hand instructions. The Global Positioning System (GPS) is available free of charge at any time, and is accurate within 16.5 feet. The maps in the Delphi NAV200 package provide street-level detail, allowing door-to-door navigation.
Delphi NAV200 U.S. Edition Warning: DANGER OF ACCIDENT When using your Delphi NAV200 in a vehicle, it is your sole responsibility to install, secure, and use the device in a manner that will not cause accidents, personal injury, or property damage, or in any manner obstruct your view or interfere with the operation of vehicle safety equipment. The user of this product is solely responsible for observing safe driving practices. Do not operate your Delphi NAV200 while driving. Park the vehicle first.
Delphi NAV200 U.S. Edition Table of Contents 4 Section 1 About GPS / Introduction …………………………………. 6 Section 2 Unpacking Delphi NAV200 ………………………………... 8 Memory Cards …………………………………………10 Accessories and Replacement Parts …………………10 Section 3 Installing NAV200 in Your Vehicle……………………….11 Section 4 Features and Controls …………………………………….13 Delphi NAV200 Receiver Controls …………………..13 Section 5 Getting Started………………………………………………14 Powering Up ……………………………………………..14 Inserting a SD Card …………………………………….
Delphi NAV200 U.S. Edition Simulating the Route …………………………………50 Starting Navigation in Extended Mode ………………51 Section 7 Working With the Map ……………………………………..53 Operating the Map ………………………………………53 Representation of the Map in Navigation Mode ……56 Displaying Additional Information on the Map …….57 Configuring Delphi NAV200 …………………………59 Section 8 Useful Functions for Navigation…………………………61 Adding a Route Point During Navigation ……………61 Next Destination ………………………………………..
Delphi NAV200 U.S. Edition Section 1 About GPS / NAV 200 Introduction The Global Positioning System (GPS) is a network of satellites launched by the U.S. military beginning in the1970s. The satellites continuously transmit accurate time and position information, which is freely used by commercial and military applications worldwide.
Delphi NAV200 U.S. Edition • Keep the Delphi NAV200 away from excessive moisture and extreme temperatures. Do not subject the Delphi NAV200 to sudden and severe temperature changes that could cause condensation inside. In the event of moisture condensation, allow the Delphi NAV200 to dry out completely before use. • Always disconnect the Delphi NAV200 from the power supply when leaving the car parked for a long period or when not using the system during travel.
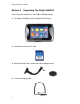
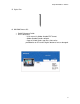
Delphi NAV200 U.S. Edition Section 2 Unpacking The Delphi NAV200 Here’s what you should find in the Delphi NAV200 package: 1. The Delphi NAV200 unit with integrated GPS receiver 2. United States maps on SD card 3. Windshield mount with suction cup and dashboard mount. 4.
Delphi NAV200 U.S. Edition 5. Stylus Pen 6. NAV200 Owners Kit: • • Quick Reference Guide DVD Containing: - User manual in Adobe Acrobat PDF format - Adobe Acrobat Reader software - Copy of United States map files, that can be preloaded to an SD card if original becomes lost or damaged.
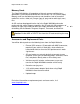
Delphi NAV200 U.S. Edition Memory Cards The Delphi NAV200 has 32 megabytes of internal memory available for the operational system (Microsoft Wince Net Core version 4.2). SD (secure digital) Memory cards are available for purchase and should be used to store other media files such as video (avi), images (jpg, gif, png) and/or audio (mp3, wav) files. An SD card can be plugged into the slot in the Delphi NAV200 and can be purchased with various memory capacities.
Delphi NAV200 U.S. Edition Section 3 Installing Delphi NAV200 in Your Vehicle Warning: To avoid personal injury, follow the safety guidelines and installation instructions provided so that the Delphi NAV200 does not obstruct the view of the driver, interfere with the operation of any airbags and safety features in the vehicle, or become airborne in the case of an accident. Do not attempt to install Delphi NAV200 while driving.
Delphi NAV200 U.S. Edition If the suction cup does not adhere, clean the mounting area of the windshield with a cloth dampened with isopropyl alcohol. Let the area dry, then reapply the suction cup. When the outside temperature is cold,, the windshield may need to be heated before the suction cup will adhere.
Delphi NAV200 U.S. Edition Section 4 Features and Controls Warning: For your safety, program the Delphi NAV200 and enter information about your destination BEFORE you start your journey. Do not operate Delphi NAV200 while driving.
Delphi NAV200 U.S. Edition Section 5 Getting Started Warning: For your safety, program the Delphi NAV200 and enter information about your destination BEFORE you start your journey. Do not operate Delphi NAV200 while driving. Powering Up Power on Press the Power button located on the lower left side for at least one second. Power off Press the Power button located on the lower left side for at least one second.
Delphi NAV200 U.S. Edition Inserting a SD Card Delphi NAV200 has a slot for Secure Digital (SD) cards located in the bottom. Delphi NAV200 will accept SD cards containing digital maps or other data, such as audio (mp3) files, movie (avi) files, or image (jpg) files. The Delphi NAV200 comes equipped with an SD card preloaded with continental U.S. maps (excludes Alaska & Hawaii). The card will already be in position in the SD card slot, and ready to use for navigation.
Delphi NAV200 U.S. Edition Home Screen The main menu offers eight options, each of which are detailed in the sections that follow: At any time you can return to this menu by pushing the Main Menu button or by closing the current mode (accomplished by tapping the “x” in the upper right corner of the screen).
Delphi NAV200 U.S. Edition Section 6 Navigation Mode Warning: For your safety, program the Delphi NAV200 and enter information about your destination BEFORE you start your journey. Do not operate Delphi NAV200 while driving. Park the vehicle first. DELPHI DISCLAIMS ALL LIABILITY FOR ANY USE OF THIS PRODUCT IN A WAY THAT MAY CAUSE ACCIDENTS, DAMAGE, OR THAT MAY VIOLATE THE LAW. Driver Protection The driver must not operate this unit while the vehicle is moving.
Delphi NAV200 U.S. Edition Using the Keyboard The Delphi NAV200 lets you enter addressee information with the character keyboard. Character Keyboard Use your finger or the stylus to enter letters by tapping the appropriate letter. All letters are upper case in the Delphi NAV200. Tap the icon to enter a space. Tap the icon to delete the previous character. Tap the icon to enter numbers, e.g. when entering a ZIP code. Tap the icon to return to character entry mode. icon to enter a special character.
Delphi NAV200 U.S. Edition As soon as you have entered a special character, the standard letter keyboard reappears. Note: It is not necessary to enter special characters, but it may be helpful in entering names for saved destinations and itineraries. Note: You can also move the cursor anywhere on the screen by simply tapping on the place where you want it.
Delphi NAV200 U.S. Edition Command Buttons The following buttons appear at the bottom of every navigation screen: Back: Tap this icon to return to the previous screen. (This icon is not available on the Main Screen.) Main Screen: Tap this icon to open the Main Screen. In addition, you will see one of three GPS symbols in the upper right corner: No GPS: A GPS receiver is not connected or the power supply is interrupted. No Signal: A GPS receiver is connected, but no signal is being received.
Delphi NAV200 U.S. Edition GMT: Greenwich Mean Time Longitude/Latitude: Current position Satellites: Number of received satellites; at least three satellites must be received for navigation HDOP: Horizontal Dilution of Precision (Indicates the quality of position determination. Theoretically, any value from 1 to 50 may occur. The smaller the value, the more accurate the position determination. A 1 indicates no deviation from the real position. Values up to 8 are acceptable for navigation.
Delphi NAV200 U.S. Edition 3. Buttons to enter data: These are actually entry fields, like City or Zip, Street, Category, etc. When you tap an entry field, another screen with a keyboard, list, or both will appear. The entry must be confirmed by tapping another button (normally OK or Save) before the current screen closes. Lists Often you will be asked to select an item from a list. One entry is always highlighted. Scroll through list with the desired entry with the buttons and select your icon.
Delphi NAV200 U.S. Edition Initializing the Delphi NAV200 The Delphi NAV200 receives GPS signals continuously via the antenna. In order for your antenna to receive signals, ensure that: 1. The unit is outside or in a vehicle parked outside. 2. The antenna is pointing horizontally out through your windshield and has a clear view of the sky. When you first power on the unit and program a route, it may take several minutes for the unit to get its first GPS fix.
Delphi NAV200 U.S. Edition To change the mode, follow these steps: 1. In the Main Menu, tap Settings. The Settings screen appears: 2. The User mode entry should be at the top of the list. If not, tap the icon until it is selected. 3. Tap . The User mode screen appears: The current mode is indicated in the Current user mode field. 4. Tap the Current user mode field to switch to the other user mode. 5. Tap 24 to save the changes.
Delphi NAV200 U.S. Edition Note: When you switch to Standard mode, a dialog window will ask whether you want to keep the configuration changes made in extended mode. This dialog window appears even if you have not made any configuration changes. Tap Yes if you want to keep these changes. The User mode screen will close and the Main Menu screen of the selected mode will appear.
Delphi NAV200 U.S. Edition Extended Mode The Extended mode Main Menu screen appears: The following functions are accessed from the Extended mode Main Menu screen, and are explained fully in the pages that follow. Tap the Navigation icon to enter a destination with no stopover. Tap the Home icon to navigate to your home address. Tap the Route planning icon to plan a route. Tap the Show map icon to display the map currently in use. Tap the Settings icon to modify the settings of Delphi NAV200.
Delphi NAV200 U.S. Edition Selecting a Destination Entering an Address To enter an address, follow these steps: 1. (Standard Mode) In the Main Menu, tap Destination screen appears: . The Tap the State entry field and select the appropriate entry. 1. (Extended Mode) In the Main Menu, tap Destination screen appears: . The Tap the State entry field and select the appropriate entry. 2. On the Destination screen, tap Enter Address.
Delphi NAV200 U.S. Edition Tap the City entry field if you want to enter the destination city name, or tap the ZIP entry field to enter a ZIP code. 3. Tap the Street entry field and enter a street name. 4. Tap the No. field and enter the street address number, if known. Alternatively, tap the Intersection entry field and enter a cross street. You will be directed to this intersection.
Delphi NAV200 U.S. Edition 1. (Extended Mode) In the Main Menu, tap The Destination screen opens: . Tap Point of interest to view the Point of Interest screen: Tap …nearby GPS position.
Delphi NAV200 U.S. Edition The POI Nearby screen appears: Tap the Radius entry field to select a radius around your current position where you want to search for points of interest. 2. Tap the Category entry field (optional) to select a type of POI to search for. Only POI within the indicated radius will be listed. 3. Tap the Subcategory entry field (optional) to refine your search. 4. Tap the Point of interest entry field to select a specific POI.
Delphi NAV200 U.S. Edition 1. (Extended Mode) In the Main Menu, tap Destination screen appears: . The Tap Point of interest to view the Point of Interest screen: Tap …in a browsed city. The POI in a city screen appears: Tap the City or ZIP entry field to enter a location where you want to search.
Delphi NAV200 U.S. Edition 2. Tap the Category entry field (optional) to select a type of POI to search for. Only POI within the selected city will be listed. 3. Tap the Subcategory entry field (optional) to refine your search 4. Tap the Point of interest entry field to select a specific POI. Point of Interest Nationwide (Extended Mode Only) 1. In the Main Menu, tap appears: . The Destination screen Tap Point of interest to view the Point of Interest screen: Tap …nationwide.
Delphi NAV200 U.S. Edition 2. The POI Nationwide screen appears: 3. Tap the Category entry field (optional) to select a type of POI to search for. 4. Tap the Point of interest entry field to select a specific POI.
Delphi NAV200 U.S. Edition Selecting Destinations on the Map (Extended Mode Only) The Delphi NAV200 allows you to indicate a destination directly on the map. In addition to selecting cities and streets, you may also select points of interest quickly. To select a destination on the map, follow these steps: 1. In the Main Menu, tap opens: . The Destination screen Tap the State entry field and select the appropriate entry. 2. Tap Select on map. The Map screen appears: 3.
Delphi NAV200 U.S. Edition The Delphi NAV200 then displays information about your selection, along with several options: Select from the following options: Start navigation to your selected destination. [!] Caution: Using this function while you are already navigating deletes all current destinations, including stopovers. Save the destination in Saved Destinations. Search for a nearby POI.
Delphi NAV200 U.S. Edition Add the selection to your itinerary. The selected point will be marked by a small flag. It will also be added to the list of route points on the Route Planning screen, where it will be labeled as your destination point. Note: Using this function while you are already navigating causes an immediate recalculation of your route. Make the selection your next stopover on your itinerary. Your route will be recalculated immediately.
Delphi NAV200 U.S. Edition 2. The Favorites screen appears: Tap on your choice to highlight it, then tap 3. The Address screen appears: Select from the following options: Start navigation to your selected destination. [!] Caution: Using this function while you are already navigating deletes all current destinations, including stopovers. View the selection on the map. Save the destination in Saved Destinations.
Delphi NAV200 U.S. Edition Recent Destinations The Delphi NAV200 remembers recently selected destinations. On this screen, you can select destinations for navigation, add destinations to Favorites, and delete destinations. To use Recent Destinations, follow these steps: 1. (Standard Mode) In the Main Menu, tap . 1. (Extended Mode) In the Main Menu, tap The Destination screen appears: Tap . 2. The Recent Destinations screen appears: Tap on your choice to highlight it, then tap 3.
Delphi NAV200 U.S. Edition Select from the following options: [!] Caution: Using this function while you are already navigating deletes all current destinations, including stopovers. View the selection on the map. Save the destination in Saved Destinations. Using Your Home Address To store your home address, select Settings on the Main Menu and then select home address to enter. If you have stored your home address, you may quickly begin navigation icon on the Main Menu.
Delphi NAV200 U.S. Edition Destination Management The Delphi NAV200 stores destinations in two locations: Favorites and Recent Destinations. Saving a Destination 1. After you have entered or selected a destination, you can save it to Favorites by tapping . icon to edit. If you have opened the Recent Destinations list, tap the 2. The Name of Destination screen appears: Enter a name for the destination. 3. Tap . The destination has now been added to Favorites. Renaming a Destination 1.
Delphi NAV200 U.S. Edition 2. Select the destination you want to rename. 3. Tap the icon to edit. The Name of Destination screen appears: 4. Enter the new name. 5. Tap . The destination has now been renamed. Deleting a Destination The Delphi NAV200 allows you to delete a destination from either the Favorites or Recent Destinations list by following these steps: 1. Select the entry to be deleted. 2. Tap the icon to delete.
Delphi NAV200 U.S. Edition Tap . The destination has now been deleted. Route Planning (Itineraries with Stopovers) (Extended Mode Only) The Delphi NAV200 allows you to plan itineraries even when not receiving a GPS signal. These itineraries can then be stored for later use. Indicating Route Points 1. On the Main Menu, tap screen appears: . The Route Planning 2. Tap the icon to enter the first route point. The Destination screen appears. Enter a destination as described in “Selecting a Destination.
Delphi NAV200 U.S. Edition 3. Tap Add to route. The Route Planning screen appears. The destination is added as route point 1. 4. Repeat steps 2-3 for every route point you want to add to the itinerary.
Delphi NAV200 U.S. Edition Editing, Saving, and Managing Itineraries The Delphi NAV200 allows you to save multiple itineraries for later use. At any time, you can add route points, modify the order of route points, or display the itinerary on the map. The following options are available on the Route Planning screen: Note: Icons are deactivated if the list does not contain a route point. Up: Scroll up through list. Down: Scroll down through list. Route point up: Move the selected route point up the list, e.
Delphi NAV200 U.S. Edition Load itinerary: Load a saved itinerary. The Select Itinerary screen appears: Select the desired itinerary and tap . Rename itinerary: Rename a saved itinerary. The Select Itinerary screen appears: Select the desired itinerary and tap screen appears: .
Delphi NAV200 U.S. Edition Enter the new name of the itinerary and tap . The Select Itinerary screen reappears. The itinerary has been renamed. Tap to load the renamed itinerary or Planning screen without loading an itinerary. to open the Route Delete itinerary: Delete an itinerary.
Delphi NAV200 U.S. Edition Tap Tap to delete the selected itinerary. The confirm screen appears: . The deleted route no longer appears.
Delphi NAV200 U.S. Edition Calculating the Route An itinerary may be calculated even if no GPS signal is being received so you can get an impression of the route. Note: When you start navigation, the system identifies your current location and makes it the start point. The first indicated route point becomes your first stopover. 1. On the Route Planning screen, tap the icon to calculate the distance and the estimated duration of the route. The Route Options screen opens: 2. Set the route options.
Delphi NAV200 U.S. Edition When the route is calculated, the total distance and the estimated time from the first to the last route point are displayed below the route points list of the Route Planning screen. The distance and estimated time of each stage will also be indicated with the selected route point entry. Displaying the Route on the Map On the Route Planning screen, tap the on the map. The Map screen opens: icon to display the entire route The route is highlighted in orange.
Delphi NAV200 U.S. Edition Simulating the Route The Delphi NAV200 allows you to execute a simulated navigation along the itinerary when the route has been calculated. Note: GPS signal reception is not necessary for a simulation. Note: Simulations are restricted to a maximum of 60 miles. 1. On the Route Planning screen, tap the opens: 2. Tap the icon. The Map screen options icon. The Additional Functions screen appears: Tap Simulation. The route will be recalculated for simulation purposes.
Delphi NAV200 U.S. Edition The simulation will begin when the calculation has finished. To stop the simulation at any time, tap the The Additional Functions screen opens. Tap options icon. . Starting Navigation in Extended Mode 1. Once a destination has been selected, tap screen appears: . The Route Options 2. Set the route options. For detailed information on setting route options, see “Configuring The Delphi NAV200.
Delphi NAV200 U.S. Edition 3. The system calculates the route and the map screen appears: Your current position is indicated by a green arrow. The calculated route is highlighted in orange. Note: When you start navigation after having planned or loaded an itinerary, then your current position is the start point of the route. The first indicated route point is then the first stopover on your route. If the Delphi NAV200 is not receiving a GPS signal, the following message appears: You have two options: 1.
Delphi NAV200 U.S. Edition Section 7 Working With the Map Operating the Map To access the map in Standard mode: 1. Tap Show on map on the Address screen after entering an address. To access the map in Extended mode: 1. Tap on Show map on the Main Menu. 2. Tap on Select on map on the Destination screen. 3. Tap on Show on map on the Address screen after entering an address.
Delphi NAV200 U.S Edition On the Map screen, you have several control options: Tap on map: A quick tap accesses the Additional Functions screen, where you can make adjustments. Tapping and holding on the map brings up information about the selected point. Hide/show icons: Hide all icons so you can see more of the map. Tap again to restore icons. Note: Also tap this icon to restore the standard view of the map if you have modified it, as described below.
Delphi NAV200 U.S. Edition North orientation: Toggle this icon to switch between orienting the map north or in the driving direction. 3D: Displays the map in 3D (flight) mode. Tap return to 2D (standard) mode. to Options: Brings up the Additional Functions screen, where a variety of adjustments can be made, including: Night mode: Adjusts brightness of map screen. Settings: Displays the Settings screen. Quit navigation: Exit Navigation mode. Block road: Block or unblock a road.
Delphi NAV200 U.S. Edition Representation of the Map in Navigation Mode The following fields containing useful information are displayed in Navigation mode: Field 1: If there are two turns coming quickly after each other, the small upper arrow field indicates the second upcoming turn. Field 2: The green arrow indicates your current position on the map. Since the displayed sector changes continually, your position is centered. (Exception: Frozen map mode.) Field 3: The larger arrow indicates the next turn.
Delphi NAV200 U.S. Edition Displaying Additional Information on the Map. The Delphi NAV200 allows you to determine which information is to be displayed on the map. Modifying any configuration begins on the Settings screen. 1. Open the Settings screen - by tapping the Settings button on the Main screen - or by tapping the Additional Functions button (or short into the map) and selecting Settings 2.
Delphi NAV200 U.S. Edition 7. Tap the command buttons to display (On) or not (Off) the respective information on the map. The desired information on the route (upper section) and on the current stage (lower section) will be displayed at the right hand side of the map. Route – All information below refers to final destination Stage – All information below refers to the next route point.
Delphi NAV200 U.S. Edition Configuring the Delphi NAV200 The Delphi NAV200 allows you to adjust what informational items are displayed on the screen. These options are accessed through the Settings menu: Whenever a change is made to any of these options, tap modifications. to save the Routing options: Adjust preferred travel options Time zone: Change current time zone. Format: Change time from 12 to 24 hour clock; change distance from miles to kilometers. Home address: Enter or edit your home address.
Delphi NAV200 U.S. Edition Auto Mode: Adjust view for 2D or 3D preferences. Itinerary: Turn ON or OFF proceeding automatically to next destination. Product Information: Display of product information only.
Delphi NAV200 U.S. Edition Section 8: Useful Functions for Navigation Adding a Route Point During Navigation (Extended Mode Only) The Delphi NAV200 allows you to add a new route point to your itinerary at any time. Your route will be recalculated in order to make the new route point the next destination. 1. 2. 3. 4. In Navigation mode, tap briefly anywhere on the map. Tap Set interim destination. The Destination screen appears. Set the new route point as described in “Selecting a Destination.
Delphi NAV200 U.S. Edition To unblock a blocked section of road, briefly tap on the map and then tap Unblock. Delphi NAV200 uses the route that had been originally calculated.
Delphi NAV200 U.S. Edition Section 9 Music Mode Warning: For your safety, DO NOT operate the Delphi NAV200 entertainment features while driving. Movie and music (MP3) playing, picture viewing, world clock, and calculator are intended for use while you are not driving your vehicle. DELPHI DISCLAIMS ALL LIABILITY FOR ANY USE OF THIS PRODUCT IN A WAY THAT MAY CAUSE ACCIDENTS, DAMAGE, OR THAT MAY VIOLATE THE LAW. The Delphi NAV200 can playback audio files saved in mp3, and wav format on an SD card.
Delphi NAV200 U.S. Edition Playing an Audio File Audio functions are controlled by tapping on the various buttons located on the control bar in the lower half of the screen: Play: Pressing the Play button plays the file listed at Current Music. The screen will display current playback time and playback status. If a file is damaged, the next file will be played without opening a popup screen. If all files are damaged, a popup screen opens and all audio playback stops. Pause: Playback stops temporarily.
Delphi NAV200 U.S. Edition Stop: Playback stops. Current status is displayed as “Stop.” Current playing time is displayed as “00:00:00.” If Previous or Next is selected during stop, only the file name moves; playback remains stopped. Repeat: Default is All Repeat mode. Tapping this option cycles through “All Repeat > All Play > 1 Track Repeat > All Play.” The repeat setting remains when Music mode is exited, and is saved for the next session. Mute: Mutes all volume. Press again to turn sound on again.
Delphi NAV200 U.S. Edition Previous/Next: Tap the arrows or press the +/- buttons to select the next or previous audio file in the list. If the file is damaged, Delphi NAV200 automatically skips to the next available file. List: Displays the play list screen. The file currently being played is highlighted. This screen allows you to scroll through your list of audio files, or arrange them randomly or alphabetically. Press Play to play the highlighted file, or tap Cancel to return to the previous screen.
Delphi NAV200 U.S. Edition Section 10 Movie Mode Warning: For your safety, DO NOT operate the Delphi NAV200 entertainment features while driving. Movie and music (MP3) playing, picture viewing, world clock, and calculator are intended for use while you are not driving your vehicle. DELPHI DISCLAIMS ALL LIABILITY FOR ANY USE OF THIS PRODUCT IN A WAY THAT MAY CAUSE ACCIDENTS, DAMAGE, OR THAT MAY VIOLATE THE LAW. The Delphi NAV200 can playback video files saved in avi format on an SD card.
Delphi NAV200 U.S. Edition Playing a Video File At any time, tapping on the video portion of the screen will alternate between full screen mode and menu mode. Menu options on the control bar include: Review: Tap to rewind file; button turns red and file rewinds in 10second increments. Tap again to resume play at current location. Note: Tapping Review and Play/Pause in rapid succession will begin play from the beginning of the file. Play/Pause: Tap to begin play; tap again to pause.
Delphi NAV200 U.S. Edition Section 11 Picture Mode Warning: For your safety, DO NOT operate the Delphi NAV200 entertainment features while driving. Movie and music (MP3) playing, picture viewing, world clock, and calculator are intended for use while you are not driving your vehicle. DELPHI DISCLAIMS ALL LIABILITY FOR ANY USE OF THIS PRODUCT IN A WAY THAT MAY CAUSE ACCIDENTS, DAMAGE, OR THAT MAY VIOLATE THE LAW.
Delphi NAV200 U.S. Edition Viewing an Image File Menu options on the control bar include: Previous: Views the previous image. Next: Views the next image. Note: If a file is damaged, Delphi NAV200 automatically skips to the next available image. Full size: Expands the image to full screen. Note: Tapping on the image also alternates between full screen view and control bar view List: If multiple files are available, they are displayed on the Picture list screen.
Delphi NAV200 U.S. Edition Section 12 Game Mode Warning: For your safety, DO NOT operate the Delphi NAV200 entertainment features while driving. Movie and music (MP3) playing, picture viewing, world clock, and calculator are intended for use while you are not driving your vehicle. DELPHI DISCLAIMS ALL LIABILITY FOR ANY USE OF THIS PRODUCT IN A WAY THAT MAY CAUSE ACCIDENTS, DAMAGE, OR THAT MAY VIOLATE THE LAW. The Delphi NAV200 offers the classic game of Othello.
Delphi NAV200 U.S. Edition Section 13 Calculator Mode Warning: For your safety, DO NOT operate the Delphi NAV200 entertainment features while driving. Movie and music (MP3) playing, picture viewing, world clock, and calculator are intended for use while you are not driving your vehicle. DELPHI DISCLAIMS ALL LIABILITY FOR ANY USE OF THIS PRODUCT IN A WAY THAT MAY CAUSE ACCIDENTS, DAMAGE, OR THAT MAY VIOLATE THE LAW.
Delphi NAV200 U.S. Edition Section 14 World Clock Mode Delphi NAV200 allows you to check the current time of any city in the world. When the World Clock mode is entered, the screen displays the time in the city where you currently are located. Note: World clock will work properly only when it has signed on from GPS satellites. Tap the arrow buttons to cycle through different time zones. Section 15 Settings Delphi NAV200 allows you to adjust the screen settings and configurations to personal preferences.
Delphi NAV200 U.S. Edition Configure Settings Tap the screen to select a popup sound, a button sound, and time zone. Tap Save to save your settings.
Delphi NAV200 U.S. Edition Section 16 Troubleshooting The Delphi NAV200 unit is designed and built to provide trouble-free performance. If it does not appear to be functioning properly, please follow these troubleshooting guidelines. No GPS fix: 1. Check the satellite icon in the upper right corner of the map view screen. 2. Make sure the antenna on the unit is pointed outward and upward, providing a clear view of the sky. 3. Ensure that the vehicle does not have a heat-reflecting or heated windshield.
Delphi NAV200 U.S. Edition Technical Information Dimensions 134 mm x 80 mm x 29 mm Weight: 190g Specifications Screen size … 3.5" diagonal (89 mm) Screen resolution … 320 x 240 pixels Number of colors … 16.7M Microprocessor … Samsung S3C2440/400 MHz Onboard storage memory (for OS) … 32 MB GPS accuracy … 16.
Delphi NAV200 U.S. Edition FCC Statement This equipment has been tested and found to comply with the limits for a Class B digital device, pursuant to Part 15 of the FCC rules. These limits are designed to provide reasonable protection against harmful interference in a normal installation. This equipment generates, uses, and can radiate radio frequency energy and, if not installed and used in accordance with the instructions, may cause harmful interference to radio communications.
Delphi NAV200 U.S. Edition Section 17 Warranty Delphi Product & Service Solutions (“Delphi”) warrants all Delphi NAV200 systems sold by Delphi (“Products”) to be free of defects in material and workmanship, subject to the following conditions. The duration of Delphi’s warranty with respect to the Delphi NAV200 is limited to one (1) year from the date of sale to the original consumer purchaser. No other express warranties are made with respect to any Product.
Delphi NAV200 U.S. Edition So the above limitations or exclusions may not apply to you. This warranty gives you specific legal rights. You may also have other rights that may vary from state to state. NO PERSON IS AUTHORIZED BY DELPHI TO MODIFY OR ADD TO THIS LIMITED WARRANTY.
Delphi NAV200 U.S. Edition Product and Service Solutions Delphi Corporation 1441 West Long Lake Road Troy, Michigan 48098-5090 U.S.A www.shopdelphi.com © 2007 Delphi Corporation. All rights reserved.