
Reference Guide

For more information about upgrade instructions for the update utility, see the Upgrade instructions section.
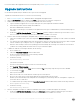
Upgrade instructions
Use the Dell TPM Update Utility for Windows/ DOS to perform the TPM upgrade.
To update the TPM rmware version 1.2 to version 2.0, do the following:
1 Go to Dell TPM 2.0 Update Utility, and download the TPM upgrade utility application le.
2 When the File Download window is displayed, click Save to save the le to your USB mass storage device.
3 Disable Unied Write Filter (UWF) on your thin client. To disable UWF, do the following:
a Log in as an Admin. If logged in as a User, log o and log in to the system again with the Admin credentials.
b On the desktop, double-click the Dell Wyse WF Disable icon.
Write lter is disabled and system reboots.
c After reboot, log o and log in to the Admin account again because auto logon is enabled and the system automatically logs in to
User mode.
d Double-click Dell Thin Client Application, navigate to Auto logon, and then change the default auto logon user name to Admin
from User. Admin or User account referred in this scenario is the local Admin/ User account.
4 Clear the TPM owner before running the TPM update utility. To clear the TPM, do the following:
a If BitLocker is enabled on your system, then suspend the BitLocker encryption before updating the TPM on a BitLocker enabled
system.
b The TPM must be on and enabled in BIOS setup. Ensure that the TPM is not owned. If the TPM is owned, go to BIOS setup and
clear the TPM before proceeding. Run TPM.msc, if applicable, to reinitialize the TPM under Windows OS.
c When the TPM ownership is cleared, some operating systems automatically take ownership of the TPM in the successive boot
(TPM Auto Provisioning), disable this feature in the OS to proceed with the update
5 To disable the TPM Auto Provisioning in Windows, do the following:
a Boot to Windows OS.
b Launch the PowerShell Command window in Admin mode.
c At the PowerShell command prompt, run the following command:
Disable-TpmAutoProvisioning
d Conrm the following:
AutoProvisioning: Disabled
System reboot is required.
e Press the F2 Key when rebooting the system to access the BIOS setup.
f Go to Security > TPM 1.2 Security.
g To clear the TPM settings, click the Clear check box and select Yes at the prompt. Skip this step, if the item is disabled.
h To save changes, click Exit.
i Reboot system to Windows.
j Make sure the TPM is not owned. Windows should not provision TPM anymore.
k Browse to the location where you have downloaded the le, and then double-click the new le.
Windows system automatically restarts and update the TPM during the system startup. When the TPM update is complete, the
system auto reboots to take eect.
l To re-enable the auto provisioning, launch the PowerShell command window in Admin mode, and run the following command:
Enable-TpmAutoProvisioning.
m Conrm the following:
AutoProvisioning: Enabled
6 After the TPM update is complete, re-enable the Unied Write Filter (UWF). To enable UWF again, do the following:
a Double-click Dell Thin Client Application, navigate to the Auto logon, and then change the default auto logon user name to
User from Admin. Admin or User account referred in this scenario is the local Admin/ User account.
2
TPM rmware version 1.2 to version 2.0 upgrade instructions for Wyse 7040 thin client