
Administrator Guide


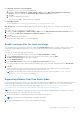


Table Of Contents
- Dell Wyse ThinOS Version 8.6 Administrator’s Guide
- Contents
- Introduction
- About this guide
- What is new in ThinOS 8.6_807
- What is new in ThinOS 8.6_710
- What is new in ThinOS 8.6_606
- What is new in ThinOS 8.6_511
- What is new in ThinOS 8.6_412
- What is new in ThinOS 8.6_303
- What is new in ThinOS 8.6_206
- What is new in ThinOS 8.6_027
- What is new in ThinOS 8.6_024
- What is new in ThinOS 8.6_019
- Before working on ThinOS
- Getting started
- End User License Agreement
- Configuring ThinOS using the First Boot Wizard
- Connecting to a remote server
- Using your desktop
- Configuring thin client settings and connection settings
- Connecting to a printer
- Connecting to a monitor
- Locking the thin client
- Signing off and shutting down
- Battery information
- Sleep mode
- Additional getting started details
- Classic desktop features
- Login dialog box features
- Word wrap feature
- Accessing system information
- ENERGY STAR compliance
- IPv6 certification
- Global Connection settings
- Configuring connectivity
- Configuring the network settings
- Configuring the remote connections
- Configuring the central configurations
- Configuring the VPN Manager
- Configuring the connection brokers
- Configuring Citrix
- Configuring the Citrix broker connection
- Citrix Receiver feature matrix
- Citrix HDX RealTime Multimedia Engine or RealTime Optimization Pack
- Cisco Jabber Softphone for VDI
- Using Citrix ADC
- Citrix Cloud services
- Citrix icon refresh
- Using multiple audio in Citrix session
- Configuring ICA connections
- Support for multi-monitors in Citrix session
- ICA Self Service Password Reset
- QUMU or ICA Multimedia URL Redirection
- HTML5 Video Redirection
- ICA SuperCodec
- Anonymous logon
- Configuring the Citrix UPD printer
- Configuring VMware
- Configuring the VMware broker connection
- VMware Horizon Client feature matrix
- Using VMware Horizon View broker and desktop
- Enable username hint for smart card login
- Supporting VMware Real Time Audio-Video
- VMware Blast
- VMware Horizon Virtualization Pack for Skype for Business
- Using multi-monitors in PCoIP session
- Using Multi-monitors in VMware Blast session
- Blast Virtual Printing
- Enable hardware cursor in Blast session
- Enable relative mouse feature
- USB device splitting in Blast session
- Supporting Teradici SDK
- Configuring PCoIP connections using Teradici Remote Workstation card
- Customize PCoIP login window and icons
- Configuring Microsoft Remote Desktop
- Configuring Dell vWorkspace
- Configuring Amazon Web Services or WorkSpaces
- Configuring Teradici Cloud Access
- Configuring Citrix
- Configuring local settings
- Local Settings Menu
- Configuring the system preferences
- Configuring the display settings
- Configuring the peripherals settings
- Configuring the keyboard settings
- Configuring the mouse settings
- Configuring the audio settings
- Configuring the serial settings
- Configuring the camera settings
- Configuring the touch screen settings
- Configure the touch screen settings for VDI sessions
- Configuring the Bluetooth settings
- USB support
- Support for USB Type-C
- Configuring the printer settings
- Reset features
- Local Settings Menu
- TCX Suite
- Trusted Platform Module version 2.0
- Performing diagnostics
- BIOS management on ThinOS
- Security
- Troubleshooting
- Examples of common printing configurations
- Important notes
- Frequently asked questions

● Using View Connection Server web portal
1. Log into your View Connection Server web portal.
2. Navigate to View Configuration > Global Settings > Edit, select the Hide server information in client user
interface check box, and clear the Hide domain list in client user interface check box.
3. Click OK.
4. Log in to the VMware Horizon broker.
The server URL is hidden, and the domain list is displayed.
● Using INI parameter
Use the INI parameter, ConnectionBroker=vmware DisableShowServer=yes.
Hide Domain List—The domain list can be hidden in the Horizon View Broker logon UI. To configure this setting, do the
following:
1. Log in to your View Connection Server web portal.
2. Navigate to View Configuration > Global Settings > Edit, select the Hide domain list in client user interface check
box, and clear the Hide server information in client user interface check box.
3. Click OK.
4. Log in to the VMware Horizon broker.
The domain list is hidden, and the server URL is displayed.
Enable username hint for smart card login
You can enable users to specify the account to be used in the Username hint field when you log in to a Horizon View session
using a smart card. Enabling this option allows you to use a single smart card certificate to authenticate to multiple user
accounts.
To enable the username hint field, do the following:
1. Log in to the View Administrator Admin console, and click View Configuration > Servers.
2. On the Connection Servers tab, select the View Connection Server instance, and click Edit.
The Edit Connection Server settings page is displayed.
3. Click the Authentication tab.
4. In the View Authentication section, select the Allow smart card user hints check box.
You cannot configure the smart card user name hints feature when you set the smart card authentication to Not Allowed.
5. Click OK.
On the ThinOS client, log in to a Horizon View session with a smart card. In the VMware Horizon View broker sign-on
window, enter the username and the smart card PIN to authenticate the user.
NOTE:
If the user name does not match the smart card certificate user, an error message No user could be
found for your Certificate is displayed.
Supporting VMware Real Time Audio-Video
Use the Real-Time Audio-Video feature to run Skype and other online conference applications on the remote desktop. Using this
feature, both audio and video devices that are connected to your thin client are available to use for VoIP in remote desktop.
To know more about the VMware Real Time Audio-Video support, go to pubs.vmware.com/horizon-62-view/topic/
com.vmware.horizon-view.desktops.doc/GUID-D6FD6AD1-D326-4387-A6F0-152C7D844AA0.html.
NOTE: There is no additional configuration for ThinOS. RTAV video requires RTME package to be installed on your device.
To validate the VMware Real Time Audio-Video, do the following:
1. Connect to the VMware PCoIP or Blast desktop with the audio and video devices.
NOTE: USB redirection must be disabled for the audio/video devices.
2. Verify the audio playback of the system using the VMware virtual audio.
Configuring the connection brokers
127