
Setup Guide
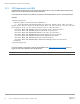
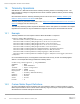

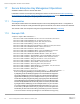


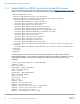
Table Of Contents
- 1 Getting Started
- 2 Template
- 3 SCP Export
- 4 SCP Import
- 5 SCP Import Preview
- 6 iDRAC Configuration
- 7 LifecycleController
- 8 EventFilters
- 9 RAID / Storage Configuration and Operations
- 10 BIOS Configuration
- 11 NIC / FiberChannel / InfiniBand Configuration
- 12 SupportAssist Operations
- 13 RepositoryUpdates
- 14 iDRAC Direct (SCP via USB)
- 15 OS Deployment
- 16 Telemetry Operations
- 17 Secure Enterprise Key Management Operations
- 18 Auto Config – DHCP Provisioning
- 19 Troubleshooting
- 20 Additional Resources

Server Configuration Profiles: User’s Guide
59 Server Configuration Profiles: Reference Guide | 456
racadm>>lclog viewconfigresult -j JID_581182121065
SeqNumber = 5966
FQDD = iDRAC.Embedded.1
Job Name = Import Configuration
DisplayValue = SEKM.1#SEKMStatus
Name = SEKM.1#SEKMStatus
OldValue = Disabled
NewValue = Enabled
Status = Success
ErrCode = 0
SeqNumber = 5963
The SEKM certificate installation can be confirmed via the same configuration results by checking the
CertData and CertType attributes.
SeqNumber = 5963
FQDD = iDRAC.Embedded.1
Job Name = Import Configuration
DisplayValue = Certificate Data
Name = SecurityCertificate.1#CertData
OldValue = ******
NewValue = ******
Status = Success
ErrCode = 0
DisplayValue = Certificate Type
Name = SecurityCertificate.1#CertType
OldValue = ""
NewValue = KMS_SERVER_CA
Status = Success
ErrCode = 0
DisplayValue = Certificate Data
Name = SecurityCertificate.2#CertData
OldValue = ******
NewValue = ******
Status = Success
ErrCode = 0
DisplayValue = Certificate Type
Name = SecurityCertificate.2#CertType
OldValue = ""
NewValue = SEKM_SSL_CERT
Status = Success
ErrCode = 0
NOTE: iDRAC SEKM attributes must be configured in a separate SCP Import operation (or another
interface) before enabling SEKM on a PERC device and creating a locked virtual disk. These operations
cannot be combined in a single SCP Import.