
User's Manual


12. On the Configure Apply/Export Options screen, click Apply/Export to proceed with the operating system installation.
The system prompts you to insert the Citrix Xen Server Media. You can provide the media using the Virtual media
option, or by inserting the CD.
13. Reboot the system using the operating system CD.
14. Select the keyboard type and language.
15. Select the driver source and press <F9>. The driver source options are:
– Local Media
– HTTP or FTP
– NFS
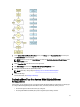
The Welcome to XenServer — Version <version number> screen appears.
16. Insert the CDs and after the drivers are loaded, click OK.
17. On the End User License agreement screen, click Accept EULA.
18. On the Virtual Machine Storage screen, select the storage disk and click OK.
19. On the Select the Installation Source screen, select the local media option.
20. Configure the password and click OK.
21. Select the Network Interface Card (NIC) and click OK.
22. Select the (DHCP) or static IP.
23. Configure the host name and DMS as required.
24. Select the time zone.
25. Select the system time and click Install XenServer.
26. Remove the CDs after the installation is complete.
Installing Microsoft Windows 2012 (64–bit) Using SBUU ISO
NOTE: The following procedure uses the iDRAC console as an example for installing the Windows Server 2012 (64–
bit).
1. In the iDRAC console, select Virtual Console/Media → Launch Virtual Console.
2. Click Add Image and navigate to the location where the SBUU ISO image is located.
3. Select the check box next to the Mapped field of the SBUU ISO image.
NOTE: WinPE is required for booting SBUU on systems running Windows operating systems.
The Systems Build and Update Utility home page is displayed.
4. Click Hardware Configuration → RAID → Create Virtual Disk .
The Create Virtual Disk screen is displayed.
5. Select the Controller, Array Disk, and RAID Level.
6. Click Save Settings to create the RAID.
7. On the left pane, click Server OS Installation.
The Set the Date and Time screen is displayed.
8. Set the date and time and click Continue.
The Select an Operating System to Install screen is displayed.
9. Select the Windows Server 2012 x64 operating system option and click Continue.
The Select RAID Configuration screen is displayed.
10. Select one of the following options and click Continue.
– Apply RAID Configuration specified in Hardware Configuration
11